Bulk Update - Projects
The "Bulk Update - Projects" feature gives administrators the ability to update multiple Projects at once by uploading a comma-separeted values (CSV) file into Eclipse PPM. This saves users from having to manually navigating to individual Projects in order to edit them.
Tip: This is especially helpful for Project Managers who oversee large Portfolios of Projects; they can manage their Project updates on a spreadsheet and simply upload it into the application. It is also especially useful for organizations that would like to integrate their Eclipse PPM Project data with another system. The data can be exported into a spreadsheet and then imported into Eclipse PPM, ensuring that data in both systems is always synchronized. Contact your Eclipse PPM representative if this is something your might be interested in.

Note: Users will need the "Bulk Update - Projects" permission from an Application Policy in order to use this feature.
Note: Users can only use Bulk Update to edit information that they have permission to edit. If that attempt to change information that they are not permitted to edit, the Project will fail to update.
Tip: If you are interested in creating multiple Projects (or Resources) at once using a CSV file, see Bulk Import.
The "Bulk Update - Projects" feature consists of three components:
Creating an update file
Before using the "Bulk Update - Projects" feature, you must prepare a CSV file that contains all of the Project information that you wish to update.
A CSV (comma-separated values) file is any text file that allows data to be saved in a table-structured format. The most common way to create a Bulk Update file is by using Microsoft Excel. However, the file must be saved as a ".csv" file before it can be uploaded into Eclipse PPM.
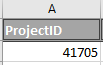
The rows of the CSV update file will contain the listed Projects that will be editing in bulk. Each column will represent Project information that can be edited once the file is uploaded. The top row will contain the column headers:
In this example, the user will be attempting to update two Projects at once: "Reservoir Laboratory" and "Repository for Digital Assets".
Although not all columns are required, the CSV file must contain the "ProjectID" column and each listed Project must have a Project ID number entered. Project IDs cannot be edited; they are automatically generated and used to identify the Projects that are being updated. The rest of the columns are optional and do not need to be included in the update file.
The update file may consist of the following columns. Make sure that each column header is spelled EXACTLY as it appears below.
Tip: Click here to download a sample CSV update file that contains each column header.
-
ProjectID (required): The ID number of the Project you would like to edit. If it cannot be matched to an existing Project, an error will occur. This value cannot be updated through a Bulk Update; it is only used to identify the Project that will be updated.
Note: When "Validate 'ID' against 'Name'" is turned ON, an error will occur if a Project's "ProjectID" value does not match its "ProjectName" value. See the Processing Options below for more information.
-
ProjectName: The name of the Project.
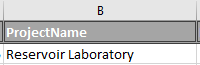
Note: When "Validate 'ID' against 'Name'" is turned ON, an error will occur if a Project's "ProjectID" value does not match its "ProjectName" value. This means that a "ProjectName" value will be required if the option is turned ON. It also means that users cannot update Project names when it is turned ON because the existing "ProjectName" value will need to correspond to the "ProjectID" value. See the Processing Options below for more information.
Note: Administrators can enforce Projects to have unique names while configuring Project settings. If this has been enforced, a listed Project will fail to update if another Project already uses the entered name.
-
ProjectNumber: The Project number. The maximum length of a Project Number is 64 characters.
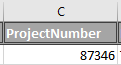
Note: The upload will fail if the number already belongs to another Project. Project numbers must be unique.
-
ProjectDescription: A description of the Project. The maximum length of a Project description is 2048 characters.

-
ProjectIsOperations: Indicates whether or not the Project is considered "Operations". One of two values can be entered into this field:

-
True: The Project is "Operations".
-
False: The Project is not "Operations".
Note: Microsoft Excel will often automatically convert "True" or "False" values to all caps. This is OK; the value is not case sensitive.
-
-
ProjectType: The Project Type. The value entered must match an existing Project Type.
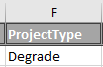
Note: Administrators have the ability to add and manage Project Types in Eclipse PPM.
-
ProjectPriority: The current Priority of the Project. The value entered must exactly match an existing Project Priority.
Note: Administrators have the ability to add and manage Project Priorities in Eclipse PPM.
-
ProjectBusinessPriority: The Project's Business Priority Number. Business Priority Numbers must be between 1-999.
-
ProjectCategory: The Project's Category. The value entered must exactly match an existing Project Category.
Note: Administrators have the ability to add and manage Project Categories in Eclipse PPM.
-
ProjectPortfolioProgram: The name of the Program or Portfolio that the Project belongs to. The value entered must exactly match an existing Program or Portfolio.
Note: It is possible for Programs and Portfolios to have duplicate names in Eclipse PPM. In the case of a Program and a Portfolio sharing the same name, the Project will always be added to the Program. If multiple Programs or Portfolios share the same name, the Project will be added to the most recent one.
In any of these cases, a warning message will appear after the upload indicating that the name is a duplicate as well as the ID number of the Program or Portfolio that the Project was added to:
-
ProjectOrganizationOwner: The Project's Organization Unit. The value entered must exactly match an existing Organization Unit without the abbreviation.
Note: Administrators have the ability to add and manage Organization Units in Eclipse PPM.
Note: It is possible for Organization Units to have duplicate names in Eclipse PPM. In the case of multiple Organization Units sharing the same name, the newer Organization Unit will always be chosen. A warning message will appear after the upload indicating that the name is a duplicate:

-
ProjectOwner: The Owner of the Project. The name must be formatted "LastName, FirstName" with a space after the comma and it must exactly match an existing Resource name in Eclipse PPM:
Note: It is possible for Resources to have duplicate names in Eclipse PPM. In the case of multiple Resources sharing the same name, the newer Resource will always be chosen. A warning message will appear after the upload indicating that the name is a duplicate:

-
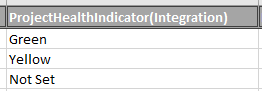
ProjectHealthIndicator(<IndicatorName>): The current status of a Health Indicator on the Project. "<IndicatorName>" must be replaced by the exact name of a Health Indicator in the column header. Also, the values in the column must be one of the four Health Indicator statuses: "Green", "Yellow", "Red", or "Not Set":
Note: Update files can contain multiple "ProjectHealthIndicator" columns to update multiple Health Indicators on the Project.
Note: If the "Add missing Health Indicators to project?" option below is selected, the Health Indicators on the CSV file will automatically be added to any Projects that do not currently have them. See the Processing Options below for more information.
-
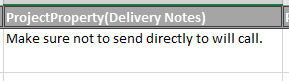
ProjectProperty(<PropertyName>): The value of a Project Property on the Project. "<PropertyName>" must be replaced by the exact name of a Project Property in the column header. Depending on the Property Type, the expected value will vary.
Note: Update files can contain multiple "ProjectProperty" columns to update multiple Properties on the Project.
-
Date: The date must be formatted "MM/DD/YYYY".
-
Flag: Either "True" or "False" can be entered as a value. "True" = Yes and "False" = No.
Note: Microsoft Excel will often automatically convert "True" or "False" values to all caps. This is OK; the value is not case sensitive.
-
Multiple Select: The names of the values must exactly match the names of available values for the Property. Also, multiple values must be separated by a vertical line symbol (|).
Note: The Multiple Select values will either merge with the existing values on the Project or totally replace them based on the selection from "Multiple Select Project Property Values". See the Processing Options below for more information.
-
Single Select: The name of the value must exactly match the name of an available value for the Property.
-
Number: The value must be numeric.
-
Text: The value must be a string of text less than 4000 characters.
-
-
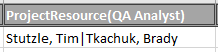
ProjectResource(<ProjectRoleName>): The name of the Resource(s) that will be added to the Project under the indicated Role. "<ProjectRoleName>" must be replaced by the exact name of an existing Role in the column header. Also, the values in the column must be Resource names formatted "LastName, FirstName" with a space after the comma and they must exactly match an existing Resource name in Eclipse PPM. If more than one Resource will be added to the Project in the Role, each name must be separated by a vertical line symbol (|).
Note: Update files can contain multiple "ProjectResource" columns to update multiple Resources and Roles on the Project.
Note: The Project Resources will either merge with the existing Resources on the Project or totally replace them based on the selection from "Project Resources". See the Processing Options below for more information.
-
ProjectStatus: The current Status of the Project. The values in the column must exactly match existing Project Statuses in Eclipse PPM.
Note: Depending on the selection from "Pending Project Status Workflows", Projects with pending workflows will either skip this field or have their workflows canceled so the Status can be changed to the value. See the Processing Options below for more information.
-
ProjectStatusUpdate: The current Status Update of the Project.

Note: Depending on the selection from "Project Status Update", the values in this column might totally replace the existing Project Status Updates, prepend the text to the existing Status Update, or append the text to the existing Status Update. See the Processing Options below for more information.
Once you have finished preparing your Excel spreadsheet, save it to your computer as a ".csv" file:

From here, you are ready to begin uploading your file into Eclipse PPM.
Uploading the file into Eclipse PPM
After your upload file has been saved to your device as a CSV, you are ready to upload it into Eclipse PPM.
To upload the "Bulk Update" file into Eclipse PPM:
Before You Start: You will need the "Bulk Update - Projects" permission from an Application Policy in order to access the "Bulk Update - Projects" page.
-
Select the Administration icon from the Icon Bar:

-
Select Bulk Update - Projects from the "Other" menu:
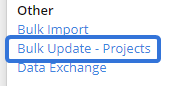
Note: If you cannot see this option, you may not have the "Bulk Update - Projects" permission from an Application Policy.
-
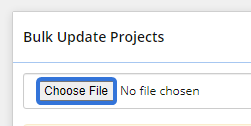
Select the Choose File button:
-
Use the window that appears to navigate to and select your saved CSV upload file.
Note: If you have not yet created an upload file, see above for help.
-
Configure the processing options for the bulk update.
Caution: Failing to review each of the processing options can result in loss of Project data or unwanted Project changes. Be sure to go through the processing options before EVERY bulk update. See Processing Options below for an explanation of each option.
-
Select the Upload button:

After selecting Upload, a window will appear to indicate how many Projects were successfully updated in total, how many failed to update, and how many were updated with warning messages:
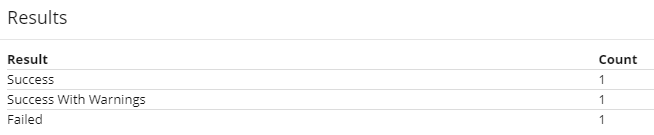
Note: The "Success" result displays a total of all the Projects that successfully uploaded, including those that uploaded as "Success With Warnings". This is why the sum of these numbers may not add up to the number of Projects in your upload file.
Directly below the results, a table will list all of the warnings and failures as well as a description of the issues:

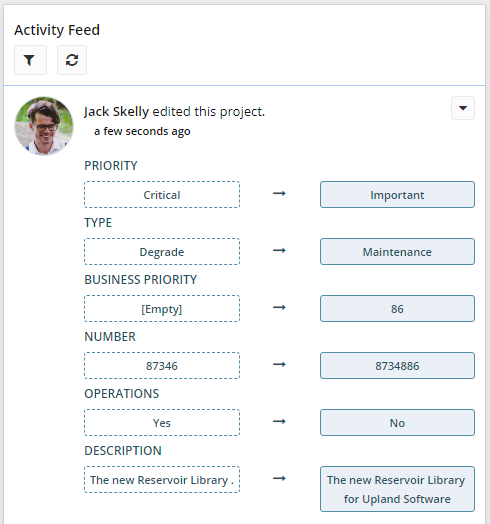
Users can easily review any of the individual Projects by viewing a Project's Activity Feed. Every update made to the Project will be listed:
Processing Options
Caution: Failing to review each of the processing options can result in loss of Project data or unwanted Project changes. Be sure to go through the processing options before EVERY bulk update.
Users can configure the following options to determine how the Project data will behave once imported into Eclipse PPM:
-
Update blank/empty fields: When this checkbox is selected, blank values in the update file will erase any values on the Project. When it is not selected, empty values will be ignored and the corresponding values on the Project will not be changed.

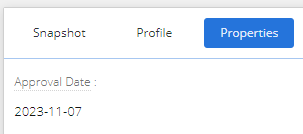
Example: The "Reservoir Library" Project currently has a value set for the "Approval Date" Property:
In the update file, the "Reservoir Library" line does not have a value listed for "ProjectProperty(Approval Date)":
If the "Update blank/empty fields" checkbox is selected, the Project's "Approval Date" will be wiped clean. If the checkbox is not selected, the "Approval Date" will not be affected.Tip: If you decide to select this checkbox, make sure that all current values have been entered into the update file if you do not want them to change. In the example above, you would have to insert the current "Approval Date" in the "ProjectProperty(Approval Date)" cell to prevent it from being erased.
-
Validate 'ID' against 'Name': When this checkbox is selected, Eclipse PPM will check to see if the "ProjectID" values correspond to the "ProjectName" values.

If they do not match, the Project will fail to update:

Tip: If you would like to update Project names with your upload, make sure this checkbox is not selected. If it is selected, Project names that do not match the existing Project names will cause a failure.
Note: The validation is case sensitive. If capital letters in the "ProjectName" value do not match those in the existing name, the validation will fail and the Project will not be updated.
-
Add missing Health Indicators to project?: When this checkbox is selected, the Health Indicators that are included in the update file will be added to the Project if they do not already exist on the Project. If it is not selected, the Health Indicator will not be added to the Project even if there is a value entered on the update file.

-
Add missing Properties to project?: When this checkbox is selected, the Properties that are included in the update file will be added to the Project if they do not already exist on the Project. If it is not selected, the Property will not be added to the Project even if there is a value entered on the update file.

-
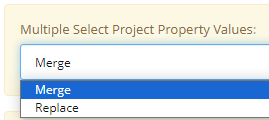
Multiple Select Project Property Values: Determine how the values on Multiple Select Property Types will be imported into Eclipse PPM.
-
Merge: The specified values on the update file will be merged with the existing values on the Project Property.
Example: The "Reservoir Library" Project currently has "Public" and "Government" selected for the "Stakeholders" Multiple Select Property:

In the update file, the "Reservoir Library" line has different values set for the "Stakeholders" Property:
If "Merge" is selected, the values identified in the update file will be merged with the values that currently exist on the Project: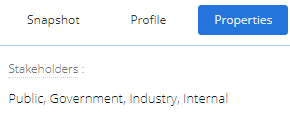
-
Replace: The existing values on the Project Property will be erased and replaced by the values specified on the update file.
Example: The "Reservoir Library" Project currently has "Public" and "Government" selected for the "Stakeholders" Multiple Select Property:
In the update file, the "Reservoir Library" line has different values set for the "Stakeholders" Property:
If "Replace" is selected, the existing values will be erased and replaced by the values identified in the update file:
-
-
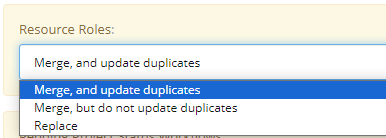
Resource Roles: Determine how Resources in the "ProjectResource(<ProjectRoleName>)" will be imported into Eclipse PPM with respect to the identified Roles.
-
Merge, and update duplicates: The Resources will be added to the Project in the specified Role. If any of the Resources were already attached to the Project in a different Role, their Role will be updated to the Role specified on the update file.
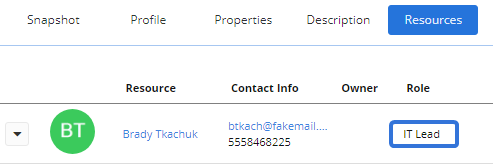
Example: Brady is already the "IT Lead" on the "Reservoir Library" Project:
In the update file, he has been included under the "ProjectResource(QA Analyst)" column for the "Reservoir Library" line along with his coworker, Tim, who is not already on the Project:
If "Merge, and update duplicates" is selected, Tim will be added to the Project as a QA Analyst and Brady will have his Role switched to QA Analyst: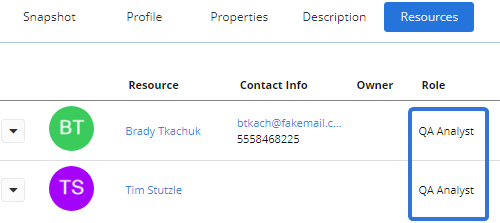
-
Merge, but do not update duplicates: The Resources will be added to the Project in the specified Role only if they do not already exist on the Project. If any of the Resources already exist on the Project in a different Role, their Role will not be updated to the new one.
Example: Brady is already the "IT Lead" on the "Reservoir Library" Project:
In the update file, he has been included under the "ProjectResource(QA Analyst)" column for the "Reservoir Library" line along with his coworker, Tim, who is not already on the Project:
If "Merge, but do not update duplicates" is selected, Tim will be added to the Project as a QA Analyst but Brady's Role will not be changed: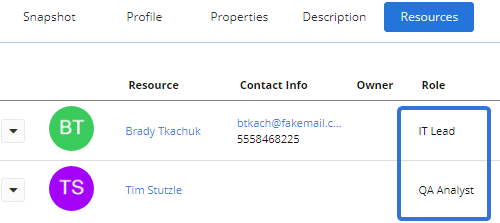
-
Replace: The Resources will be added to the Project in the specified Role. Any Resources that existed in the specified Role on the Project will be removed.
Example: Brady is the "IT Lead" on the "Reservoir Library" Project:
In the update file, both Tommy and Tim have been included under the "ProjectResource(IT Lead)" column for the "Reservoir Library" line:
If "Replace" is selected, both Tommy and Tim will become IT Leads for the Project and Brady will be removed as a Project Resource: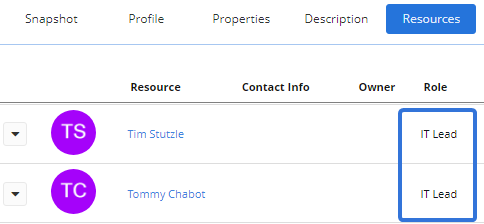
Tip: If "Replace is selected, be sure to include the names of any existing Resources on Project Roles that you do not want to remove.
-
-
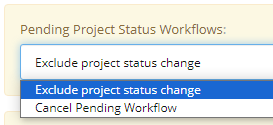
Pending Project Status Workflows: Determine how values in the "ProjectStatus" column will affect Projects with pending Workflows.
-
Exclude project status change: Projects with a "Change Project Status" Workflow configured for the new Status will not have their Status changed, regardless of what is entered under the "ProjectStatus" column on the update file. If this occurs, a "Failed" message will indicate that approval is required for Project Status changes:

Note: If an Advanced Workflow has been used to exclude the new Status from requiring approval, the Status will be successfully changed.
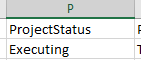
Example: Will wants to update the status of his "Reservoir Library" Project to "Executing":
Unfortunately for him, an Approval Template has been attached to the "Change Project Status" Workflow for the Project: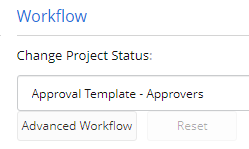
This means the Project's Status cannot be changed without approval, so it will not be changed as a result of the Bulk Import.
However, the Advanced Workflow button (pictured above) can be used to attach different Approval Templates to specific Statuses. Alternatively, certain Statuses can be configured NOT to have an Approval Template attached: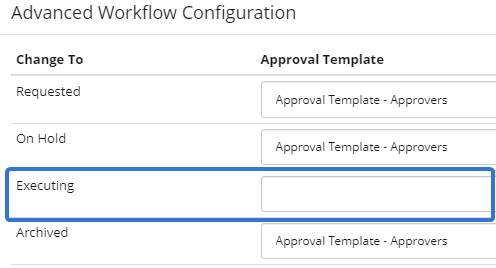
Statuses without Approval Templates attached to them can become new the new Project Status without approval. If the "Executing" Status does not have an Approval Template attached to it (pictured above), Will can successfully change the Project's Status to "Executing" when "Exclude project status change" is selected. -
Cancel Pending Workflow: Projects with a "Change Project Status" Workflow configured for the new Status will have their Status changed. The values under the "ProjectStatus" columns will change the Statuses of all listed Projects without approval.
Example: Will wants to update the status of his "Reservoir Library" Project to "Executing":
An Approval Template has been attached to the "Change Project Status" Workflow for the Project:
Also, a template has been specifically attached to the "Executing" Status through Advanced Workflow: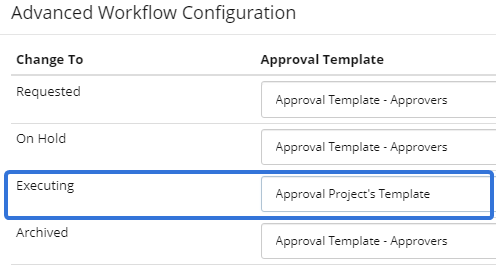
Despite this, the Bulk Update will override the Workflow and the Project's Status will be changed to "Executing".
-
-
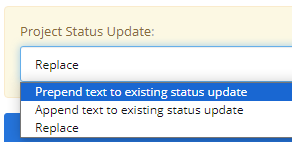
Project Status Update: Determine how values in the "ProjectStatusUpdate" will be imported into Eclipse PPM.
-
Prepend text to existing status update: The text entered for a Project under the "ProjectStatusUpdate" column will be added to the beginning of the existing Status Update.
-
Append text to existing status update: The text entered for a Project under the "ProjectStatusUpdate" column will be added to the end of the existing Status Update.
-
Replace: The text entered for a Project under the "ProjectStatusUpdate" column will totally replace the existing Status Update.
-