A site is a physical or virtual office or location that can be used for scoping and to track, in detail, how much time and expenses were spent at a given location. Using sites, you can determine what site, clients, projects, tasks, users, groups and teams a particular user can view and access. In addition to its security advantages, this powerful scoping concept can be used to significantly reduce the number of projects and tasks users have to work with on day-to-day basis in a geographically dispersed organization.
This article details how to create a Site.
- From the Sites list page click Create Site.
Tip: Click here to view the article for accessing the Site's details page.
- Enter the following information:
- Name: Type in the name of the site being created.
- Id: Enter an ID for the site in the ID box.
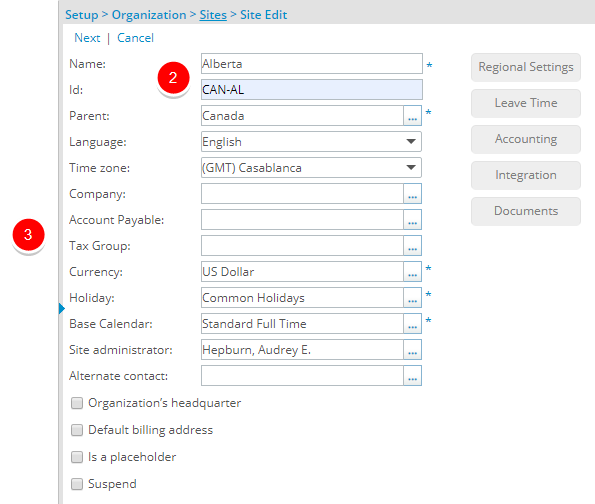
- Select the appropriate option for each of the following settings:
- Parent: Click the Browse button, located beside the Parent box to open the Site List page. Select a Parent Site.
- Language: From the Language list box, select the language to be used at the site.
- Time zone: Select a Time zone for the site.
- Company: Click the Browse button, located beside the Company box to open the Company List page. Select a company from the list to associate it with the site.
- Account Payable: Click the Browse button, located beside the Account Payable box to select an account to which all transactions of the site are mapped.
- Tax Group: Click the Browse button, located beside the Tax Group box, which brings up the Tax Group List page. A table listing different Tax groups is displayed; select the Tax group that applies to the site.
- Currency: Click the Browse button, located beside the Currency box, which brings up the Currency List page. A table listing different currencies is displayed; select the currency that applies to the site.
- Holiday: Click the Browse button, located beside the Holiday box, which brings up the Holiday List page. A list of countries appears; select the country with the holidays you want to add to your calendar.
- Base calendar: Click the Browse button, located beside the Base calendar box, which brings up the Calendar List page. A list of calendars appear; select the calendar you want to associate to the site.
- Site administrator: Click the Browse button, located beside the Site administrator box, which opens the User List page. Select name of the primary person who is in charge of the work site.
- Alternate contact: Click the Browse button, located beside the Alternate contact box, which opens the User List page. Select the name of the person to contact if the primary person (in charge of the work site) is not available.
- If the site is to act as the Organization's headquarters (center of operations), have a Default billing address, Is a placeholder, or is Suspended, select the appropriate box(es).
Note: You can only have one organization headquarters.
- Click Next.
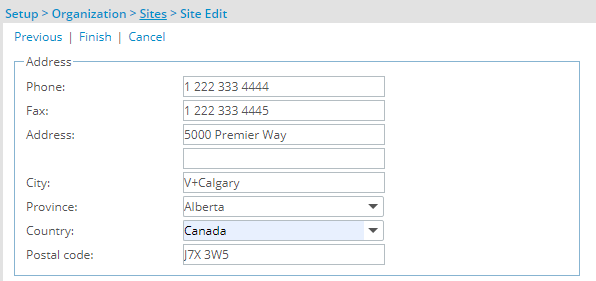
- Fill in the appropriate address information in the following boxes:Phone, Fax, Address, City, State, Country and Zip Code
- If there is any other additional information, fill it in the Description box.
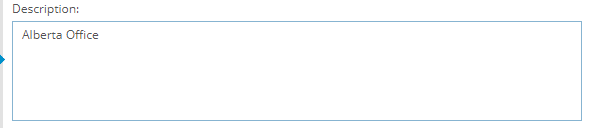
- Click Finish.
Note: The Address entered here and used in the Invoice Template is determined through the following precedence rule:
- Address defined at Company level.
- Address defined for Site marked as Default billing address.
- Address defined for Site marked as Organization's headquarters.
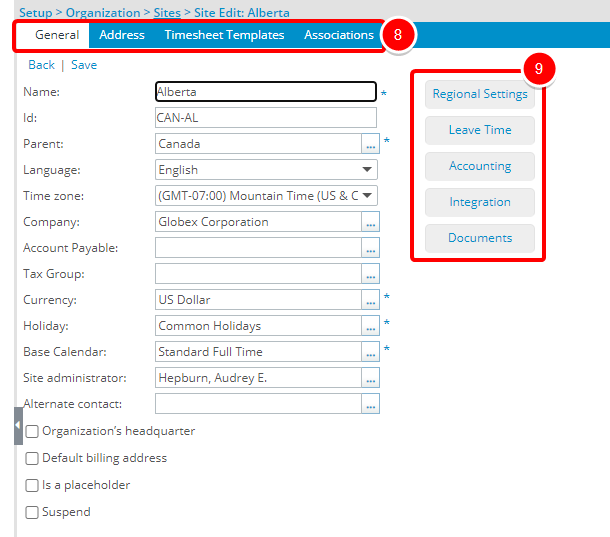
- Once you click Finish, the Site Edit page refreshes and you will see the following tabs:
- General
- Address
- Timesheet Templates
- Associations (Expense Item)
- The Regional Settings, Leave Time, Accounting, Integration, and Documents, buttons are available.