This article covers how to access and view the Clients list page as well as the available options to you.
Accessing and Viewing the Clients List page
- From the Icon Bar click Setup
 .
. - From the Navigation Menu click Work to expand the corresponding menu.
- From the Work menu items, click Clients.
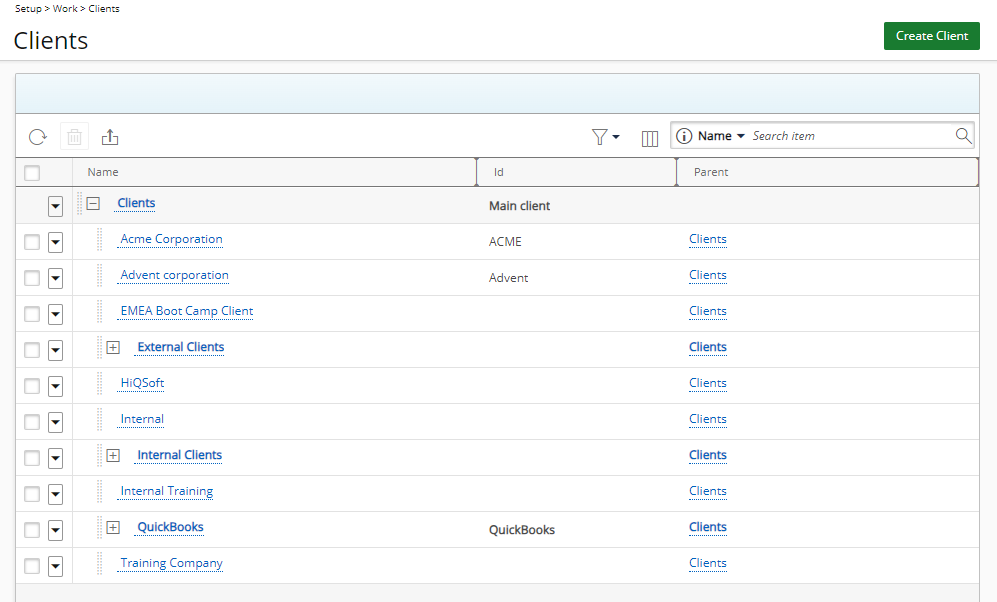
- View the Clients list, which displays in a Hierarchy format.
Available options from the Clients List page
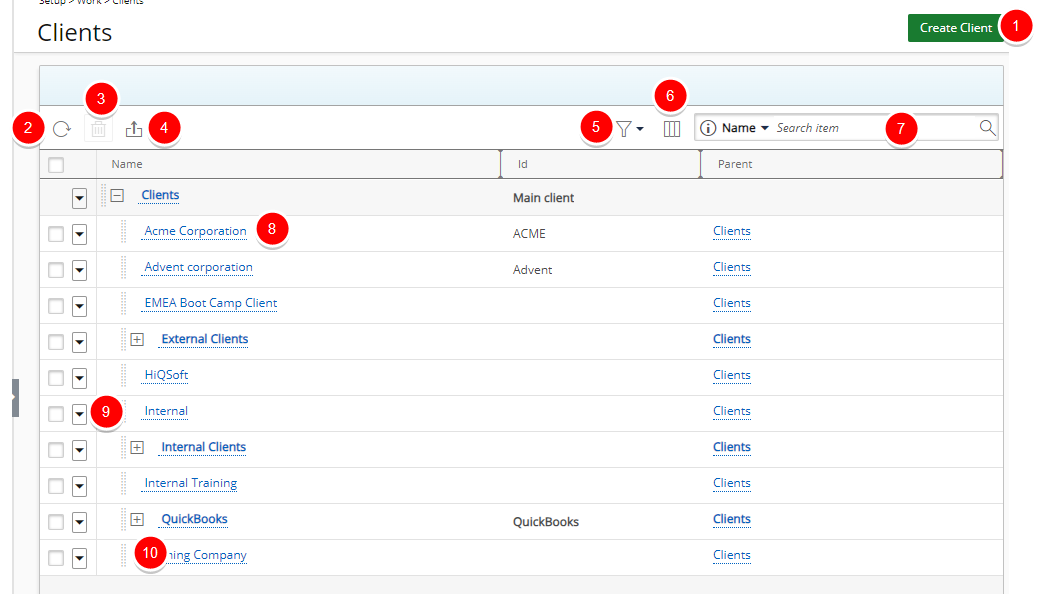
- Click Create Client to create a new Client.
- Click Refresh
 to refresh the page.
- Click Delete
 to delete the selected Client.
 - Click Export to Excel
 to export all the Clients(s) listed, and as displayed, to Excel.
 - Filter the Clients list based on Active and/or Suspended criteria.
Note: By default, both options are selected, and the filter icon is grey. If either or both selection boxes are unchecked, the Filter button turns blue, and the View switches to a flat list. For further details refer to On-page basic Filter (Simple Filter).
- Click Column Selection
 to open the Column Selection dialog box where you can add or remove columns to display on the Clients list page. The following columns are displayed by default: Nameand Id. In addition to any User Defined Fields associated to Clients you can choose to add the Client Type column.
 - Search functionality: Select a search criterion from the available anchored criteria filters; Name, Id, Client Type. Enter the corresponding search value, then click the Search button
 . For further derails refer to Searching for an item.
 - Click the Name of the Client you wish to modify to access the Client Edit page.
- Click the down arrow
 located against a Client name to access the Context menu which provides shortcuts to easily:
- Create a New Client.
- Delete Client. Note that the Delete option is not available for placeholder Clients with child items.
- Access the Client Contact List.
- Click
 and drag a Client name to a new Parent placeholder.
 - Items in the Parent column are hyperlinked to their respective edit pages.