This article covers the viewing of a Client's POs and the available options to you.
Access and View the Client POs
- From the Icon Bar click Setup
 .
. - From the Navigation Menu click Work to expand the corresponding menu.
- From the Work menu items, click Clients.
- From the Clients List page select the Client name to access the Client Edit page.
- Upon the Client Edit page displaying, click the POs tab.
- View the Client's POs.
- If the Summary section is collapsed by default, click the Expand button (down arrow) to view the Clients POs page with the Summary section expanded.
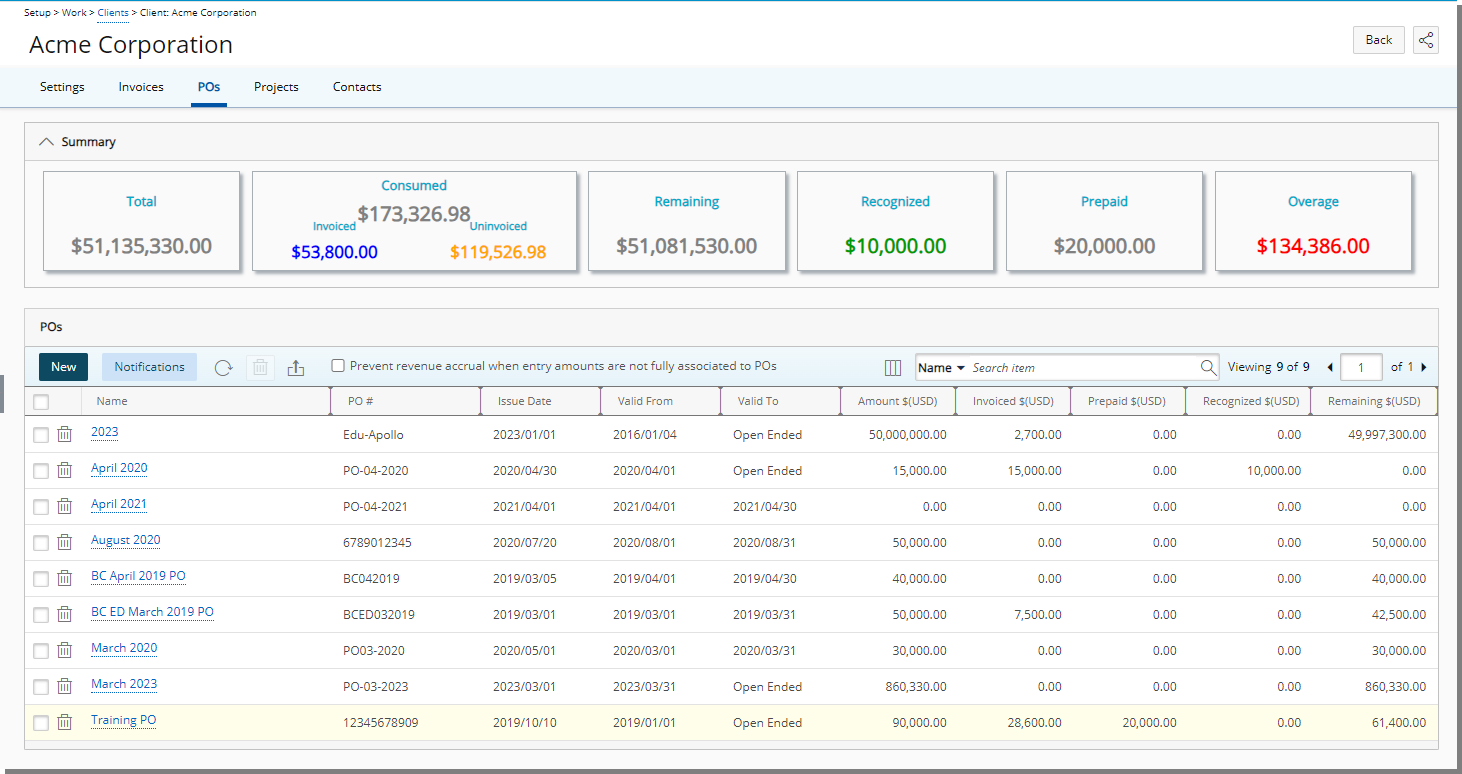
Note: The amounts within the Client's POs Summary section are only calculated and shown upon expanding it. The default visibility for the Client PO Summary section can be managed by a Master Administrator from the System Configuration page (Setup > Organization > System > System Setup).
Available Options
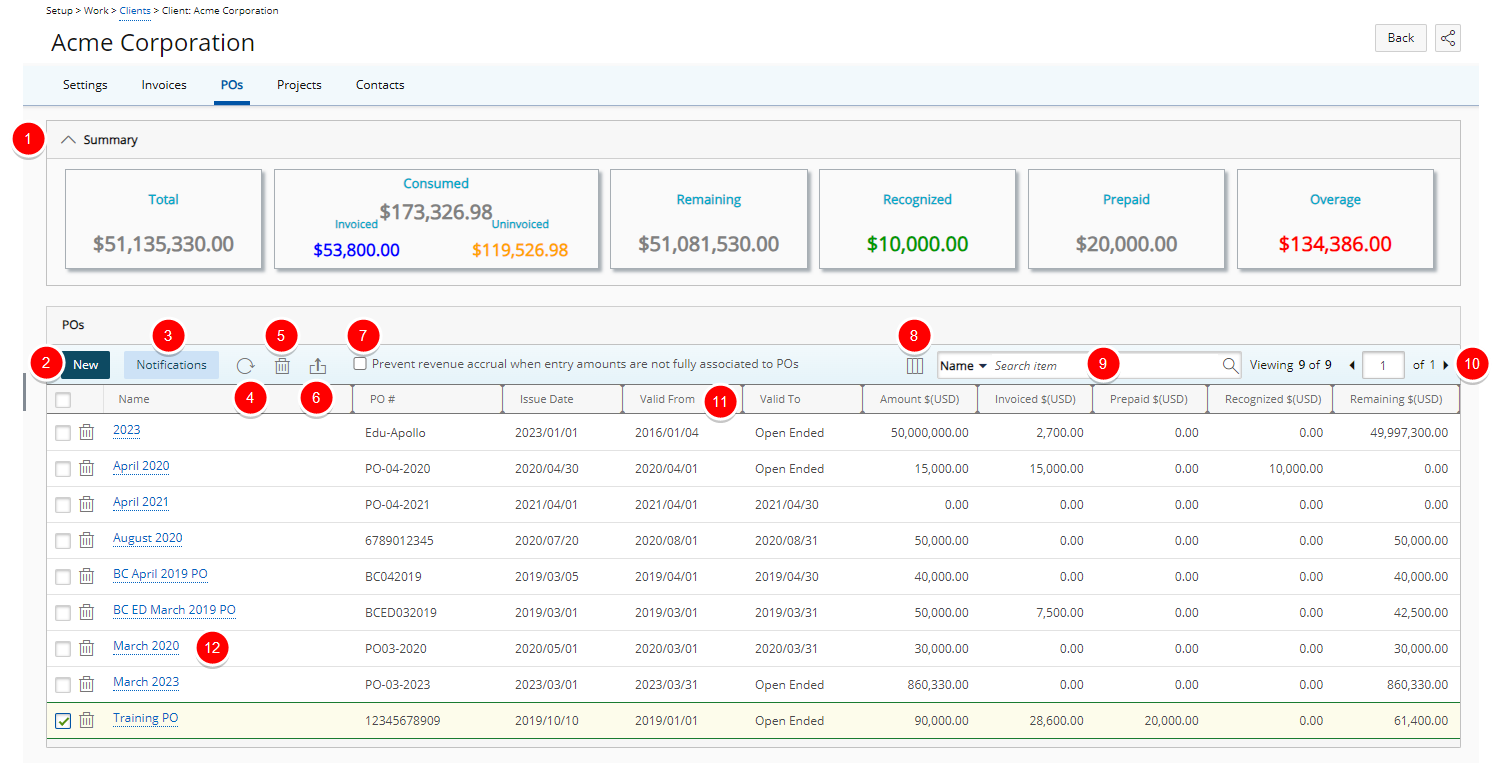
- Expand
 /Collapse
  the Summary Section to view financial details related to client purchase orders. The amounts within the Client PO Summary section are calculated and displayed only when the section is expanded.
Note: The default visibility for the Client PO Summary section can be managed by a Master Administrator from the System Configuration page (Setup > Organization > System > System Setup).
- Choose the Prevent revenue accrual when entry amounts are not fully associated to POs selection box to prevent transitioning an invoice to a state marked as Recognize Revenue when the entry amounts are not fully associated to POs. For further details refer to Preventing revenue accrual when entry amounts are not fully associated to POs for a Client.
- Click
 New to create a new PO line item
 - Select the required PO Line Items, then click Delete to delete them.
- Click Tools to access the context menu from where you can export all the Client POs list to Excel.
Note that numeric columns are formatted as number or currency in the exported Excel files, allowing you to perform calculations directly on the data. For further details refer to Export to Excel.
Tip: You can sort the Client POs list based on Name, PO#, Issue Date, Valid From, Valid To, Amount, Invoiced $, Prepaid amount, Recognized amount or Remaining amount in ascending (
 ) or descending (
 ) order by clicking on the corresponding column header. An arrow will appear on the sorted column, visually indicating the sort order.
 - Click Notifications to access the manage PO Notifications.
- Select a search criterion from the available anchored criteria filters; Name PO# and Project. Enter the corresponding search value, then click the Search
 . For further derails refer to Searching for an item.
 - The following columns are displayed by default: Name, PO #, Issue Date, Valid From, Valid To, Amount, Invoiced, Prepaid, Recognized and Remaining.
Click Column Selection to define which columns you wish to have displayed on the list page. In addition to any User Defined Fields associated to the Client POs you can choose to add the following columns: Consumed amount and Description.
 - Click an existing PO to access the PO Edit page.