The invitation sent to the Client Contact email address contains a link to allow them to set their password. Upon accessing the Set Password page and saving their new password, they are then logged into the PSA Customer Portal. The unique Client Contact Logon Name can easily be changed from the Profile Settings page.
This article details the steps for a first login and how to modify the Client Contact Logon Name.
First Login
- Look for and open the email with the following Subject line: "You've been invited to the PSA Customer Portal."
- Click the Setup Password link.
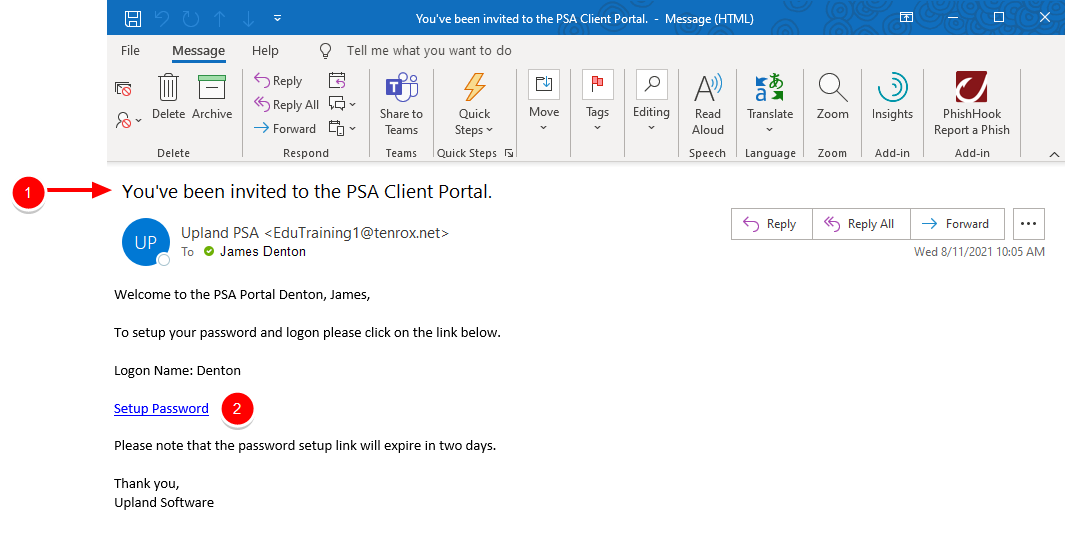
Note: The invitation link expires within 48 hours.
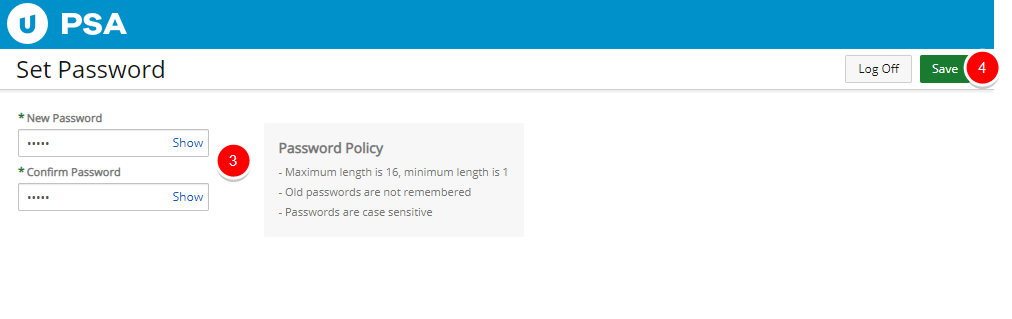
- Upon the Set Password page displaying, enter a New Password and then Confirm Password according to the Password Policy displayed on the page.
- Click Save.
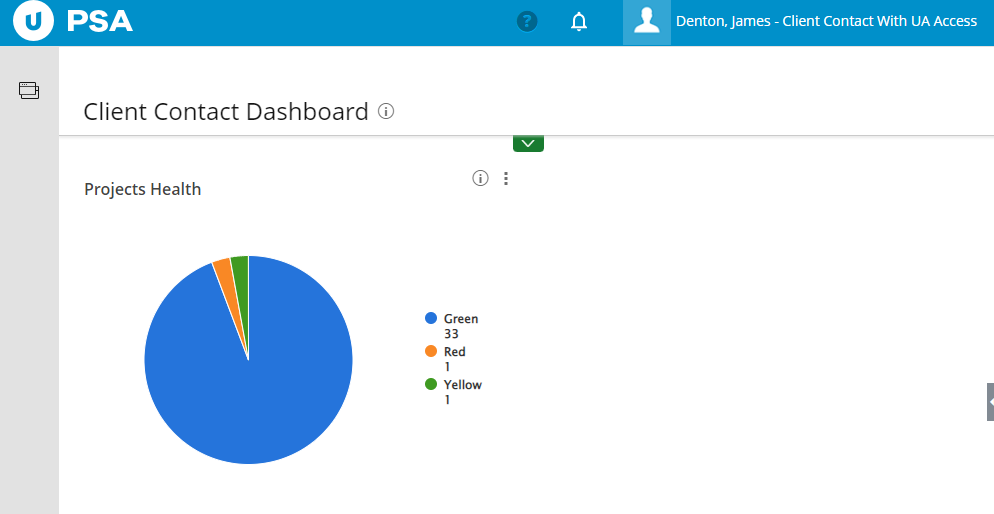
- Upon successfully saving the password you will be logged automatically into the Customer Portal and the first Dashboard assigned to your User Profile will be displayed.
Tip: You can choose to overwrite your default Dashboard by selecting a different one from your User Settings (User Settings > Dashboards tab). For further details refer to Modifying your Client Contact Settings.
Caution: Any subsequent logins must be from your PSA login page at: https://clientname.tenrox.net where clientname is specific to your organization.
Modifying your Client Contact Settings
From the Profile menu you can:
The following file formats are supported and attempts to upload other types will trigger an error notification:
- .JPEG
- .TIFF
- .PNG
- .GIF
Note: The maximum upload size for the profile picture is 4 megapixels (MP).
- Click your profile picture or your name and role, at the upper right-hand corner of the page to access the Profile Menu.
- Select Update Profile Picture.
-
Select Upload new picture.
-
Click Upload file.
-
Follow the browser prompts to choose the profile picture file.
- Click your profile picture or your name and role, at the upper right-hand corner of the page to access the Profile Menu.
- Select Settings, to access the Settings window.
- From the Language selection list choose your preferred language.
- To modify your Logon name, enter the new name in the designated box.
Note: Your Client Contact Logon name must be unique.
- To modify your Password:
- Enter your old password in the designated box.
- Type the new password twice in the designated boxes.
- Click Save, and a dialog box will appear confirming that your new password has been successfully changed.
Note:
Upon changing the Password, a message bar will be displayed informing you of a successful Password change.
Upon modifying either only your Logon Name or both your Logon Name and Password at same time, you will be automatically logged out and need to login using your updated Logon Name/Password.
- Click your profile picture or your name and role, at the upper right-hand corner of the page to access the Profile Menu.
- Select Settings, to access the Settings window.
- Click the Dashboards tab.
- Press the required Dashboard name and drag it to the top of the Selected Dashboards table. The first Dashboard listed within this table will be displayed as your default Dashboard.
Tip: The order of the listed dashboards displayed in the Selected Dashboards table are the same as the order of the dashboards displayed in your menu. To modify the order press a Dashboard name and drag it to the required position.
- Click Close
 to return to the Dashboard.
 - Note that the page will be refreshed and the newly selected default Dashboard will be displayed.
- Click Log Off, to close your PSA session.
- Click your profile picture or your name and role, at the upper right-hand corner of the page to access the Profile Menu.
- Click My Notifications, to view and mange your Notifications. For further details refer to My Notifications.
- Click your profile picture or your name and role, at the upper right-hand corner of the page to access the Profile Menu.
- Click Log Off, to close your PSA session.
Accessing the Help and About page
The Help Menu is displayed when you click on the question mark button giving you quick access to the Online Help and the application About pages.
- Click the Help button.
- Depending on your PSA configuration you may see either one of the following options:
- Click Online Help, to open the PSA Online Help Center in a new window.
- Click Help to open the new help sidebar. From here, search by keyword(s) and phrase(s) to find articles from both the Help Center and Community — all in one place. For further details refer to Using the Help sidebar.
Note: The Help sidebar is not available in IE11. For the best experience, please update your browser.
Click the Help button and select About, to access the about dialog box which contains the following information:
- PSA Release and Build numbers as well as the Service pack information.
- A link to the PSA website.
- Copyright information.
- Links to the License Agreement as well as the Privacy Policy.