Client Edit | Settings Details
This article details how to access the Settings Details of a Client and the available options to you.
- From the Icon Bar click Setup
 .
. - From the Navigation Menu click Work to expand the corresponding menu.
- From the Work menu items, click Clients.
- From the Clients List page select the Client name to access the Client Edit page.
- The Settings tab of the Client Edit page will be displayed.
- You can navigate to the General, CRM and any available UDF sub tabs.
- The Client navigation bar will be visible to you. You can use it to complete the following client elements:
- Under the Settings section, you can find the Details.
- Under the Financial section, you can find the Invoice Options, Accounting as well as Cost, Billing and Rate Cards components of your client.
- Under the Others section, you can find the Scope, and Attachments.
- Under the Related section, you can find the Clients and Users related to your Client.
- From the Integration section, you can set up the integration with various third-party applications.
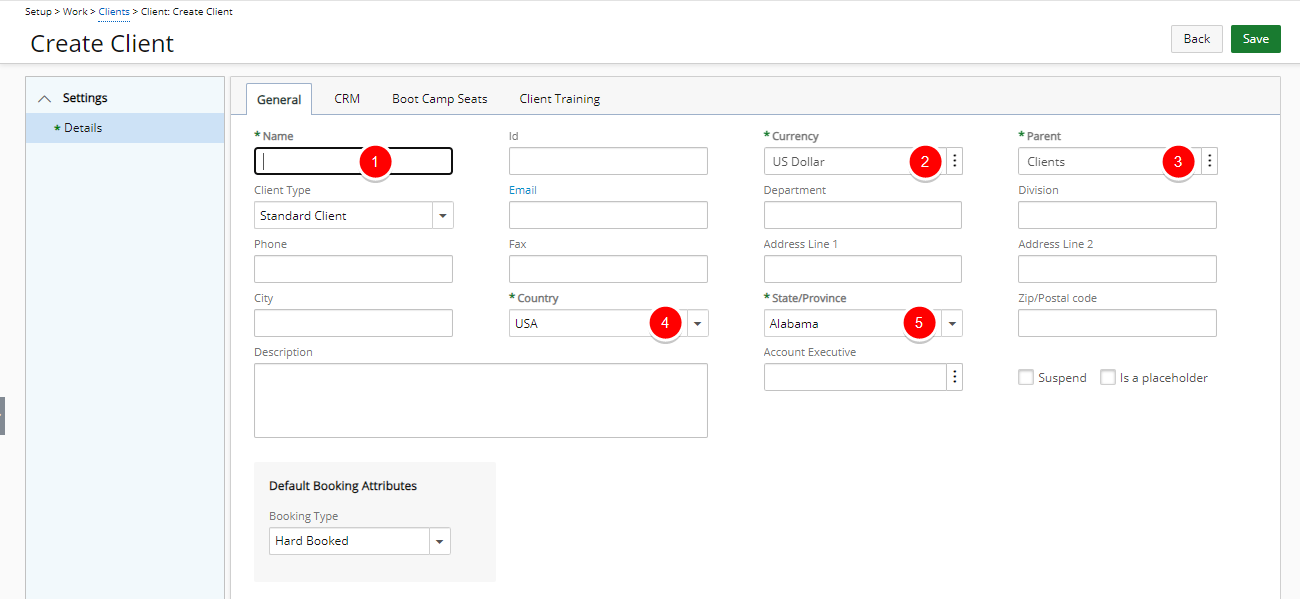
General tab:
The following fields are mandatory:
- Name*: Name of client
- Currency*: Currency used by the client
- Parent*: Click the browse button to select and designate, from the Client List page, under which placeholder the client is to be displayed.
- Country*: Country of company
- State/Province*: State or province of company
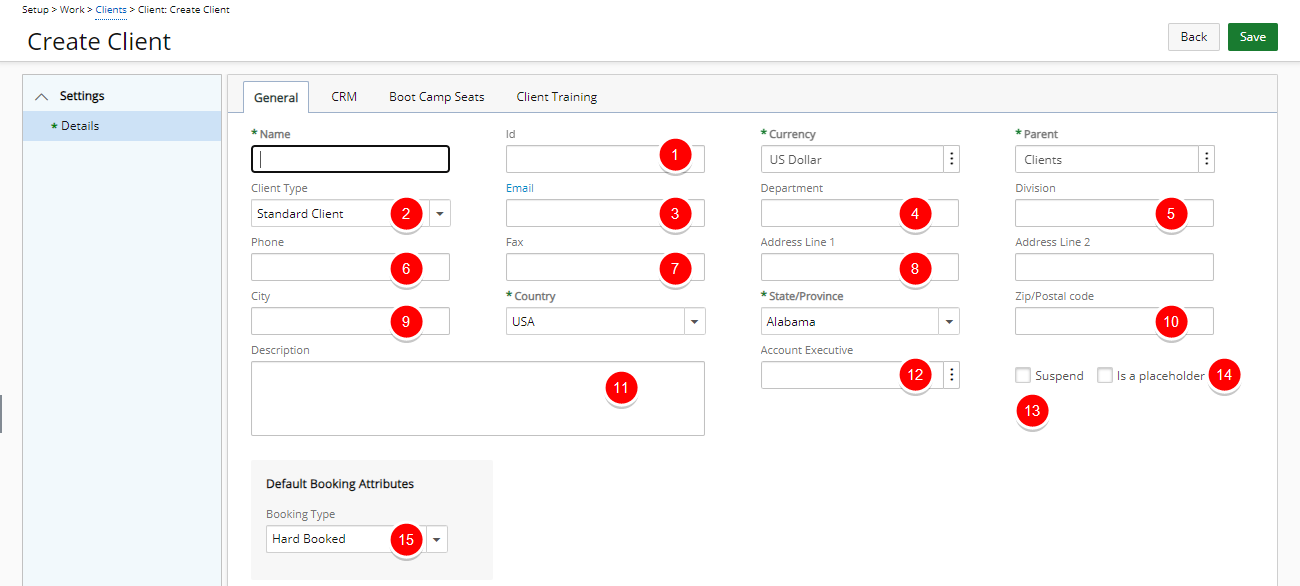
The following fields are optional:
- Id: Enter a unique identifier assigned to the client.
- Client type: type of client
- Email: email address of the client; clicking the Email field name opens an email message to allow users to create and send the client an email
- Department: department of the contact in the company
- Division: division of the contact in the company
- Phone: phone number
- Fax: fax number of the client
- Address Line 1/Address line 2: civic address
- City: name of city
- Zip/Postal code: postal code or ZIP code
- Enter additional information in the Description box.
- Account executive: account executive assigned to the client
- Select Suspend to suspend the client.
Note: Suspended Clients are:
- Visually highlighted in red within the Clients list.
- Presented in red and are non-selectable in browse for item list pages.
- Hidden in selection lists.
- Available for selection in Filters and reporting
- Select Is a placeholder if the new client is used as a placeholder in the Clients list.
- Select the default Hard Booked or Soft Booked Booking Attributes from the Booking Type selection list. Any new Projects that are created for this Client will also have a default Soft Booked or Hard Booked Booking Attribute. As a result any Bookings created for this Clients Projects will also default to Soft Bookedor Hard Booked based on your selection at the Client level. By Default Hard Booked is selected.
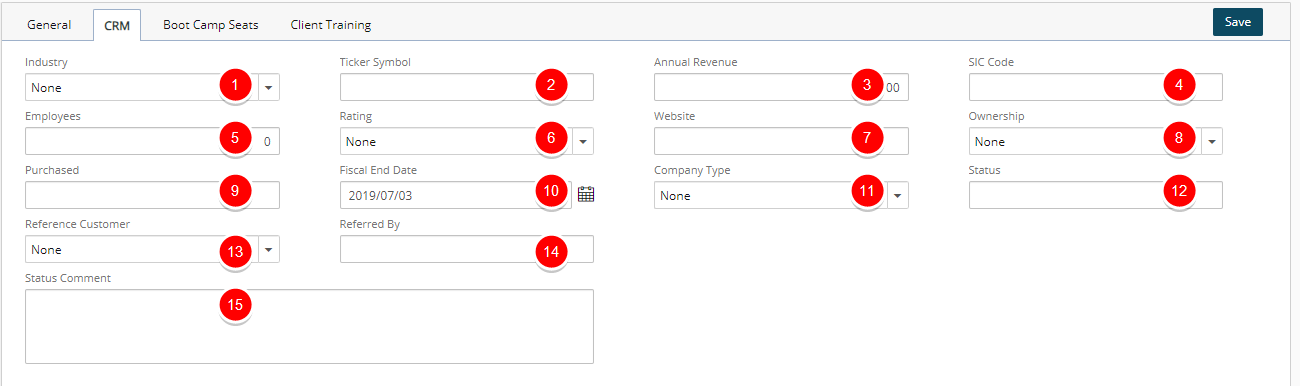
CRM tab:
From the CRM tab you can enter or select the following settings:
- Industry: primary business of the client
- Ticker Symbol: stock exchange and stock symbol of the client; for example, NASDAQ: ADSK
- Annual Revenue: total income incurred from the client’s company
- SIC Code: Standard Industrial Classification (SIC) code of the client’s main business categorization, for example, 57340 for Electronics
- Employees: number of employees working for the client’s company
- Rating: rating of the client; for example, Hot, Cold, or Warm
- Website: Website address of the client’s company
- Ownership: ownership of the client’s company
- Purchased: description of what the client purchased
- Fiscal End Date: end date of the company’s annual reporting period
- Company Type: type of company
- Status: status of company
- Reference Customer: indicates if a customer was contacted for references
- Referred By: name of person who referred the company
- Status Comment: Enter any comments on the status of the company.