The Group Leave Time Calendar offers users the ability to see a monthly view of a group's requested and approved leave time(s).
This article details how to access the Group Leave Time through the Group Edit page.
The Group Leave Time Calendar can be accessed through:
- The Leave Request Manager Calendar View tab (Entries > Leave Request Manager)
- The Group Edit page (Setup > Organization > Groups > Group Edit)
- The Group Leave Time Report option from the Group Work Plan page.
Note: If the logged user has the Leave Requests - All Requests Tab security, and View right to the Group component, then the Group Leave Time link will be available within the respective Group Edit page for all groups. Otherwise, the Group Leave Time link will only be available upon editing the Group(s) they are the named Manager of.
- From the Icon Bar click Setup
 .
. - From the Navigation Menu click Organization.
- From the available options select Groups.
- Upon the Groups list page displaying, click View and choose the required option.
- Click the name of the Group you wish to edit, to access the Group Edit page.
- From the General tab click Group Leave Time.

Note: If the logged user has the Leave Requests - All Requests Tab security, and View right to the Group component, then the Group Leave Time link will be available within the respective Group Edit page for all groups. Otherwise, the Group Leave Time link will only be available upon editing the Group(s) they are the named Manager of.
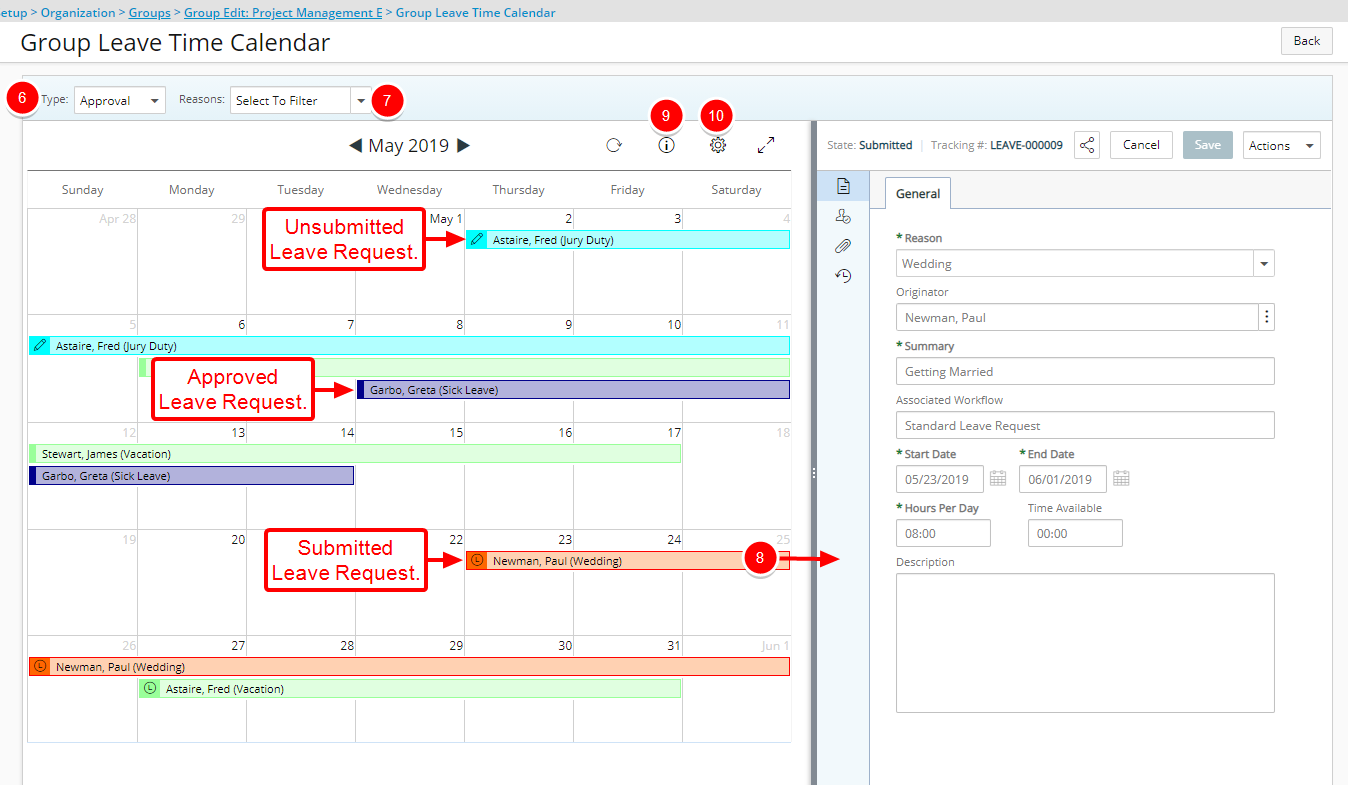
- Upon the Group Leave Time Calendar page displaying, select the Group Type to see on the Calendar View and filter it to your requirements. The available options are:
- When Functional is selected, the view shows those resources with the selected group as their functional group.
- When Approval is selected, the view shows those resources with the selected group as their approval group.
- When Resource is selected, the view shows those resources that have the selected group as their resource group.
- Filter the Calendar View based on Leave Time Tasks by selecting the appropriate filter option(s) from the Reasons box. Select Select all or choose the required Reason(s) from the list of available options. Upon selecting a Reason(s) the Calendar View will refresh and display only Leave Requests with the selected Reason(s).
- Click on a Leave Request from the calendar to view the details on the right pane, where you can
- Action on the Leave Request assigned to you (based on your Role)
- Edit your own Leave Requests and access the General, Assignment, Attachments and History tabs.
Note: The Leave Request will be read only if it’s current State Attribute is Read-only.
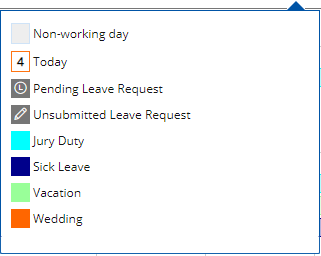
- The Calendar bar icons and colors are explained in the Legend. These colors are dependent on the colors that were defined for the different Leave Time types Setup > Timesheet > Leave Time however, the background colors within the Calendar are less saturated so that the text can remain legible.
For further details refer to the Defining Leave Time article.
- Select the Days and Number of rows (min 4, max 10 rows) to be displayed on the Calendar View simply by clicking on the Setup icon and making your selections from the available options.