Groups contain a list of all departments within the organization. Groups define the organization’s hierarchical structure for timesheet approval, and each one can be broken down into subgroups. Each group is assigned a manager, and the manager of each group can view the timesheet of users in their group.
This article details how to access the Groups List page and the available options to you.
Access Groups List page
- From the Icon Bar click Setup
 .
. - From the Navigation Menu click Organization.
- From the available options select Groups.
- View the Groups list page.

Available Options
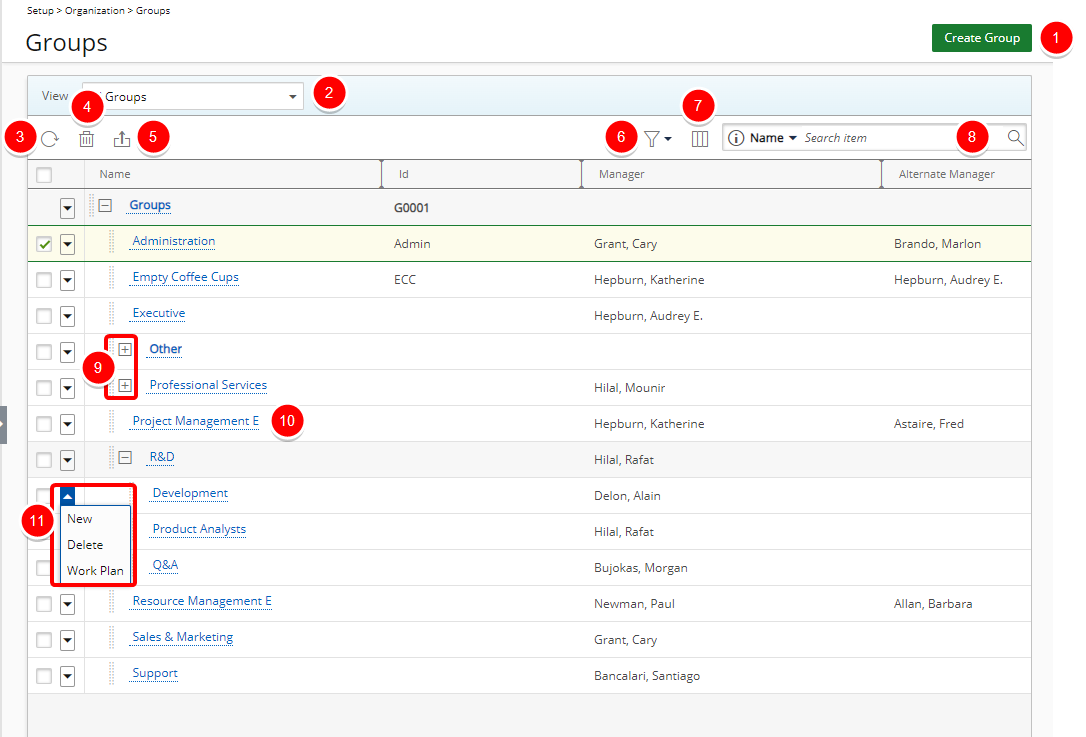
The following options are available from the Groups list page:
- Click Create Group to create a new Group.
- Click to select the required View:
- All Groups: Displays all Groups in the system. (Available to Security profiles with the View right to Groups and Group List with All Groups View)
- My Groups: Displays all Groups where the logged in User is the named Manager. (Available to Security Profiles with the View right to Groups)
Note: In cases where the Group Manager is set to Out Of Office in PSA, their Groups will be available to the named Alternate Group Manager through My Groups View.
- Click Refresh
 to refresh the page.
- Delete
 selected Group(s).
 - Click Export to Excel
 to export all Group(s) listed, and as displayed, to Excel.
 - Filter the list based on Active and Suspended criteria. By default, both options are selected, and the filter icon is grey. If either or both selection boxes are unchecked, the Filter button turns blue, and the View switches to a flat list. For further details refer to On-page basic Filter (Simple Filter).
- Click Column Selection
 to open the Column Selection dialog box where you can add or remove columns to display on the Groups list page.
The following columns are displayed by default: Name, Id, Manager and Alternate Manager. In addition to any User Defined Fields associated to Groups you can also choose to include the Parent column . - Search functionality: Select a search criterion from the available anchored criteria filters; Name, Id, Manager, Alternate Manager and Parent. Enter the corresponding search value, then click the Search button
 . For further derails refer to Searching for an item.
 - Click the Expand
 / Collapse
  button to expand or collapse the tree.
 - Click the name of a Group you wish to modify to access the Group Edit page.
- Click the down arrow
 located against a Group Name to access the Group context menu:
- For parent items with children, only the New and Workplan options will be present.
- For child items or placeholder items without children, you can choose New, Delete and Workplan.
Tips:
- You can easily sort the columns by ascending or descending order simply by clicking on the column header.
- Easily change the Parent simply by dragging and dropping a Group under a new parent.