You can create projects to build packages, manage workflow and collaboration, and track progress at the project, subsection, file, question and participant level. When you create a project, you select a document type to define the structure of the package, a style template to apply to the documents within the package, and a due date. Once the project is created, you, as the project owner, can add participants who can be assigned to subsections, files, questions within a questionnaire, or the entire project. Once all the sections are complete, you or another owner can build the package.
Note: Document types that include an RFP Compliance Matrix component must use created documents feature for automation. For more information on how projects and created documents differ, and help deciding which to use, see Automating RFPs, proposals, and presentations.

Project interface
The project page is comprised of a navigation panel and a workspace. The navigation panel has three tabs: Sections, Assignments and Participants. These tabs help you navigate through the project and assignments and quickly assign participants to the project or a specific assignment. The workspace, which displays the selected section, subsection or file, is the area where you will do most of your work on the project's content.
Tip: The name of the current open project will be displayed in the browser tab. For example, when a user opens their "ABC Company" project, the browser tab will display "Qvidian - ABC Company".

The project page.
Navigation panel
To display the navigation panel, click the > icon at the top right of the panel. To hide the navigation panel, click the < icon.
The Sections tab displays the sections, subsections and files included in your project, along with an Instructions and Related Files section. The status of the sections and subsection is indicated by a status bar to the left of the section or subsection title. Sections that cannot be acted upon, like the TOC, will not have a status bar.
Status bars:
 For participants: It is your turn in an assignment. For project owners: The section is not complete.
 For participants and project owners: The section is complete.
 For participants and project owners: The section is past due. This also displays on Data Entry sections if any required fields are blank.
You can expand or collapse a section or subsection to view or hide its subsections or files. To expand or collapse a section, click the arrow to the left of the title. Click on section, subsection or file to go to it in the workspace. Optional subsections and files have a check box to the left of their titles. Select or clear the check boxes to include or exclude the sections or files.

Example of the Sections tab.
Section Display Mode: Full vs Simplified Doc Structure
Switch between the Full and Simplified Doc Structure views any time using the Section Display Mode toggle. The Full Doc Structure view displays all Project sections and subsections. The Simplified Doc Structure view displays only the subsections you own or can change.

An example of Full Doc Structure (left) and Simplified Doc Structure (right). Click to enlarge.
- Open the Sections tab of your Project.
- Select a display mode using the toggle:
- Full: Display all sections, subsections, and content are visible, including those you cannot change.
- Simplified: Displays only the subsections you own or can change. For selection-driven content sections, only the first occurrence of relevant selections is visible, and any automatically driven selections are hidden. Relevant optional sections are visible but unchecked by default. The Overview, section headings, and static content are all hidden.
Note: By default, everyone initially sees the Full Doc Structure view, unless the “Show Simplified Doc Structure in Projects on First Use” system permission has been enabled. When enabled, the first time a user opens a Project, their view will default to Simplified Mode. After opening a Project, the user can change their view and the system will remember their preferences the next time they create or open a Project.
Note: Upland Qvidian will remember the doc structure view you selected last, so your preferred doc structure view will remain active across projects and between log-ins.
Caution: In some instances, the same Selection Driven Content Section can have different names in the Full and Simplified Doc Structure views. This occurs because you can have multiple subsections that use the same component. The subsection name is populated by the "Name" Document Type field, and the component name is populated by the "Display Title" Document Type field. For example, if a component is titled, “Business Issues,” but the subsections are titled for each distinct location in the document, such as “Business Issues Intro,” “Business Issues Body,” and/or “Business Issues Summary.”
Note If a selection driven content component is opened in the Sections tab, a panel featuring: a navigation tree, search bar, filter, and Shortcuts option will appear. For more information on navigating selection driven content, see Selection Driven Content section (projects).
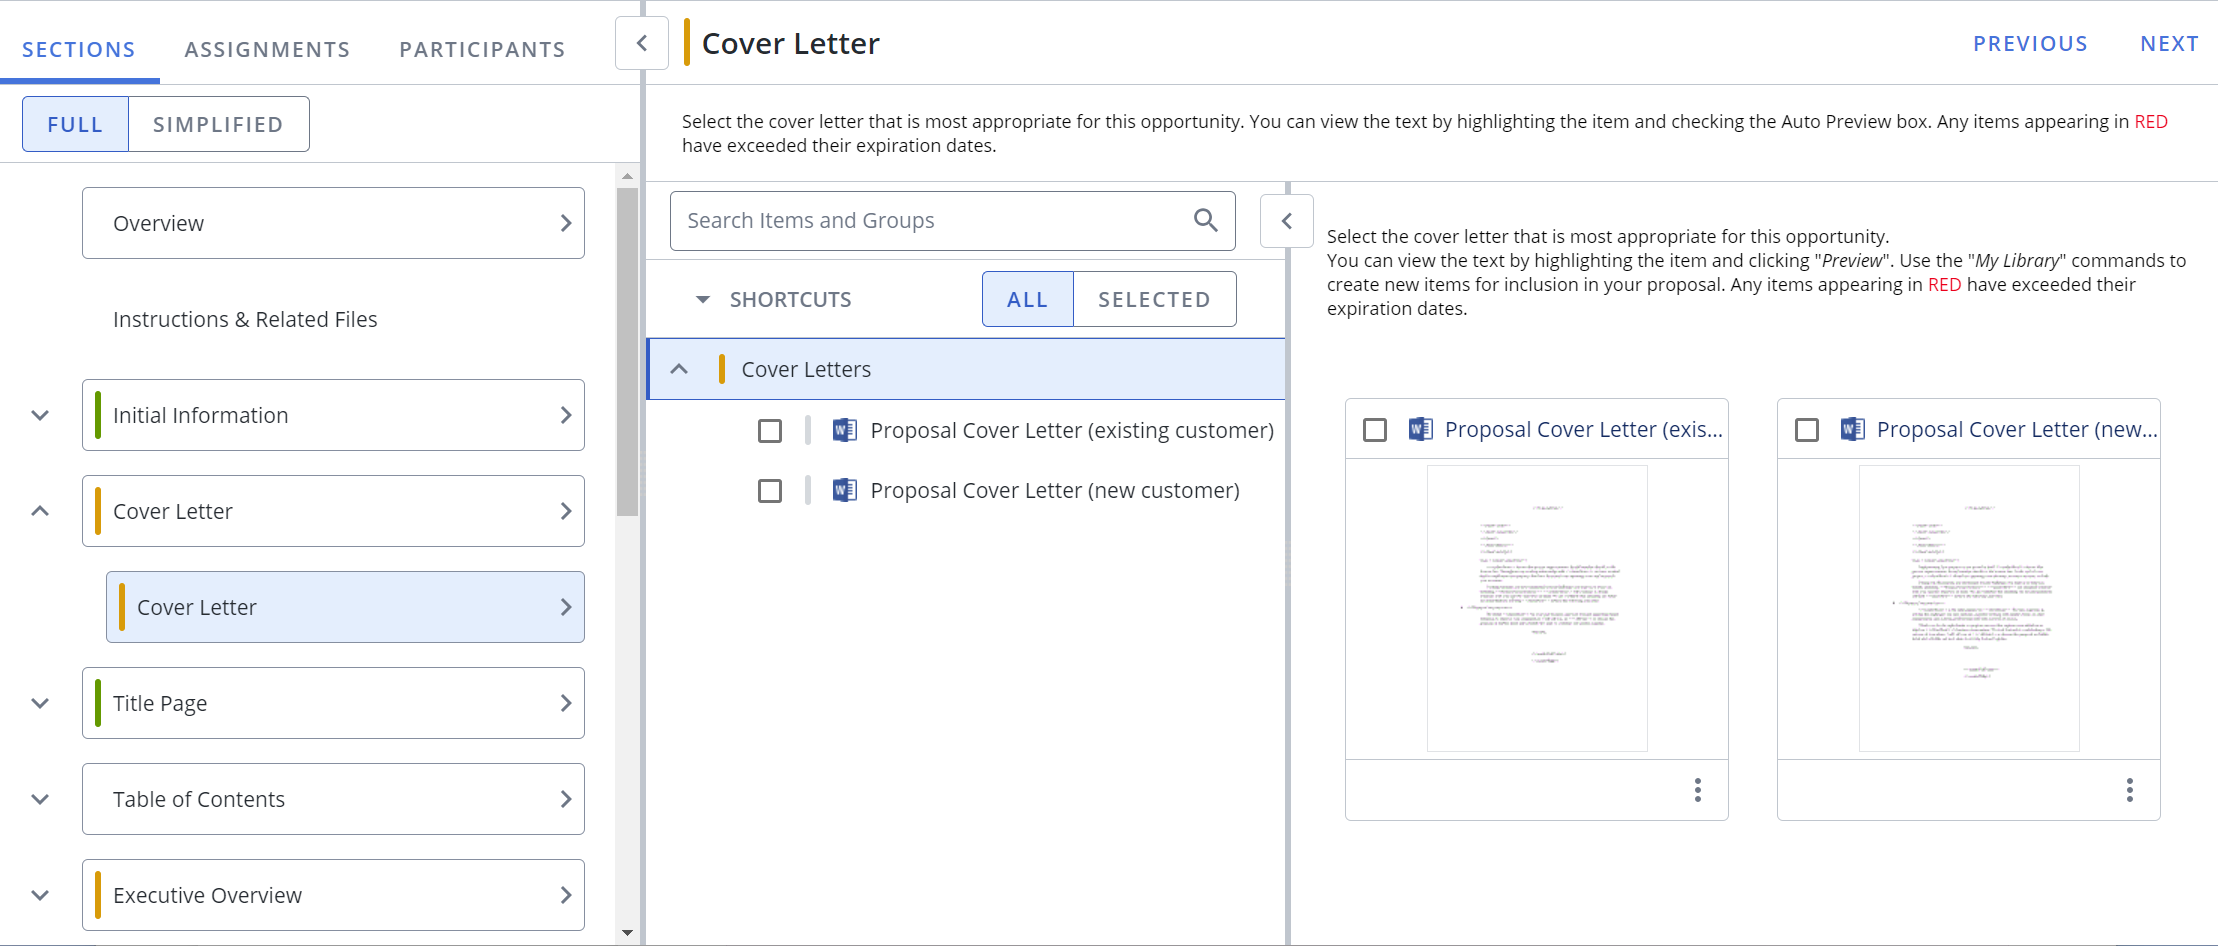
Example of the selection driven content within the Sections tab.
The Assignments tab lists the project workflow and/or your assignments, depending on the view. Click the Workflows toggle to view all assignments, or My Tasks to view only your assignments.
The Workflows / My Tasks bars, at the top of the Assignments panel, indicate the progress of the workflow or user's assignments. The Workflows view displays by default for project owners and reflects the progress of the project by showing the percentage of assignments in each status, along with the project due date. My Tasks displays by default for other participants and reflects the progress of only your assignments. The bars display the percentage of assignments in each status as indicated by color. Hover over the colored status sections on the bars to display the number of assignments in that status. For more information on assignment status, see Create and edit project assignments
- Find specific assignments by entering text into the search bar and clicking the Search
 icon or Enter.
 - Click the Filter
 icon to filter assignments by status.
 - Click on any assignment to go to the relevant slice or file, or click the Go to Workflow Detail
 icon on the assignment card.
 - Export assignment information from the expanded panel by clicking the Export Assignments
 icon. For more information, see Export project information.
The project's participants are listed in the Participants tab in the navigation panel, along with the number of their assignments and a status bar that displays their progress in the assignments. You can hover over a participant's name or initials to view their location and contact information. Click the View Detail icon to the right of the participant to expand or collapse a list of their assignments.
Project owners can add participants to a project and assign those participants to roles from the Participants tab. for more information, see Add and manage participants in projects.
Workspace
The workspace, to the right of the navigation panel, is the area where you will do most of your work on the project's content. When a subsection its opened, the subsection and its files display, along with the subsection type in the top title bar and the file names above the files. The options within sections and subsection vary depending on the type of section or subsection. For more information, see Project sections and subsections.
Files included in the project will display as thumbnail previews in the workspace when the section or subsection is opened. You can preview all pages of a single document by double-clicking it. Microsoft Office default fonts are supported when previewing a piece of content. To view the full page preview of an RFP file, click the More  menu on the file and select View Full Preview. You can zoom in and out on the page. Select the Preview Custom Fields toggle to view the file with its custom fields. The first ten pages will display. To see additional pages, click Click to load next n pages, where n is 10 or the number of remaining pages in the document.
| Project Workspace Icon | Description |
|---|---|
 Zoom to Fit Width Zoom to Fit Width |
Click to view the full size of the first page of each file in the subsection. |
 View Thumbnails View Thumbnails |
Click to return to the thumbnail preview. |
 AutoFill Options AutoFill Options |
Click to view the following AutoFill options: Run AutoFill, Complete All AutoFill Responses, Discard All AutoFill Responses, Stop and Cancel AutoFill. |
 Submit Content Submit Content |
Click to view the following Submit Content options: Submit All, Submit New, Submit Revisions, Show Submit Flags, Hide Submit Flags. |
 Search Mode Search Mode |
Click to turn on Search Mode, which allows you to search the content library on a selected slice. This icon only appears when an RFP is opened in the Project. |
 Refresh Refresh |
Click to refresh the currently open RFP file. This displays any edits other participants have made since you have opened the file. |
 Clear All Clear All |
Click to clear all data screens in a particular section. |
 Previous Previous |
Click to move to the previous project section. |
 Next Next |
Click to move to the next project section. |
 Project Assignments Project Assignments |
Click to create project assignments in an area with text fields, such as the Overview section. |
 Add Participants Add Participants |
Click to assign ownership of project components that have work to complete. Once assigned to a component, owners can edit content, update data, and manage workflows. |
In addition to the project title, the header includes buttons to access other project areas.
| Project Header Icon | Description |
|---|---|
 Architecture Architecture |
Click to view and/or edit your current project |
 Show Activities Show Activities |
Click to view the Project activity |
 Show Comments Show Comments |
Click to view the Project and assignment comments. |
 Show Notifications Show Notifications |
Click to view the Project notifications. |
 Properties Properties |
Click to view the project properties. |
 Build Package Build Package |
Click to Build a Package. When all actions are completed, the "Next" button in the project workspace changes to "Save and Build," promoting you to build the project. |
Next tasks
Once you are familiar with the project page, you can begin creating your project. After you've set up your project, you can do any of the following to continue working on your project:
- Upload files to your Instructions and Related Files section, File List subsection.
- Prepare and upload a questionnaire to your RFP Project subsection.
- Preview Static Content and make content selections in the project's sections and subsections.
- Add project participants. Participants must have Upland Qvidian licenses. Upland Qvidian users who have the Manage Projects Created by Other Users application permission will have the same rights as owners, regardless of whether they are assigned to the project.
- Create assignments. You must add participants prior to creating assignments.
When all the sections are complete, you can build the package.