When the Show Non-Working Time option is enabled in the Timesheet Template, users are given the ability to select a Non-Working Time Entry Type from the New Assignment dialog box. This allows them to assign and log time against predefined Leave Time Tasks.
This article details how to enable the Show Non-Working Time option in a Timesheet Template, allowing users to enter time against Leave Time tasks such as vacations or holidays.
- From the Icon Bar click Setup
 .
. - From the Navigation Menu click Timesheet.
- From the available options select Timesheet Templates.
- From the Timesheet Templates list that displays, click the Name of the Timesheet Template you wish to access.
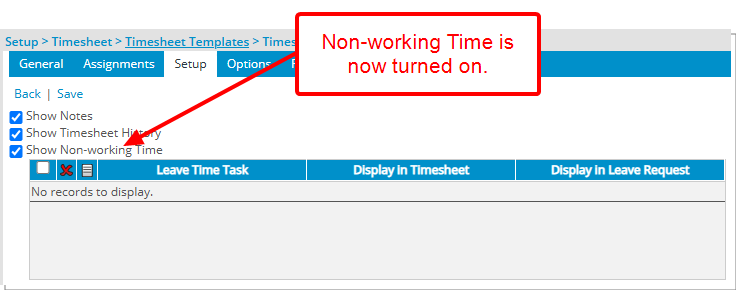
- Upon the Timesheet Template Edit page displaying, navigate to the Setup tab.
- Select the Show Non-working Time option.
Note: Upon selecting the Show Non-working Time option the Non-working Time table becomes available where you can add, modify or delete an existing Non-Working Time option(s).
- Note that in the Show Totals section, the Non-working Time option is selected by default for Timesheet Templates where the Show Non-working Time is turned on. As a result the Non-Working Time row will be displayed within the Totals section of Timesheet page.
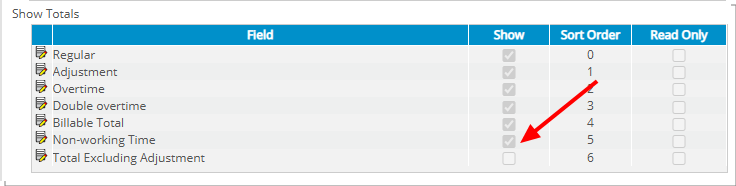
Note: You can disable the Non-working Time option here, which will remove Non-working Time from the Totals section of the user’s Timesheet.
- Click Save.
To add a Non-Working Time option:
- Click New
 in the table header.
 - From the Add Non-working Time dialog box select the required Leave Time.
- Select to Display in Timesheet and/or Display in Leave Request.
- Proceed to do any of the following:
- Click the Save and New link to save and add selection to the table while the Add Non-working Time dialog box remains open to make another selection.
- Click the Save link to save and add selection to the table, then the Add Non-working Time dialog box automatically closes.
- Upon returning to the Timesheet Template Edit page click Save.
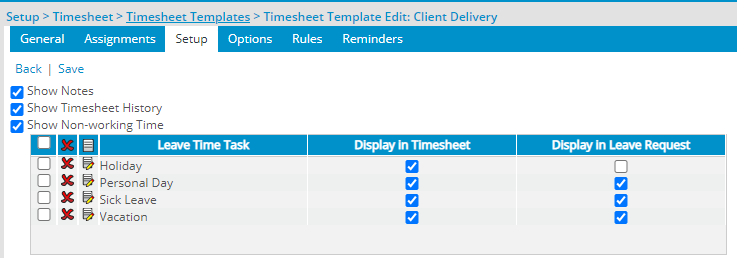
- In our example we have added the Holiday Leave Time and Sick Leave:
- View the impact of your change: Users assigned to this template can now choose the relevant Non-Working Time when picking Assignments.
The Non-working Time section is then visible to the user on their timesheet page. They may now enter Non Working Time against an activity selected in this section of their Timesheet. Furthermore the Non-Working Time row is also visible from the Totals section.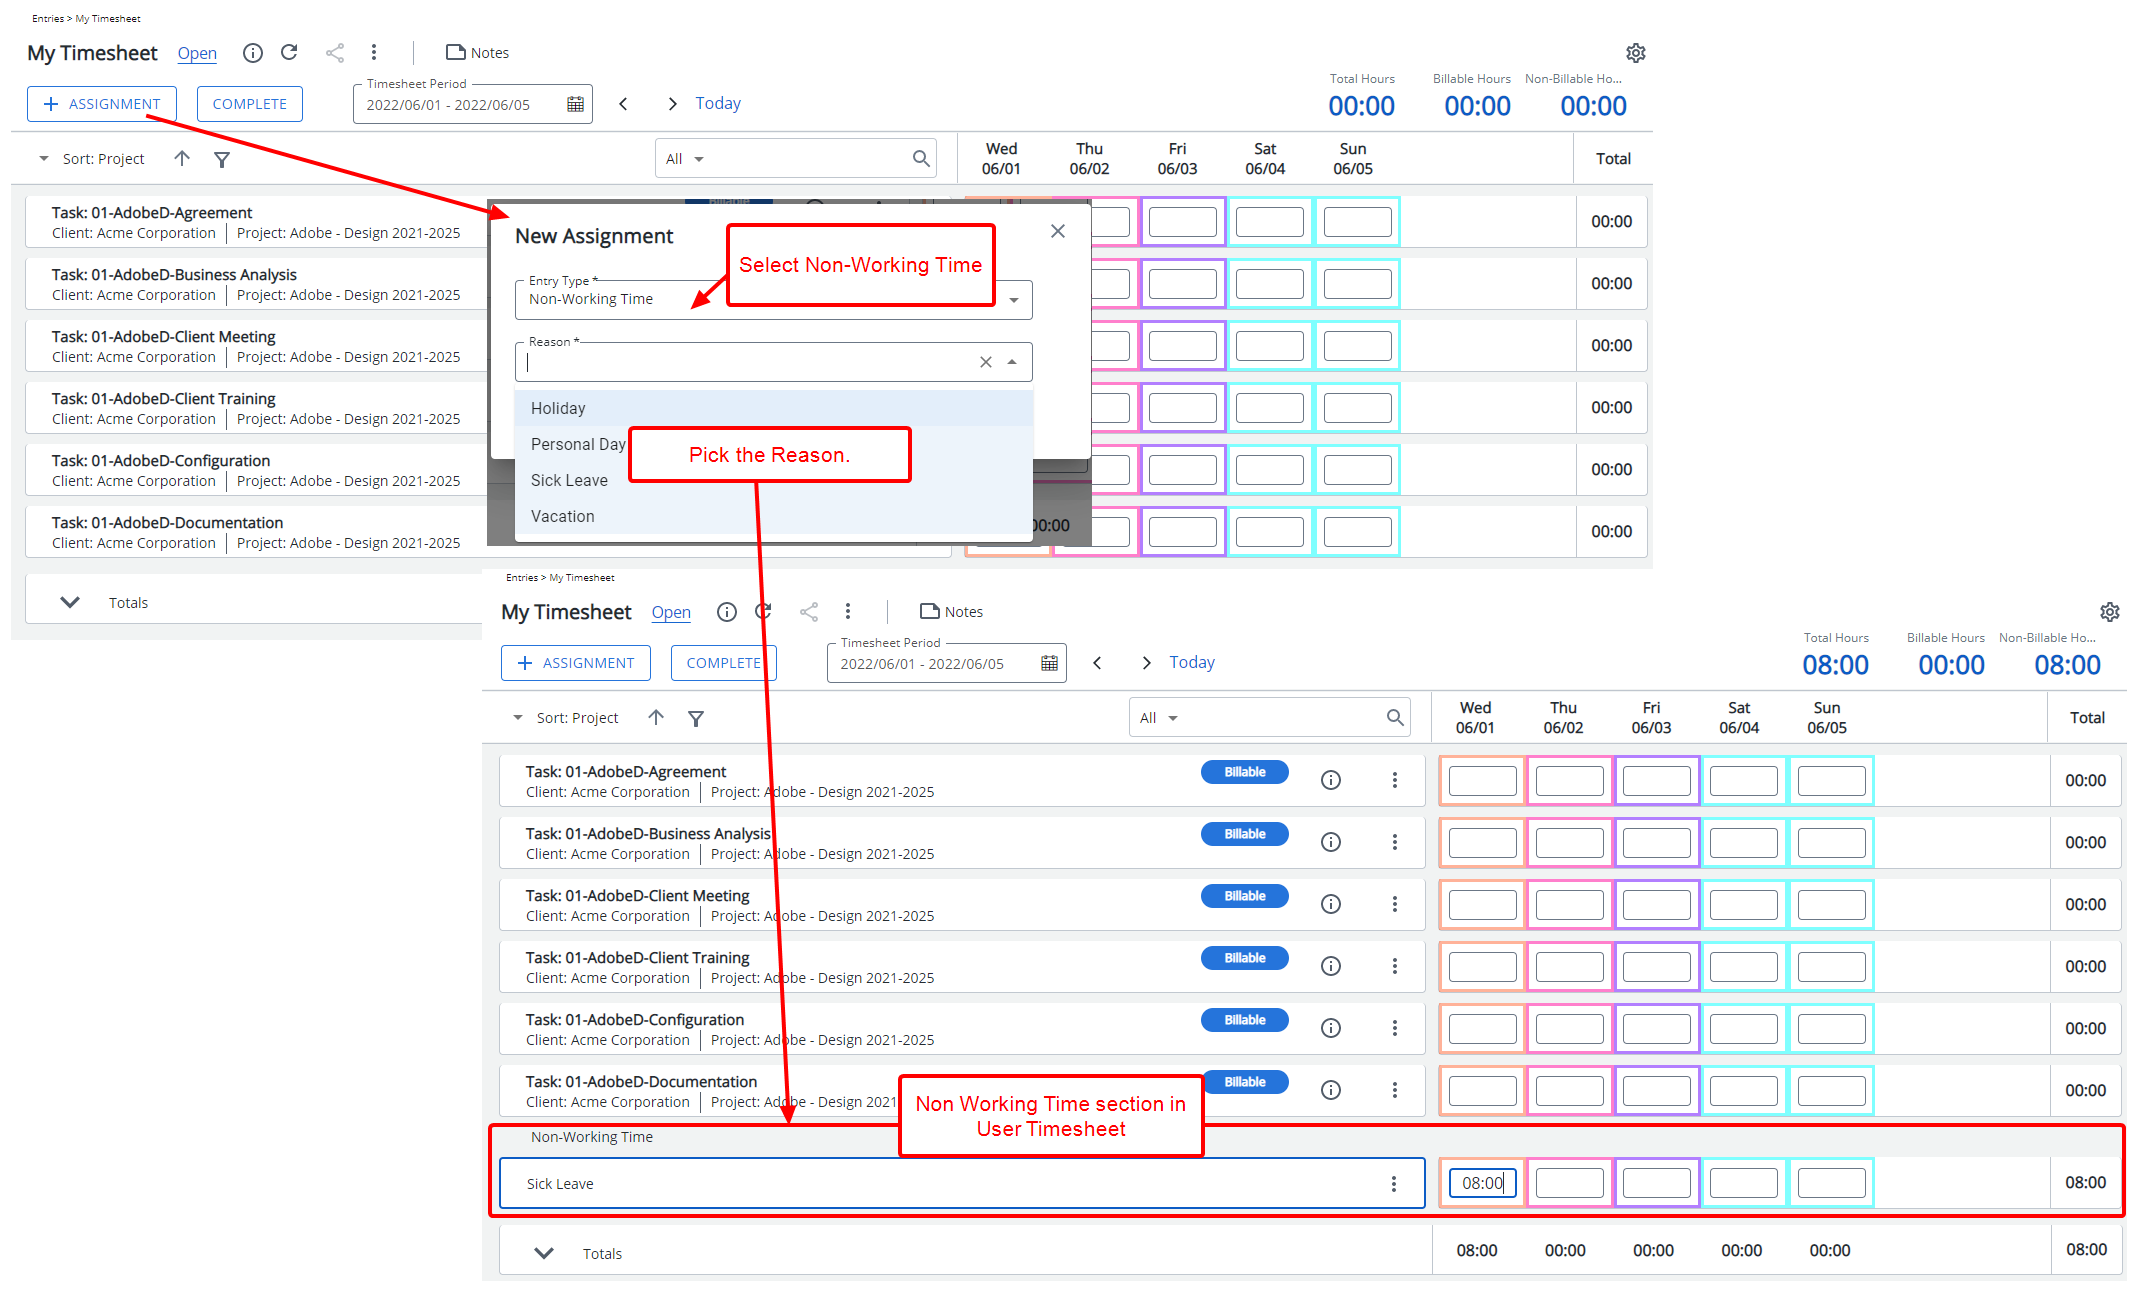
To edit a Non-Working Time option
- Click the Edit
 icon beside the Non-working Time option.
 - From the Edit Non-working Time dialog box select another replacement from the Leave Time list.
- Proceed to do any of the following:
- Click the Save and New link to save and add selection to the table while the Edit Non-working Time dialog box remains open to make another selection.
- Click the Save link to save and add selection to the table, then the Edit Non-working Time dialog box automatically closes.
- Click the Close link to simply close the Edit Non-working Time dialog box.
- Upon returning to the Timesheet Template Edit page click Save.
To delete a Non-Working Time option
- Click the Delete
 icon beside the Non-working Time option in the table to delete them individually.
 - Select the global selection box or the individual selection boxes of specific Non-working Time, then click the Delete icon in the table header to delete multiple non-working time options simultaneously.
- A message requesting confirmation of deletion is displayed. Choose either one of the following:
- Yes to proceed with the deletion of the selected item(s).
- No to abort deletion, maintaining the item(s) in the table.
- Upon returning to the Timesheet Template Edit page click Save.