The Leave Time Summary dialog box displays non-working or non-project related time. Configuring the Timesheet Template enables users to access this summary within My Timesheet, making it easier to review their leave information.
This article details how to configure a Timesheet Template so users can see a summary of their Leave Time through My Timesheet.
- From the Icon Bar click Setup
 .
. - From the Navigation Menu click Timesheet.
- From the available options select Timesheet Templates.
- From the Timesheet Templates list that displays, click the Name of the Timesheet Template you wish to access.
- Upon the Timesheet Template Edit page displaying, navigate to the Setup tab.
- Select the Show Leave Time Summary option.
- Upon selecting Show Leave Time Summary:
- You can then choose to display the following for each selected Leave Time Task:
- Time Used to display the number of hours used for the leave time.
- Time Remaining to displays the number of unused hours remaining for the leave time.
- Time Available to display the number of hours that can be borrowed for the leave time; when these hours are used and deducted from Time Available, the Time Remaining goes into a negative.
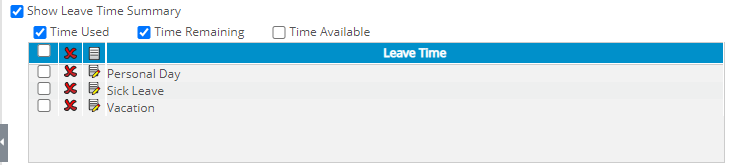
Note: By default the Time Used,Time Remaining and Time Available options are selected.
- The Leave Time table becomes available where you can add, modify or delete an existing Non-Working Time option(s).
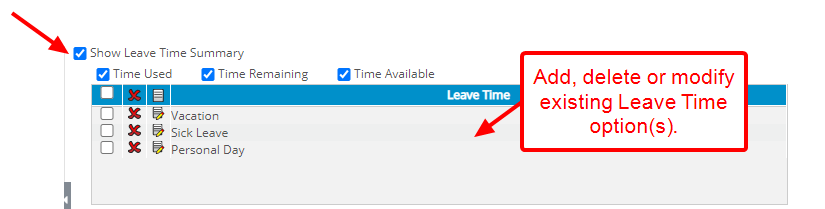
Note: By default the Vacation,Sick Leave and Personal Day options are set.
- You can then choose to display the following for each selected Leave Time Task:
- Click Save.
Note: When editing or saving a template, the system verifies that all selected leave times still exist in the database. If a selected leave time is deleted from the database, it is removed from the Leave Time table.
To add a Leave Time
- Click the New
 icon in the table header.
 - From the Add Leave Time dialog box select the required Leave Time from the list.
- Proceed to do any of the following:
- Click the Save and New link to save and add selection to the table while the Add Leave Time dialog box remains open to make another selection.
- Click the Save link to save and add selection to the table, then the Add Leave Time dialog box automatically closes.
- Click the Close link to simply close the Add Leave Time dialog box.
- Upon returning to the Timesheet Template Edit page click Save.
Note: When editing or saving a template, the system verifies that all selected leave times still exist in the database. If a selected leave time is deleted from the database, it is removed from the Leave Time table.
- In our example we have added the Jury Duty Leave Time:
- View the impact of your change: Users can now access and view the Leave Time Summary from their Timesheet context menu.

To edit a Leave Time
- Click the Edit
 icon beside the Leave Time option.
 - From the Edit Leave Time dialog box select a replacement from the Leave Time list.
- Proceed to do any of the following:
- Click the Save and New link to save and add selection to the table while the Edit Leave Time dialog box remains open to make another selection.
- Click the Save link to save and add selection to the table, then the Edit Leave Time dialog box automatically closes.
- Click the Close link to simply close the Edit Leave Time dialog box.
- Upon returning to the Timesheet Template Edit page click Save.
Note: When editing or saving a template, the system verifies that all selected leave times still exist in the database. If a selected leave time is deleted from the database, it is removed from the Leave Time table.
To delete a Leave Time
- Click the Delete
 icon beside the Leave Time option in the table to delete them individually.
 - Select the global selection box or the selection boxes of specific Leave Time options, then click the Delete icon in the table header to delete multiple Leave Time options simultaneously.
- A message requesting confirmation of deletion is displayed. Choose either one of the following:
- Yes to proceed with the deletion of the selected item(s).
- No to abort deletion, maintaining the item(s) in the table.
- Upon returning to the Timesheet Template Edit page click Save.
Note: When editing or saving a template, the system verifies that all selected leave times still exist in the database. If a selected leave time is deleted from the database, it is removed from the Leave Time table.