Timesheet Template – Setup Tab
The Setup tab in the Timesheet Template Edit page allows you to configure which sections and features are available to users in the new My Timesheet experience. These settings control visibility and behavior for Notes, Timesheet History, Non-Working Time, Leave Time Summary, In/Out Times, Project Time, Summaries, Totals, and the number of Assignment rows displayed.
Additionally, the Setup tab lets you define default behaviors for Assignment Mode, Field visibility, and the number of days shown in the Timesheet.
Caution: This article applies to the new My Timesheet experience.
Available Options
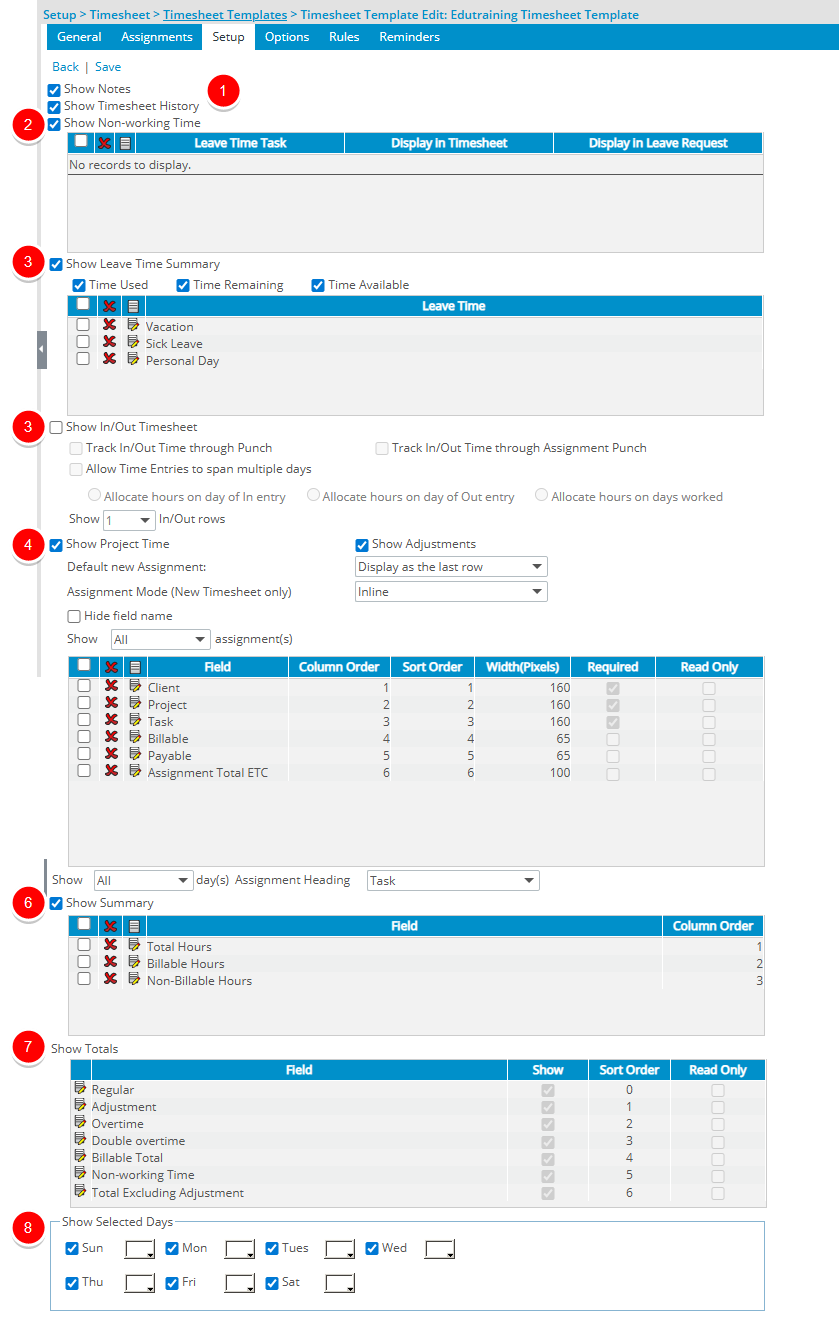

Show Notes - Currently the Show Notes option does not impact the availability of the Timesheet Notes button located within the new My Timesheet. The Notes button is available provided the logged user has View right to Notes.
Show Timesheet History - When selected, Users can access Timesheet History through the new My Timesheet context menu. Default: selected.

Show Non-working Time section - Allows Users to choose a Non-Working Time Entry Type. When enabled, you can define which Non-Working Time types are available. Default: selected. Further details refer to Configuring the Timesheet Template so users can see the Non-working Time in their Timesheet page. Default: selected.
Note: The system verifies that all selected leave times exist in the database. Deleted leave times are removed from the Non-Working Time table.
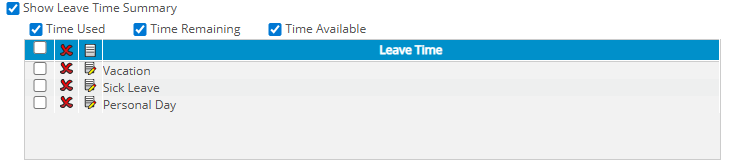
Show Leave Time Summary Section - Enables Users to access the Leave Time Summary through the new My Timesheet context menu. Default: selected.
Options to display in the summary:
- Time Used to display the number of hours used.
- Time Remaining to displays the number of unused hours remaining.
- Time Available to display the number of hours that can be borrowed; if exceeded, Time Remaining can go negative.
Note: The above mentioned options are selected by default.
You can then define which Leave Time are to be shown within the Leave Time Summary dialog box. By default the Vacation, Sick Leave and Personal Day options are set. For further details refer to Showing the Leave Time Summary Section on User Timesheets.
Note: The system verifies that all selected leave times exist in the database; deleted leave times are removed from the Leave Time table.

Enables users to enter In/Out times similar to punching a time clock. For details refer to Showing the In/Out Section on User Timesheets.
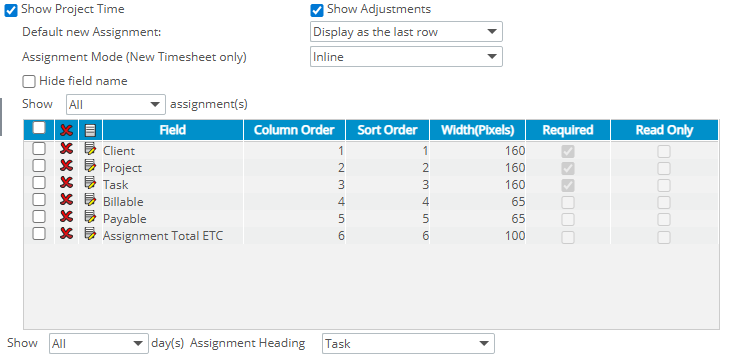
Show Project Time - Displays selected Project Time fields in the New Assignment dialog box. For further details refer to Adding/Editing/Removing Project Time Fields from a Timesheet Template.
- When the Show Adjustments is selected, Users can select the Adjustment Entry Type from the New Assignment dialog box. Otherwise the Adjustment option will be unavailable to them.
- Default new Assignment: Selecting Do not display option, will remove the ability for users of the New Timesheet assigned to this Template to add new Assignments using the + Assignment button. Additionally, the options to Edit and Copy existing Assignment rows are also removed, ensuring that users cannot modify or add new Assignments to their Timesheets. This does not impact the ability to use + Adjustment and +Non-Working Time buttons which remain available to the User.
Caution: The Display as the last row and Display as the first row options apply only to the Legacy Timesheet. These two settings have no impact on the New Timesheet
- Assignment Mode (New Timesheet only)
- Inline When selected, upon clicking the +Assignment button you can pick your assignment directly from your Timesheet.
- Modal Window When selected, upon clicking the +Assignment button, a modal window will be displayed allowing you to pick your Assignment.
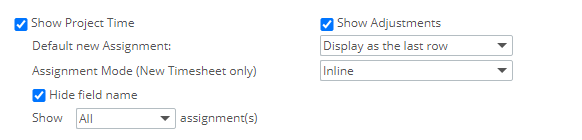
- Hide field name: When selected, the Field labels will be hidden from the Assignment rows for the Default and Comfortable view Densities only.
Note: Field label(s) are always hidden for the Compact Density view.
- Choose the number of rows of Assignments to display in the timesheet, with the options as follows:
- Select All to display all assignments in the timesheet (default selection).
- Select <1-20> to display the chosen number of assignments within the Assignments section of the timesheet.Depending on the number selected, that many rows are displayed in the timesheet, and the user has to scroll to see their remaining assignments, or the default assignment row if required.
- You can then define which fields are to be shown within the User Timesheets. For further details refer to Adding/Editing/Removing Project Time Fields from a Timesheet Template.
- From the available options for Show <x> day(s), select the number of days to display in the timesheet, with the options as follows:
- All: Displays all days within the period (default selection).
- <1-7>: Displays this number of days specified in the timesheet
Note:
- The Show <x> day(s) option applies to both the Show Non-working Time and Show Project Time options.
- When editing or saving a template, the system verifies that the Show Project Time option is selected and at least one project time field is added. If no project time field is added for display when the Show Project Time option is selected, then the timesheet template cannot be saved
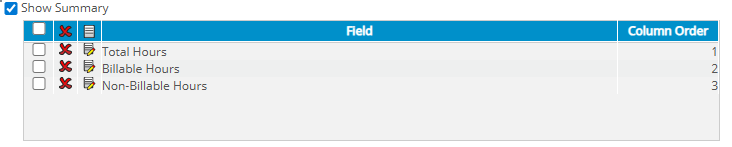
Show Summary Section - Displays the Summary section in User Timesheets.
Then define which KPIs to show. For further details refer to Adding/Editing/Removing Summary Fields from a Timesheet Template.
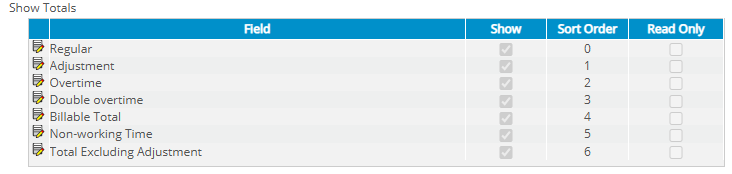
Show Totals Section - Define which totals are displayed in User Timesheets. For further details refer to Managing the Totals section in a Timesheet Template.
- Regular – hours not categorized as Non-Working Time, Overtime, Double Overtime, or Adjustments.
- Adjustment – total Time Adjustments (default selected when Show Adjustments is enabled).
- Overtime – total hours categorized as Overtime.
- Double overtime – total hours categorized as Double Overtime.
- Billable Total – total Billable hours.
- Non-working Time – hours for vacation, sick leave, holidays, or other non-billable absences (default selected when Show Non-Working Time is enabled).
- Total Excluding Adjustment – calculated total including Regular, Non-Working Time, Overtime, and Double Overtime.

Assign colors to each day of the week; the color appears as a pastel border around the Time Entry cell in My Timesheet. For more information click here.