PSA2025 R3.0 - Product Enhancements
PSA2025 R3.0 is set to be deployed to your staging sites on October 22, 2025. While production sites are set to be upgraded on November 16, 2025. The listed changes, including new features, enhancements, bug fixes, or deprecations, will become available to you upon upgrading to 2025 R3.0.
What's New in This Release
This release introduces significant improvements in usability, personalization, and performance across PSA. From fully customizable Homepages with embedded analytics to a bold new look for Work Plans, your teams gain powerful tools to work faster and smarter. We have also delivered meaningful enhancements based on your feedback—helping to streamline workflows, surface insights, and simplify everyday tasks.
While the updates highlighted below showcase some of the most impactful features, be sure to review the full release notes to explore everything included in this release.
The new and improved Homepage Templates put the power of personalization in your hands—allowing you to create visually dynamic, role-specific dashboards that surface exactly what each user needs to see. With an easy drag-and-drop designer, configurable widgets, and flexible assignment options, you can deliver a custom homepage experience that boosts productivity, simplifies navigation, and brings key insights front and center. No more one-size-fits-all dashboards—just the right information, in the right place, for the right people.
This release enhances usability, clarity, and control. We have modernized the interface for a cleaner, more intuitive experience, streamlined everyday workflows to save time, and strengthened security and insights so you can plan with confidence.
Together, these improvements make managing resources easier and more effective, aligned with today’s best practices.
Key Focus Areas:
- Modernize and Simplify the Interface: A refreshed design with cleaner pages, updated tooltips, and consistent dialog boxes for a more intuitive experience.
- Enhance User Experience and Efficiency: Streamlined Quick Add/Copy, removal of outdated elements, and improved workflows for faster task management.
- Strengthen Security and Insights: Expanded permissions, booking history, and advanced filtering to increase control, transparency, and decision-making.
We are moving fully to New Analytics, bringing a modern, streamlined experience with intuitive navigation, optimized workflows, and advanced insights. Your existing reports will be automatically migrated—no action required.
2025.07.11.2025R20.V1.EB
Note:
- This page may be updated as new information becomes available. Visit this page regularly for the latest updates.
- Screenshots and examples are for illustration only. Your environment may appear differently depending on your organization’s configuration, access permissions, and feature settings.
API/SDK
Description: You can now retrieve, assign, and delete Planning Roles associated with Users via the Users API.
New Endpoints:
| GET | api/v2/Users/{id}/PlanningRoles |
|---|---|
| Description |
Retrieves all planning roles assigned to the specified user. Supports OData query filters for refined results. |
| Request Information | None |
| Response Information |
Copy
|
Response Schema:
| Name | Description | Type |
|---|---|---|
| Name | Name of the planning role | string |
| PlanningRoleId | Unique identifier for the role | integer |
| IsPrimaryRole | Indicates if this is the primary role for the user | boolean |
| UniqueId | Unique ID for the role assignment | integer |
| POST | /api/v2/Users/{id}/PlanningRoles |
|---|---|
| Description |
Assigns a planning role to the specified user. |
| Request Information | None |
| Response Information |
Copy
|
| DELETE | api/v2/Users/{id}/PlanningRoles/{roleid} |
|---|---|
| Description |
Deletes the Planning Role associated to the User specified by the required id parameter. Also requires the Role id as a parameter. |
| Request Information | None |
| Response Information | None |
Benefit: This enhancement enables better integration with external systems by exposing planning role information programmatically.
Click here for more information on how to access the REST API documentation.
Description: This release adds support for managing user rate rules through the Users API endpoint.
Each Endpoint supports parameters for specifying rule details, association dates, dependency types (such as client, project, work type, or task), and rule type (cost or billing).
New Endpoints:
| GET | api/v2/Users/{id}/AssociatedRateRules |
|---|---|
| Description | Returns the Rate Rules associated to the User specified by the required id parameter. |
| Response Information | Name: id Description: User unique id Type: integer Additional Info: Required |
| Response Information |
Copy
|
Response Schema:
| Name | Description | Type |
|---|---|---|
| AccessType | Access type 1 (Active) , 2 (suspended) | integer |
| UniqueId RateRuleId | Cost Rule name | string |
| DateFrom | Start date of the association. | integer |
| DateTo | End date of the association. | date |
| DependsOn | The object on which the association depends on. 4 : client, 3: work type, 2: project, 1: task, 0: none | date |
| DependentTaskId | The task for which the association depends on. When zero, no association exists. | integer |
| DependentClientId | The client for which the association depends on. When zero, no association exists. | integer |
| DependentProjectId | The project for which the association depends on. When zero, no association exists. | integer |
| DependentWorktypeId | The work type for which the association depends on. When zero, no association exists. | integer |
| Type | 0/1 ( 0- Cost; 1- Billing) | integer |
| POST | api/v2/Users/{id}/AssociatedRateRules |
|---|---|
| Description | Assigns a new Rate Rule for the User specified by the required id parameter. Also requires the Rate Rule id parameter.
|
| Request Information | Name: id
Description: User unique id Type: integer Additional Info: Required --- Name: ruleid Description: Cost Rate Rule unique id. Type: integer Additional Info: Required |
|
Response Information |
Copy
|
Response Schema:
| Name | Description | Type |
|---|---|---|
| AccessType | Access type 1(Active) , 2(suspended) | integer |
| Name | Cost Rule name | string |
| UniqueId | integer | |
| DateFrom | Start date of the association. | date |
| DateTo | End date of the association. | date |
| DependsON | The object on which the association depends on. 4 : client, 3: work type, 2: project, 1: task, 0: none | integer |
| DependentTaskId | The task for which the association depends on. When zero, no association exists. | integer |
| DependentClientId | The client for which the association depends on. When zero, no association exists. | integer |
| DependentProjectId | The project for which the association depends on. When zero, no association exists. | integer |
| DependentWorktypeId | The work type for which the association depends on. When zero, no association exists. | integer |
| Type | 0/1 0- Cost; 1- Billing | integer |
| POST | api/v2/Users/{id}/AssociatedRateRules |
|---|---|
| Description | Partially updates the Rate Rule Entry for the User specified by the required id parameter. |
| Request Information | Name: id
Description: User unique id Type: integer Additional Info: Required --- Name: ruleid Description: Cost Rate Rule unique id. Type: integer Additional Info: Required |
|
Response Information |
Copy
|
Response Schema:
| Name | Description | Type |
|---|---|---|
| AccessType | Access type 1(Active) , 2(suspended) | integer |
| Name | Cost Rule name | string |
| UniqueId | integer | |
| DateFrom | Start date of the association. | date |
| DateTo | End date of the association. | date |
| DependsON | The object on which the association depends on. 4 : client, 3: work type, 2: project, 1: task, 0: none | integer |
| DependentTaskId | The task for which the association depends on. When zero, no association exists. | integer |
| DependentClientId | The client for which the association depends on. When zero, no association exists. | integer |
| DependentProjectId | The project for which the association depends on. When zero, no association exists. | integer |
| DependentWorktypeId | The work type for which the association depends on. When zero, no association exists. | integer |
| Type | 0/1 0- Cost; 1- Billing | integer |
| DELETE | api/v2/Users/{id}/AssociatedRateRules/{associatedrateruleid} |
|---|---|
| Description | Removes the Rate Rule associated to the User specified by the required id parameter. Also requires the Rate Rule id as a parameter. |
| Request Information | Name: id
Description: User unique id Type: integer Additional Info: Required --- Name: ruleid Description: Cost Rate Rule unique id. Type: integer Additional Info: Required |
| Response Information | None |
Benefit: These API enhancements provide full programmatic control over user rate rules. You can now integrate rate rule management into external systems, automate assignments, update rates without manual UI changes, and keep data synchronized across platforms.
Click here for more information on how to access the REST API documentation.
Description: Addition of API support for role-based budgets. This enables integrated systems to create, read, update, and delete role-based budgets through the API.
Details
- Role-based budgets can now be created, modified, deleted, and viewed using the API.
- If a user attempts to change the budget type when at least one budget exists, the same error message shown in the UI is returned by the API.
ObjectTypehas been updated to includeRoleId.
| Method | Endpoint | Description | Status |
|---|---|---|---|
| POST | /api/v2/Budgets/Project/{id}/Role/{id} | Creates a new budget for the specified role (RoleId required). | New |
| GET | /api/v2/Budgets/Role/{id} | Returns all budgets for the specified role (RoleId required). | New |
| GET | /api/v2/Budgets | Returns all budgets. Supports OData query filters. Updated to include RoleId in results. | Updated |
Benefit: The addition of role-based budget API support improves integration with external systems by allowing budgets to be programmatically created, modified, deleted, and retrieved at the role level. This enables more precise control of financial allocations across projects and teams, reducing manual effort and ensuring consistency with existing UI workflows. By exposing role budgets through APIs, organizations can automate reporting, synchronize data across platforms, and enforce governance policies with greater accuracy. The update also extends the ObjectType to include RoleId, which enhances flexibility when filtering or managing budgets through OData queries.
Click here for more information on how to access the REST API documentation.
Description: To enforce task relevance and data integrity, the API now validates Task selections in Work Items based on the configuration set in the Work Item Setup page. If a user attempts to assign a task that does not belong to the selected project, the system will return an error message.
Details
- Applies to the following HTTP methods: PUT, PATCH, and POST.
- When the Task-related Browse Type configuration is set to Display Only Project Tasks, the API will now enforce this restriction.
- If a submitted Task does not belong to the selected project, the following error message will be returned: The selected Task <Task name> does not belong to the selected Project. Please choose a valid Task.
Benefit: This validation ensures that only tasks associated with the selected project can be assigned via the API, helping prevent data entry errors, improve reporting accuracy, and maintain consistency with project configurations set in the UI.
Click here for more information on how to access the REST API documentation.
Audit Trail

Description: In previous releases, administrators lacked visibility into which users marked assignments as complete or uncomplete on Timesheets. This gap in traceability made it difficult to ensure accountability and limited oversight during audits or timesheet reviews.
To improve transparency, two new options have been added to the existing Assignment Event Type under Entry > Time tier of Audit Setup page (Setup > Organization > System > Security). These options—Complete and Uncomplete—allow administrators to audit when a user completes or reopens an Assignment directly from the Timesheet interface.
When either action is performed, a corresponding event is now recorded in the Audit Trail, providing a clear record of user activity.

Audit Trail Field Definitions and Examples
| Field | Definition | Assignment Complete Example | Assignment Uncomplete Example |
|---|---|---|---|
| Event Date | The timestamp when the event occurred in the system. | 07/18/2025 10:22:17 AM | 07/18/2025 10:22:21 AM |
| Entry Date | The date corresponding to the timesheet entry or the effective date of the action. | 07/18/2025 | 07/18/2025 |
| Event | A system-generated label describing the action and the specific assignment affected. | Assignment [Apollo-Data Processing] Complete | Assignment [Apollo-Data Processing] Uncomplete Changed By The user who performed the action. Hepburn, Audrey Hepburn, Au |
| Changed By | The user who performed the action. | Hepburn, Audrey | Hepburn, Audrey |
| Changed For | The user on whose behalf the action was performed. | Hepburn, Audrey | Hepburn, Audrey |
| Impersonated By | The user who impersonated another (if applicable). Blank if not impersonated. | (blank) | (blank) |
| Item Name | The name of the Task (Assignment) marked as complete/uncomplete. | Apollo-Data Processing | Apollo-Data Processing |
| Change Description | A label indicating the type of action performed. | Assignment Complete | Assignment Uncomplete |
| Comment | Additional system-generated message showing user and task details for the action. | Assignment Completed by Hepburn, Audrey for the Task: Apollo-Data Processing | Assignment Uncompleted by Hepburn, Audrey for the Task: Apollo-Data Processing |
Benefit: This enhancement strengthens Audit capabilities by providing clear visibility into Assignment completion actions within timesheets. It empowers administrators with precise tracking of user activity, promotes accountability across teams, and ensures a reliable, transparent history of changes to support project oversight and compliance.
For further details see Audit Changes to Assignments.

Description: To support detailed user change tracking, a new User Detailed Auditing Event Type is now available under Setup > Organization tier of Audit Setup page (Setup > Organization > System > Security). When the Update Event is enabled, this setting allows the system to capture and log changes made to user fields across the General, Personal, Security, and User Defined Fields (UDFs) tabs.
These audit logs can be reviewed in the new History tab available on the User Edit page.
Note: Only modifications performed within the User Edit page (General, Personal, and Security tabs) are audited.
Caution: Modifications made to a user outside of the User Edit page—such as editing a Team by associating a User with it—are not yet included in the User History. Auditing for these types of modifications will be available in an upcoming release.
Benefit: This enhancement significantly improves transparency and traceability of user-related changes across the system. By enabling User Detailed Auditing, administrators gain a clear and searchable history of modifications made to user records, which strengthens governance, simplifies troubleshooting, and supports compliance with internal or external audit requirements.
For further details see User Detailed Auditing.

Description: To support the new Budget History, administrators can now enable the newly added Budget Detailed Auditing Event Type located under Setup > Work tier of Audit Setup page (Setup > Organization > System > Security).
When the Update Event is enabled, this setting allows the system to capture and log changes made to Project Budgets
These audit logs can be reviewed in the new History dialog box available through the Project Budget Context menu.
Note: The History link in the Project Budget context menu is available only when Budget Detailed Auditing is enabled.
Benefit: This enhancement significantly improves transparency and traceability of Project Budget-related changes across the system. By enabling Budget Detailed Auditing, administrators gain a clear and searchable history of modifications made to Project Budget records, which strengthens governance, simplifies troubleshooting, and supports compliance with internal or external audit requirements.
For further details see Budget Detailed Auditing.

Description: In past releases, administrators had limited visibility into Booking changes in Resource Management, making it challenging to enforce compliance and verify updates.
This release adds a new Booking Detailed Auditing Event Type under Entry > Workforce Planning tier of Audit Setup page (Setup > Organization > System > Security).
When the Update Event is enabled changes to all booking properties and attributes, including Role, User, Task, Booking Type, and other editable fields are captured.
Note: Changes automatically made by the system, read-only fields, and actions such as Split, Shift, Update Effort, or deleted Bookings are not captured in detailed auditing.
When creating, copying, or modifying a booking, each change generates a history entry showing the Modification, Previous Value, New Value, Date Modified, and Modified By.
To support this feature, a new Booking History dialog box is now also available. You can access it through the Booking context menu on any Work Plan. For further details, refer to Detailed Booking History.
Benefit: This enhancement gives you full oversight of booking modifications, allowing you to track changes in real-time and ensure data integrity. You can validate bookings, generate reports, and analyze the impact of updates on projects, improving both operational efficiency and audit compliance.
For further details see Detailed Booking Auditing.
Automation

Description: To support the new Project End Date Reminder System Notification, a new Automation Processing Service called Project End Date Reminder Notifications has been added. This service processes the Project End Date Reminder System Notification and ensures it is sent automatically according to your setup. You can configure when reminders are triggered, such as a few days before or after a project’s end date, across all applicable projects in the system.
The Service includes two tabs for setup:
The Details tab shows service configuration options with default values:
- Start Date: The date when the service will begin processing reminders. You can select any future date to schedule notifications.
- Start Time: The time of day when the service will run. Notifications will be processed starting from this time.
- Time Zone: The time zone in which the service will operate. This ensures reminders are sent at the correct local time.
- Process Every: Specifies the frequency of service execution.
- Last Process: Displays the date and time when the service last ran. You cannot edit this field.
- Status: Shows the current state of the service, such as running or idle. This field cannot be modified.
- Description: A summary of the service purpose. For this service, it states: Notify Managers about approaching Project End Date.
- Enable Service: Controls whether the service is active. By default, the service is disabled and must be enabled to start sending reminders.
From the Filters tab, you can specify when reminders are sent by configuring conditions such as five days before the project end date or two weeks after the project end date.
When the process runs, the Project Manager will receive the notification by email and also see an alert in the Notification Center ![]() .
.
Note: If the Project Manager is marked as Out of Office in PSA, the notification is sent to the Alternate Project Manager instead.
Projects Excluded from Processing
The following projects will not be processed by the Project End Date Reminder Notifications service:
- Open-ended projects: Projects without a defined End date are excluded, as no reminder can be calculated.
- Suspended projects: Projects that are currently suspended are not included, since no active management is expected.
- Placeholder projects: Projects created as placeholders or templates are excluded, as they do not represent real deliverables.
- Projects without an assigned Project Manager: Projects that do not have a Project Manager assigned are skipped, because there is no recipient for the notification.
- Projects with Project Manager or Alternate Manager missing email: Projects where the assigned Project Manager or Alternate Manager has an empty email field in the User Setup page are excluded, because the notification cannot be delivered.
Benefit: The new automation service removes the need to manually manage email notifications for project end dates. By processing reminders automatically, it ensures you and your team receive timely alerts for all relevant projects. This reduces administrative work, prevents missed deadlines, and keeps project timelines accurate and consistent.
For further details see Project End Date Reminder Notifications.
Excel Import

Description: Previously, PSA’s Excel Import feature allowed importing key objects such as Sites, Business Units, Groups, Teams, Users, Titles, Clients, Portfolios, Programs, Projects, Phases, Work Types, Tasks, Skills and Skill Associations.
Now, we have enhanced the Excel Import feature to support importing Milestones and their associated User Defined Fields. The Milestones tab, now available in the Excel Import Template, lets you specify these details:
| Milestone Property Import Fields | Definition |
|---|---|
| Tenrox_Excel_Process_Status | Import status (populated by the system after the project import is processed) |
| UniqueId | - Upon Creation: The Unique ID of a new Milestone is automatically populated by the system once the creation process is completed. - Upon Update: The Unique ID of Milestones being updated must be entered by you, ensuring it matches the one initially generated by the system during the initial import. For further details on how to extract this Unique ID refer to Create a Report to View Unique Ids. Note: Do not edit this column if you are creating a new Task using Excel Import. |
| Project_Name* | Name of the Project (required field) |
| Project_Code* | Project Code (required field) |
| Name* | Defines the Name of the Milestone (required field) |
| State | Defines the State of the Milestone. Possible Values:
- On Hold - In Progress - Completed |
| Target_Completion_Date | Milestone Target Completion Date Note: Set column format to Date ( MM/DD/YYYY). For Open Ended enter 11/27/2737 |
| Status | Defines the Milestone Status. Note: Enter GREEN, YELLOW or RED. |
| Completion_Type | Defines the Completion Type of the Milestone. Possible Values:
- Date - Stage |
| Description | Description of the Milestone |
| WorkType* | Name of the Work Type. Note: Required when Is_Billing_Milestone is set to 1 (Yes). |
| Charge* | Name of the Charge. Note: Required when Is_Billing_Milestone is set to 1 (Yes). |
| Is_Billing_Milestone | Defines whether or not the Milestone is a Billing Milestone. Note: Enter 1/0 for Yes/No. |
| Exclude_From_Invoice | Defines whether or not the Milestone is Excluded From Invoice. Note: Enter 1/0 for Yes/No. |
| Billing_Date | Billing Date of the Milestone. Note: Set column format to Date ( MM/DD/YYYY). |
| %Complete | 0 to 100 (whole numbers) |
Each User Defined Field can be added as a new column by following the same naming convention as before: prefix each User Defined Field column with "UDF_" followed by the User Defined Field Field Name.
Example: "UDF_MilestoneCode" for a User Defined Field with the Field Name "MilestoneCode."
The technical details remain the same as in the previous release. For further details refer to: Importing User Defined Field values using Excel and Importing User Defined Field values : Technical Details articles.
Benefit: This enhancement simplifies data management by enabling the import of Milestones and their associated User Defined Fields, making the process more efficient, consistent, and reducing manual data entry.
For further details see:

Description: In previous releases, roles were imported exclusively from the Roles List page using the Import Roles option (OBS > Roles > Import Roles). This method used a dedicated Excel file containing three tabs: Role_Types, Roles, and Roles_Associations.

As of this release, Role import is now supported through the Excel Import tool (Tools > Import). The relevant tabs have been incorporated into the standard Excel Import Template. To import Roles, you must now download the updated import file from the Excel Import page, populate the appropriate sections, and upload the file through the same interface.

The User Logon_Name Field is now also included in the Roles_Associations tab. This improvement helps you easily distinguish between individuals with identical names when working with data imports.
The Role_Types tab, now available in the Excel Import Template, lets you specify these details:
| Role Types Property Import Fields | Definitions |
|---|---|
| Tenrox_Excel_Process_Status | Import status (populated by the system after the project import is processed) |
| UniqueId | - Upon Creation: The Unique ID of a new Role Type is automatically populated by the system once the creation process is completed. - Upon Update: The Unique ID of Milestones being updated must be entered by you, ensuring it matches the one initially generated by the system during the initial import. For further details on how to extract this Unique ID refer to Create a Report to View Unique Ids. Note: Do not edit this column if you are creating a new Task using Excel Import. |
| Key* | This is the Key of the new Role Type
(required field). Note: You can view existing Keys by going to Setup > Organization > System > System Tables > Role Types. Viewing the Key helps ensure you do not create a duplicate. Always check existing Keys before entering a new one. |
| Description_English | This is the English description of the new role type. |
| Description_French | This is the French description of the new role type. |
| Sort | This will allow entering the sort order of the new role type. |
The Roles tab, now available in the Excel Import Template, lets you specify these details:
| Roles Property Import Fields | Definitions |
|---|---|
| Tenrox_Excel_Process_Status | Import status (populated by the system after the project import is processed) |
| UniqueId | - Upon Creation: The Unique ID of a new Role is automatically populated by the system once the creation process is completed. - Upon Update: The Unique ID of Milestones being updated must be entered by you, ensuring it matches the one initially generated by the system during the initial import. For further details on how to extract this Unique ID refer to Create a Report to View Unique Ids. Note: Do not edit this column if you are creating a new Task using Excel Import. |
| Name* | This is the Name of the Role (required field). |
| Id | This is the Id of the Role. |
| Role_Type* | This is the Role Type of the Role. The Key of the Role type must be entered
(required field). Note: You can retrieve existing Role Type Keys by going to Setup > Organization > System > System Tables > Role Types. |
| Resource_Group* | This is the Resource Group of the Role (required field). |
| Calendar* | This is the Calendar associated to the Role (required field). |
| Is_Suspended | This defines whether the Role is suspended or not. Note: Enter 1/0 for Yes/No. |
| Description | This is the Description of the Role. |
| Forecasted_Cost_Rate | This is the Forecasted Hourly Cost Rate of the Role in Base Currency. Note: Will be set to 0, if no value is entered, |
| Forecasted_Billing_Rate | This is the Forecasted Hourly Billing Rate of the Role in Base Currency. Note: Will be set to 0, if no value is entered, |
The Roles_Associations tab, now available in the Excel Import Template, lets you specify these details:
| Roles Associations Property Import Fields | Definitions |
|---|---|
| Tenrox_Excel_Process_Status | Import status (populated by the system after the project import is processed) |
| UniqueId | - Upon Creation: The Unique ID of a new Role Association is automatically populated by the system once the creation process is completed. - Upon Update: The Unique ID of Milestones being updated must be entered by you, ensuring it matches the one initially generated by the system during the initial import. For further details on how to extract this Unique ID refer to Create a Report to View Unique Ids. Note: Do not edit this column if you are creating a new Task using Excel Import. |
| Role_Name* | This is the name of the Role to be associated (required field). |
| Logon_Name* | This is the Logon Name of the User to whom the Role will be associated (required field). |
| Last_Name | This is the Last Name of the User to whom the Role will be associated. |
| First_Name | This is the First Name of the User to whom the Role will be associated. |
| Is_Primary_Role | This defines whether the Role is to be associated as a Primary Role or as an Alternate Role. Note: Enter 1/0 for Primary/Alternate. |
Furthermore, this release introduces the ability to import User Defined Fields (UDFs) associated with roles directly from the same Excel Import file.
Each User Defined Field can be added as a new column by following the same naming convention as before: prefix each User Defined Field column with "UDF_" followed by the User Defined Field Field Name.
Example: "UDF_RoleCode" for a User Defined Field with the Field Name "RoleCode."
The technical details remain the same as in the previous release. For further details refer to: Importing User Defined Field values using Excel and Importing User Defined Field values : Technical Details articles.
Note: As a result of the centralized approach to Role import via the Excel Import Tool, the Import Roles button previously available on the Roles list page (Setup > Organization > Roles) has been deprecated and is no longer available. All Role imports, including associated User Defined Fields, must now be completed using the standard Excel Import process.
Benefit: This enhancement simplifies and centralizes the import process for Roles and their associated User Defined Fields (UDFs), reducing administrative overhead and improving data accuracy. By consolidating Role import into the standard Excel Import Template, administrators benefit from a single, streamlined method to manage Role setup and customization at scale. The ability to include UDFs directly within the import file allows for faster onboarding, more consistent data entry, and greater flexibility in tailoring role data to meet organizational needs.
For further details see:
Expense Manager

Description: In a previous release, the concept of Views was introduced in Expense Manager, replacing the older tab-based navigation. Out-Of-The-Box Public Views such as My Expense Reports, Assigned Expense Reports, and All Expense Reports were made available via a centralized Views menu. Users with the Public Expense Manager View permission under Management > Central could modify the Details and Columns of these Views as well as Create, or Delete Public Views.
With this release, functionality has been expanded to allow authorized users to also modify the default Filters of a Public View. A new Filters tab is now included when editing a View, giving users enhanced flexibility to define which data appears by default, streamlining workflows and aligning Views more closely with team or organizational needs.
Available Filters in Expense Manager Views
The following table outlines the available filters that can be configured for Expense Manager Views. These filters help narrow down visible expense reports based on specific criteria, providing more control and relevance to users accessing shared views.
| Field | Definition | Available options | Conditions |
|---|---|---|---|
| Amount Due in Base Curr. | The total amount to be paid to the user in Base Currency. | Equal to, Not equal to, Greater than or equal to, Less than or equal to, Less than, Greater than, Between, Not between | When Between or Not between is selected, both Value fields will be enabled; otherwise, only Value1 will be enabled. Numeric values only. |
| Amount Due in User Reimbursable Curr. | The total amount to be paid to the user in User Reimbursable Currency. | Equal to, Not equal to, Greater than or equal to, Less than or equal to, Less than, Greater than, Between, Not between | When Between or Not between is selected, both Value fields will be enabled; otherwise, only Value1 will be enabled. Numeric values only. |
| Cash Advance in Base Curr. | The total amount of Cash Advance in Base Currency. | Equal to, Not equal to, Greater than or equal to, Less than or equal to, Less than, Greater than, Between, Not between | When Between or Not between is selected, both Value fields will be enabled; otherwise, only Value1 will be enabled. Numeric values only. |
| Cash Advance in User Reimbursable Curr. | The total amount of Cash Advance in User Reimbursable Currency. | Equal to, Not equal to, Greater than or equal to, Less than or equal to, Less than, Greater than, Between, Not between | When Between or Not between is selected, both Value fields will be enabled; otherwise, only Value1 will be enabled. Numeric values only. |
| Creator | The Name (Last Name, First Name) of the User who created the Expense Report. | In, Not in | Only the Value1 column will be available as a browse field. Clicking the browse field will open the User List. |
| Creator Active Site | This is the Creator’s Active Site. | In, Not in | Only the Value1 column will be available as a browse field. Clicking the browse field will open the Group List. |
| Creator Approval Group | The name of the Approval Group to which the Creator of the Expense Report belongs. | In, Not in | Only the Value1 column will be available as a browse field. Clicking the browse field will open the Group List. |
| Creator Approval Group Manager | The name of the Approval Group Manager to which the Creator of the Expense Report belongs. | In, Not in | Only the Value1 column will be available as a browse field. Clicking the browse field will open the Group List. |
| Creator Functional Group | The name of the Functional Group to which the Creator of the Expense Report belongs. | In, Not in | Only the Value1 column will be available as a browse field. Clicking the browse field will open the Group List. |
| Creator Functional Group Manager | The name of the Functional Group Manager to which the Creator of the Expense Report belongs. | In, Not in | Only the Value1 column will be available as a browse field. Clicking the browse field will open the Group List. |
| Creator Id | The Id of the Creator of the Expense Report | Equal to, Not equal to | Only the Value1 column will be available. It will be a text field. |
| Creator is Active | The Creator’s Active Site. | In, Not in | Only the Value1 column will be available as a browse field. Clicking the browse field will open the SiteList. |
| Creator Master Site | The Creator’s Master Site. | In, Not in | Only the Value1 column will be available as a browse field. Clicking the browse field will open the Site List. |
| Creator Resource Group | The name of the Resource Group to which the Creator of the Expense Report belongs. | In, Not in | Only the Value1 column will be available as a browse field. Clicking the browse field will open the Group List. |
| Creator Resource Group Manager | The name of the Resource Group Manager to which the Creator of the Expense Report belongs. | In, Not in | Only the Value1 column will be available as a browse field. Clicking the browse field will open the Group List. |
| Creator Termination date | The Creator’s Termination date. | Equal to, Not equal to, Greater than or equal to, Less than or equal to, Less than, Greater than, Between, Not between, Today, This Week, Last Week, This Month, Last Month, This Quarter, Last Quarter, This Year, Last Year, Year to Date, This Fiscal Month, Last Fiscal Month, This Fiscal Quarter, Last Fiscal Quarter, This Fiscal Year, Last Fiscal Year, Fiscal Year to Date | When Between or Not between is selected, both Value fields will be enabled; otherwise, only Value1 will be enabled. Calendar values only. |
| End Date | The End Date of the Expense Report. | Equal to, Not equal to, Greater than or equal to, Less than or equal to, Less than, Greater than, Between, Not between, Today, This Week, Last Week, This Month, Last Month, This Quarter, Last Quarter, This Year, Last Year, Year to Date, This Fiscal Month, Last Fiscal Month, This Fiscal Quarter, Last Fiscal Quarter, This Fiscal Year, Last Fiscal Year, Fiscal Year to Date | When Between or Not between is selected, both Value fields will be enabled; otherwise, only Value1 will be enabled. Calendar values only. |
| Originator | The Name (Last Name, First Name) of the User who originated the Expense Report. | In, Not in | Only the Value1 column will be available as a browse field. Clicking the browse field will open the User List. |
| Originator Active Site | The Originator’s Active Site. | In, Not in | Only the Value1 column will be available as a browse field. Clicking the browse field will open the Site List. |
| Originator Approval Group | The name of the Approval Group to which the Originator of the Expense Report belongs. | In, Not in | Only the Value1 column will be available as a browse field. Clicking the browse field will open the Group List. |
| Originator Approval Group Manager | The name of the Approval Group Manager to which the Originator of the Expense Report belongs. | In, Not in | Only the Value1 column will be available as a browse field. Clicking the browse field will open the Group List. |
| Originator Functional Group | The name of the Functional Group to which the Originator of the Expense Report belongs. | In, Not in | Only the Value1 column will be available as a browse field. Clicking the browse field will open the Group List. |
| Originator Functional Group Manager | The name of the Functional Group Manager to which the Originator of the Expense Report belongs. | In, Not In | Only the Value1 column will be available as a browse field. Clicking the browse field will open the User List. |
| Originator Id | This is the Id of the Originator of the Expense Report | Equal to, Not equal to | Only the Value1 column will be available and it will be a text field. |
| Originator is Active | Originator Active status. | In, Not In | Only the Value1 column will be available and it will be a multi-select combo-box with the following options: Select All, Yes, No |
| Originator Master Site | The Originator’s Master Site. | In, Not In | Only the Value1 column will be available as a browse field. Clicking the browse field will open the Site List. |
| Originator Resource Group | The name of the Resource Group to which the Creator of the Expense Report belongs. | In, Not In | Only the Value1 column will be available as a browse field. Clicking the browse field will open the Group List. |
| Originator Resource Group Manager | The name of the Resource Group Manager to which the Creator of the Expense Report belongs. | In, Not In | Only the Value1 column will be available as a browse field. Clicking the browse field will open the Group List. |
| Originator Termination date | The Originator’s Termination date. | Equal to, Not equal to, Greater than or equal to, Less than or equal to, Less than, Greater than, Between, Not between, Today, This Week, Last Week, This Month, Last Month, This Quarter, Last Quarter, This Year, Last Year, Year to Date, This Fiscal Month, Last Fiscal Month, This Fiscal Quarter, Last Fiscal Quarter, This Fiscal Year, Last Fiscal Year, Fiscal Year to Date | When Between or Not between is selected, both Value fields will be enabled; otherwise, only Value1 will be enabled. Calendar values only. |
| Period Status | The Period Status of the Expense Report. | In, Not In | Only the Value1 column will be available and it will be a multi-select combo-box with the following options: Select All, Open, Closed |
| Process Date | The status of the Expense Payable Batch in which the Expense Report is included. This column can only display one of these two values: Posted Date or In Progress. - Blank: no Entries are included in an Payable Batch - In Progress: some Entries are included in a non-posted Payable Batch - Post date: Latest post date when any Entry is included in a posted Payable Batch |
Equal to, Not equal to, Greater than or equal to, Less than or equal to, Less than, Greater than, Between, Not between, Today, This Week, Last Week, This Month, Last Month, This Quarter, Last Quarter, This Year, Last Year, Year to Date, This Fiscal Month, Last Fiscal Month, This Fiscal Quarter, Last Fiscal Quarter, This Fiscal Year, Last Fiscal Year, Fiscal Year to Date | When Between or Not between is selected, both Value fields will be enabled; otherwise, only Value1 will be enabled. Calendar values only. |
| Start Date | This is the Start Date of the Expense Report. | Equal to, Not equal to, Greater than or equal to, Less than or equal to, Less than, Greater than, Between, Not between, Today, This Week, Last Week, This Month, Last Month, This Quarter, Last Quarter, This Year, Last Year, Year to Date, This Fiscal Month, Last Fiscal Month, This Fiscal Quarter, Last Fiscal Quarter, This Fiscal Year, Last Fiscal Year, Fiscal Year to Date | When Between or Not between is selected, both Value fields will be enabled; otherwise, only Value1 will be enabled. Calendar values only. |
| State Attribute | The attribute associated with the workflow state of the Expense Report. | In, Not In | Only the Value1 column will be available and it will be a multi-select combo-box with all available State Attributes. |
| State Name | The Current Workflow State Name of the Expense Report. | Equal to, Not equal to | Only the Value1 column will be available. It will be a text field. |
| Total R&D in Base Curr. | Total amount of all R&D Expense Entries in Base currency. | Equal to, Not equal to, Greater than or equal to, Less than or equal to, Less than, Greater than, Between, Not between | When Between or Not between is selected, both Value fields will be enabled; otherwise, only Value1 will be enabled. Numeric values only. |
| Total R&D in User Reimbursable Curr. | Total amount of all R&D Expense Entries in originator's Reimbursable currency. | Equal to, Not equal to, Greater than or equal to, Less than or equal to, Less than, Greater than, Between, Not between | When Between or Not between is selected, both Value fields will be enabled; otherwise, only Value1 will be enabled. Numeric values only. |
| Total Amount in Base Curr. | Total Amount reported in the Expense Report (billable and payable amount) in Base currency. | Equal to, Not equal to, Greater than or equal to, Less than or equal to, Less than, Greater than, Between, Not between | When Between or Not between is selected, both Value fields will be enabled; otherwise, only Value1 will be enabled. Numeric values only. |
| Total Amount in User Reimbursable Curr. | Total Amount reported in the Expense Report (billable and payable amount) in originator's Reimbursable currency. | Equal to, Not equal to, Greater than or equal to, Less than or equal to, Less than, Greater than, Between, Not between | When Between or Not between is selected, both Value fields will be enabled; otherwise, only Value1 will be enabled. Numeric values only. |
| Total Amount Reimbursed in Base Curr. | Total amount of all Reimbursed Expense Entries in the originator's Master Site currency. | Equal to, Not equal to, Greater than or equal to, Less than or equal to, Less than, Greater than, Between, Not between | When Between or Not between is selected, both Value fields will be enabled; otherwise, only Value1 will be enabled. Numeric values only. |
| Total Amount Reimbursed in User Reimbursable Curr. | Total amount of all Reimbursed Expense Entries in originator's Reimbursable currency. | Equal to, Not equal to, Greater than or equal to, Less than or equal to, Less than, Greater than, Between, Not between | When Between or Not between is selected, both Value fields will be enabled; otherwise, only Value1 will be enabled. Numeric values only. |
| Total Billable in Base Curr. | Total amount of all Billable Expense Entries in the originator's Master Site currency. | Equal to, Not equal to, Greater than or equal to, Less than or equal to, Less than, Greater than, Between, Not between | When Between or Not between is selected, both Value fields will be enabled; otherwise, only Value1 will be enabled. Numeric values only. |
| Total Billable in User Reimbursable Curr. | Total amount of all Billable Expense Entries in originator's Reimbursable currency. | Equal to, Not equal to, Greater than or equal to, Less than or equal to, Less than, Greater than, Between, Not between | When Between or Not between is selected, both Value fields will be enabled; otherwise, only Value1 will be enabled. Numeric values only. |
| Total Capitalized in Base Curr. | Total amount of all Capitalized Expense Entries in the originator's Master Site currency. | Equal to, Not equal to, Greater than or equal to, Less than or equal to, Less than, Greater than, Between, Not between | When Between or Not between is selected, both Value fields will be enabled; otherwise, only Value1 will be enabled. Numeric values only. |
| Total Capitalized in User Reimbursable Curr. | Total amount of all Capitalized Expense Entries in originator's Reimbursable currency. | Equal to, Not equal to, Greater than or equal to, Less than or equal to, Less than, Greater than, Between, Not between | When Between or Not between is selected, both Value fields will be enabled; otherwise, only Value1 will be enabled. Numeric values only. |
| Total Funded in Base Curr. | Total amount of all Funded Expense Entries in the originator's Master Site currency. | Equal to, Not equal to, Greater than or equal to, Less than or equal to, Less than, Greater than, Between, Not between | When Between or Not between is selected, both Value fields will be enabled; otherwise, only Value1 will be enabled. Numeric values only. |
| Total Funded in User Reimbursable Curr. | Total amount of all Funded Expense Entries in originator's Reimbursable currency. | Equal to, Not equal to, Greater than or equal to, Less than or equal to, Less than, Greater than, Between, Not between | When Between or Not between is selected, both Value fields will be enabled; otherwise, only Value1 will be enabled. Numeric values only. |
| Total Payable in Base Curr. | Total amount of all Payable Expense Entries in the originator's Master Site currency. | Equal to, Not equal to, Greater than or equal to, Less than or equal to, Less than, Greater than, Between, Not between | When Between or Not between is selected, both Value fields will be enabled; otherwise, only Value1 will be enabled. Numeric values only. |
| Total Payable in User Reimbursable Curr. | Total amount of all Payable Expense Entries in originator's Reimbursable currency. | Equal to, Not equal to, Greater than or equal to, Less than or equal to, Less than, Greater than, Between, Not between | When Between or Not between is selected, both Value fields will be enabled; otherwise, only Value1 will be enabled. Numeric values only. |
| Total Reimbursable in Base Curr. | Total Reimbursable amount of the Expense Report in the originator's Master Site currency. | Equal to, Not equal to, Greater than or equal to, Less than or equal to, Less than, Greater than, Between, Not between | When Between or Not between is selected, both Value fields will be enabled; otherwise, only Value1 will be enabled. Numeric values only. |
| Total Reimbursable in User Reimbursable Curr. | Total Reimbursable amount of the Expense Report in the originator's Reimbursable Currency. | Equal to, Not equal to, Greater than or equal to, Less than or equal to, Less than, Greater than, Between, Not between | When Between or Not between is selected, both Value fields will be enabled; otherwise, only Value1 will be enabled. Numeric values only. |
| Workflow | Workflow associated to the Expense Report. | In, Not In | Only the Value1 column will be available as a browse field. Clicking the browse field will open the Expense Workflow List. |
This enhancement brings Expense Manager in line with other areas of the application, such as Project List and Timesheet Manager, where similar functionality already exists. Users familiar with those areas will find the filtering experience consistent and intuitive.
Benefit: This improvement offers more precise control over the data displayed in Public Views, allowing teams to tailor visibility to match their specific needs. By configuring default filters, users can reduce clutter, highlight actionable information, and ensure consistency across teams, enhancing usability, saving time, and improving focus within Expense Manager.
For further details see Configure Default Filters for Expense Manager Views.
Financial Planner

Description: In previous releases, Financial Planner Notes did not allow tagging or mentioning specific users. This made it difficult for project managers to direct action items to the right individuals, often requiring follow-up communication outside the platform.

Tip: As in previous releases
- To view notes, ensure Can add notes is enabled in the Financial Planner Template Settings.
- Notes can only be added to manually created Expenses, Products, or Charges in any View.
The Notes dialog box for Financial Planner now features an improved UI/UX that aligns with other Notes dialog boxes, such as Project Notes. The item name and period for the Note are displayed in the Title area for quick reference. You can navigate between notes for the same item across different periods using the arrow controls, making it easier to review and update related notes without closing the dialog box.
When the Enable Mentioning in Comments & Notes setting located within the System Configuration page is turned on, you can mention others in the Financial Planner Notes using @ notation.
When adding a new Note, a placeholder message—Type @ to mention and to notify someone—now appears next to the cursor, guiding you on how to tag others.
Mentioned users will receive a notification, ensuring they are aware of relevant updates or required actions. To support this functionality a new System Notification titled Financial Planner Note Mention Notification is now available from System Notifications page (Setup > Notifications). For further details refer to Financial Planner Note Mention Notification.
Typing “@” triggers a dropdown list of user suggestions (maximum of 15), which dynamically updates as you type more characters, refining the suggestions in real time.

Click the Save ![]() button to save and send the Notification. Mentioned users will receive a notification, ensuring they are aware of relevant updates or required actions.
button to save and send the Notification. Mentioned users will receive a notification, ensuring they are aware of relevant updates or required actions.
How Mentions Work:
The suggestion list will display :
- Active Users - if they have a valid Email (suspended and decommissioned users are excluded)
- Project Manager or Alternate Manager - if they are associated with the Project and have a valid email
- Project Team - if there are more than 1 active and onboarded User with a valid Email.
Mentioned Users will receive email notifications, ensuring they are promptly informed and can take necessary action.
Note: You can mention multiple Users in a single Note, including the same user more than once. However, each User will receive only one notification, regardless of how many times they are mentioned.
Tooltips and visual indicators for Mentioned Users
- Decommissioned or Suspended Users: The mention appears in red, with tooltips indicating their status: Decommissioned User, or Suspended User.
- Removed or Out-of-Scope Users: The mention appears in red, with a tooltip displaying Unknown User.
- Removed Project Manager or Alternate Manager: Tooltips display: No Manager Defined.
- Undefined Project Team: Tooltips display: No Team Member Defined.
- Removed Email Address: The mention appears in grey, with tooltips displaying: Invalid Email.
Benefit: The @mention feature in Financial Planner Notes helps project managers clearly identify and notify the right team members, reducing the need for separate follow-up communications. By sending notifications and emails directly to mentioned users, it ensures faster response times and improved accountability.
For further details see:
Customizable Homepage Templates
The new and improved Homepage Templates put the power of personalization in your hands—allowing you to create visually dynamic, role-specific Homepages that surface exactly what each user needs to see. With an easy drag-and-drop designer, configurable widgets, and flexible assignment options, you can deliver a custom homepage experience that boosts productivity, simplifies navigation, and brings key insights front and center. No more one-size-fits-all dashboards—just the right information, in the right place, for the right people.
Description: In this release, you can now create personalized My Homepage Templates, giving each user the exact information they need, right where they need it. Imagine being able to build a Homepage from scratch, adding only the widgets, links, and reports that matter to your team, and then delivering it to the right users with a single assignment.
The ability to view, create, modify, or delete Homepage Templates is controlled by dedicated security permissions, allowing any user with the appropriate access rights to manage them. For details, see the Homepage Templates Security Permissions section.
Designing A Custom Homepage Template

If you have the appropriate Security Permissions, you will see the new Homepage Templates option in the Setup menu. From there, you can browse existing templates or create new ones.
From Homepage Templates page you can:
- Create a new Homepage.
- Click the Refresh
 button to refresh the list.
 - Click the Delete
 button to delete selected Homepage(s).
 - Click the Export
 button to export the list to Excel.
 - Filter the list based on Active or Suspended
- Manage Columns from Column Selection
 . By default the following columns are displayed: Name, Is Default and Suspend.
 - Search
 for Homepages based on Name.
 - Pagination is available at the top right corner to facilitate easy navigation across pages.
- Click a Template Name to access the edit page.
- From the table header:
- Sort the columns by ascending or descending order simply by clicking a column header. Note that an arrow indicates the descending (
 ) or ascending (
 ) order applied to the column.
 - Dynamically resize column(s), to your preferred width. Simply move your cursor to the column boundary (
 ) you want to resize. When the cursor becomes a resize cursor, click and drag the column accordingly
- Sort the columns by ascending or descending order simply by clicking a column header. Note that an arrow indicates the descending (
Creating a Homepage is simple:
-
Click Create Template.

- Name your Template.
-
Is Default: Select this checkbox to mark this Template as the system's default Home page. Only one Template can be set as default for the organization.
The system applies Home page Templates based on the following hierarchy:
- User
- Security Profile
- Functional Group
- Master Site
- Is Default Home page Template
Note:
- If no Template is assigned at any level, the Default Template is applied.
- If more than one Template is assigned at the same level, the most recently assigned Template is applied.
- If no Default Template exists, the legacy Home page is displayed.
- Click Save, and instantly unlock the Designer tab. This is your creative workspace — a drag-and-drop canvas where you can arrange content using a clean, snap-to-grid layout.

Note: When a Widget is dragged onto the canvas, it is placed in the first available empty space in the top-left corner.
- The right-hand sidebar houses your available Widgets. Maybe you start with Quick Links, dragging it onto the page and adding shortcuts to Expense Manager, My Timesheets, or even an external site like the PSA Help Center. Or perhaps you drop in the Upland Analytics widget, search for a report you have already built, and pin it directly onto the Homepage so users see live project data every time they log in.
- Every widget can be resized and moved, letting you fine-tune the layout until it’s perfect. For more information on each Widget refer to Widget Library Overview.
-
Once your design is complete, the Associations tab lets you decide exactly who will see it. You can assign your template to individual Users, Security profiles, Functional Groups, Master Sites, or a combination of these.

-
Once published, users will see the tailored, role-specific dashboard each time they open their Homepage
 . The dashboard presents all Widgets as interactive Tiles, giving them a consistent view of the information that matters most.
Benefit: With customizable Homepages, administrators can create focused, role-based experiences across the software. Homepage layouts can be tailored to specific teams or user groups, ensuring that the most relevant information is available in one place. Administrators can add quick links, reports, and other widgets to help users access data more efficiently and reduce time spent navigating. The drag-and-drop designer makes layout configuration straightforward, and assignment rules with permissions maintain security and consistency. This feature provides users with personalized dashboards that improve visibility, streamline daily tasks, and support informed decision-making.
For administrative guidance and additional information on configuring and managing Homepage Templates, see:
Description: The Homepage Designer includes a growing library of configurable Widgets that can be added to any Template.
Administrator Experience

The Homepage Designer lets administrators build role-specific Homepages using a library of Widgets.
- Add Widgets: Select from the Widget library and place them on a template.
- Arrange Layout: Resize and move Widgets within a grid layout to control how information is displayed.
- Tailor by Role: Create dashboards aligned to user roles and business goals.
- Expand Over Time: As new Widgets are released, they can be added to extend functionality.
Template Assignment and Precedence
All configured widgets appear as Tiles on the User’s Homepage according to their assigned Template.
If more than one Homepage Template is assigned, the system applies it based on the following order of precedence, from highest to lowest:
- User
- Security Profile
- Functional Group
- Master Site
- Is Default Home page Template
Note:
- If no Template is assigned at any level, the Default Template is applied.
- If more than one Template is assigned at the same level, the most recently assigned Template is applied.
- If no Default Template exists, the legacy Home page is displayed.
End User Experience (TE-103284,TE-103371)
When you sign in, your assigned Homepage displays a set of Tiles. Each Tile represents a widget configured by your administrator. You can interact with options such as filters, but you cannot change core configurations.
Tiles appear in the layout defined by the administrator, including placement, size, and order.
Each tile follows its configured settings, such as selected KPIs, filters, or the number of items displayed.
Note: Information is always shown in the context of the logged-in user, ensuring that projects, tasks, or other items are relevant to you.
At a Glance:
- Quick access: Direct entry to your most-used tools and data.
- Interactive: Open related content with one click.
- No setup required: Configured automatically by administrators.
- Consistent view: Role-specific dashboard tailored to your work.
The following sections describe how to configure each Widget in the Homepage Designer and what end users will see when it is displayed as a Tile.
This Release Delivers the Following Widgets
The Quick Links widget in the Homepage Template Designer gives end users one-click access to frequently used areas without navigating menus. Administrators can add up to 10 internal or external links from the Homepage Designer.
Configuration
Use the Filter icon to select predefined PSA pages to include in the widget:
| Name | PSA Path |
|---|---|
| Charge Approval | Entries > Charges > Approval |
| Clients | Setup > Work > Clients |
| Expense Manager | Entries > Expense Manager > Last visited View |
| Groups | Setup > Organization > Groups |
| Leave Request Manager | Entries > Leave Request Manager > Last visited Tab |
| Leave Request | Entries > Leave Request Manager > My Requests tab |
| My Work Plan | Entries > My Work Plan > My Work Plan View |
| My Timesheets | Entries > My Timesheet |
| Product Approval | Entries > Products > Approval |
| Projects | Project List > Last visited View |
| Project Scheduling | Entries > Project Scheduling |
| Resource Scheduling | Entries > Resource Scheduling |
| Sites | Setup > Organization > Sites |
| Tasks | Setup > Work > Tasks |
| Timesheet Manager | Entries > Timesheet Manager > Last visited View |
| Users | Setup > Organization > Users > All Users View |
| Work Item Manager | Entries > Work Items Manager > Last visited View |

Note: Predefined internal links are marked with a chain icon (![]() ).
).
- Select the checkboxes in the Filter panel to add them.
- Selected links will appear in the widget.
Tip: Clear a checkbox to remove a link.

Note: Custom external links are marked with a globe icon (![]() ).
).
- From the Filter panel click Add Link to open a dialog box where you can define:
- URL: The destination link.
- Name: The display name shown in the widget.
- Click ADD.
- Note that the link appears in the widget.
Tip: To remove it, use the Delete
 button in the Filter panel.

- Click the pencil icon (
 ) to rename the widget title.
 - Click the checkmark (
 ) to confirm the name and save the template automatically.
 - Click the X icon (
 ) to cancel.

Click the Delete ![]() icon. The widget is removed from the Homepage.
icon. The widget is removed from the Homepage.
End User Experience (TE-103284,TE-103371)

The Quick Links Tile gives you one-click access to frequently used areas of the system—without navigating through menus.
You’ll see up to 10 links in the widget.
- Links can include both system pages (such as Timesheets, My Work Plan, or Projects) and external sites (marked with a globe icon).
- Click any link to open it directly.
- If no links are available, the widget will appear empty until your administrator configures it.
The Upland Analytics widget embeds real-time reports directly into the Homepage. Administrators can search and select from existing reports so that end users can view key metrics and insights without leaving the page.
Configuration
Administrators can control which Upland Analytics Report appears in the widget using the browse button in the Widget Designer.

- Select an existing report to add it.
- Selected report will appear in the widget.


- Click the pencil icon () to rename the widget title.
- Click the checkmark () to confirm the name and save the template automatically.
- Click the X icon () to cancel.

Click the Delete ![]() icon. The widget is removed from the Homepage.
icon. The widget is removed from the Homepage.
End User Experience (TE-103284,TE-103371)

The Upland Analytics Tile embeds reports directly on your homepage.
- You can view real-time reports without leaving the page.
- The widget automatically displays the report your administrator selected for you.
- Reports are interactive—drilldowns and filters remain available.
This widget keeps key business insights visible while you work.
The My Recent Items widget provides quick access to the most recently viewed Projects, Tasks, Work Items, and User records. It displays up to 10 items automatically, helping users return to their work quickly. Administrators can configure which item types appear and rename the widget in the Homepage Designer.
Configuration
Administrators can control which types of items appear in the My Recent Items widget using the Filter icon in the Widget Designer. Predefined item types include:
- Projects: Recently accessed projects.
- Tasks: Recently accessed tasks.
- Users: Recently accessed user records.
- Work Items: Recently accessed work items.
You select the item types by checking the boxes in the filter panel.

- Select the checkboxes in the Filter panel to add them.
- Selected items will appear in the widget.
Tip: Clear a checkbox to remove an item.

- Click the pencil icon () to rename the widget title.
- Click the checkmark () to confirm the name and save the template automatically.
- Click the X icon () to cancel.

Click the Delete ![]() icon. The widget is removed from the Homepage.
icon. The widget is removed from the Homepage.
End User Experience (TE-103284,TE-103371)

The My Recent Items Tile allows you to quickly access up to 10 recent items, each with a recognizable icon (Project![]() , Task
, Task ![]() , Work Item
, Work Item ![]() , or User
, or User ![]() ). Clicking a link opens the edit page of the specific item:
). Clicking a link opens the edit page of the specific item:
- Projects: Homepage > User > Project: Edit Page
- Tasks: Project List > Project: Edit > Manage > Task: Edit Page
- Work Items: Work Items Manager > Specific Work Item: Edit Page
- Users: Setup > Organization > Users > Specific User: Edit Page
This Tile improves efficiency by providing quick, role-specific access to recent work.
The KPI widget displays key project performance metrics directly on the homepage. Administrators use the Homepage Designer to select which KPIs to show and configure their labels, colors, and any threshold conditions.
It allows project managers and stakeholders to track key metrics such as budget status, project progress, utilization, or overdue tasks without navigating through multiple pages.
Each KPI is displayed as a card with the metric value, a customizable color bar for visual status, and an optional description accessible through an info icon.
Configuration
Administrators can configure KPI widgets to show project metrics at a glance. From the setup dialog box, you can define KPI details, select a project view, and apply color rules to highlight key values.
- Add the KPI widget to the design area.
- Click the Setup icon on the widget to open the KPI setup dialog box.
- From the Details tab:
- Project View: Choose a Public Project View to use as the data source. All projects in the selected View will be included when calculating KPI values.
- Function: Select how the KPI value is calculated, based on the Projects in the selected View:
- Sum: Adds all values.
- Average: Calculates the mean value.
- Minimum: Shows the lowest value.
- Maximum: Shows the highest value.
- Count: Shows the number of projects.
- KPI: Select a KPI from the list. Each KPI includes a Name, Description, and calculation formula.
 KPIs included in this release:
Name Description Actual Non-billable in Base Curr. Sum of all Non-Billable Amounts on the Project in Base Currency. Baseline Billable Budget in Base Curr. Sum of Baseline Billable Budgets of the Project in Base Currency. Baseline Cost Budget in Base Curr. Sum of Baseline Cost Budgets of the Project in Base Curr. Baseline Non-billable Budget in Base Curr. Sum of Baseline Non-Billable Budgets of the Project in Base Curr. Baseline Time Budget Sum of Baseline Time Budgets of the Project. Billable Charges in Base Curr. Sum of all Billable Charge Amounts on the Project in Base Curr. Billable Expenses in Base Curr. Sum of all Billable Expense Amounts on the Project in Base Curr. Billable Hard Booked Hours Sum of all Billable Hard Booked Hours on the Project. Billable Products in Base Curr. Sum of all Billable Product Amounts on the Project. in Base Curr. Billable Soft Booked Hours Sum of all Billable Soft Booked Hours on the Project. Billable Time Amount in Base Curr. Sum of all Billable Time Amounts on the Project in Base Curr. Current Billable Budget in Base Curr. Sum of Current Billable Budgets of the Project in Base Curr. Current Billable Time Budget Sum of Current Billable Time Budgets of the Project Current Cost Budget in Base Curr. Sum of Current Cost Budgets of the Project in Base Curr. Current Non-billable Budget in Base Curr. Sum of Current Non-Billable Budgets of the Project in Base Curr. Current Time Budget Sum of Current Time Budgets of the Project. Forecasted Cost Sum of all Forecasted Cost Amounts on the Project. Non-billable Time Sum of all Non-Billable Time Entries on the Project. Payable Charges in Base Curr. Sum of all Payable Charge Amounts on the Projected Cost Amounts on the Project in Base Curr. Payable Expenses in Base Curr. Sum of all Payable Expense Amounts on the Project in Base Curr. Payable Products in Base Curr. Sum of all Payable Product Amounts on the Project. Payable Time Sum of all Payable Time Entries on the Project. Payable Time Amount in Base Curr. Sum of all Payable Time Amounts on the Project in Base Curr. Reimbursable Expenses in Base Curr. Sum of all Reimbursable Expense Amounts on the Project in Base Curr. Soft Booked Hours Sum of all Soft Booked Hours on the Project. Total Allocated Hours Sum of all allocated Hours on the Project Total Billable Allocated Hours Sum of all Billable allocated Hours on the Project. Total Charges in Base Curr. Sum of all Charge Amounts on the Project in Base Curr. Total Expenses in Base Curr. Sum of all Expense Amounts on the Project in Base Curr. Total Invoiced in Base Curr. Sum of all Invoiced Amounts on the Project in Base Curr. Total Non-billable Allocated Hours Sum of all Non-Billable allocated Hours on the Project. Δ Baseline Billable Budget in Base Curr. Difference between Baseline Billable Budget and Actual Billable Δ Baseline Non-billable Budget in Base Curr. Difference between Baseline Non-Billable Budget and Actual Non-Billable in Base Curr. Δ Baseline Time Budget Difference between Baseline Time Budget and Actual Time. Δ Current Billable Budget in Base Curr. Difference between Current Billable Budget and Actual Billable in Base Curr. Δ Current Billable Time Budget Difference between Baseline Billable Time Budget and Actual Billable Time. Δ Current Cost Budget in Base Curr. Difference between Current Cost Budget and Actual Cost in Base Curr. Δ Current Non-billable Budget in Base Curr. Difference between Current Non-Billable Budget and Actual Non-Billable in Base Curr. - Name: Enter a display name for the KPI. By default, the KPI’s system name is shown.
- Description: Provide a short description for the KPI. This description appears when users hover over the info icon in the widget.
- Navigate to the Format tab to create rules to apply color formatting to the KPI bar.
- If required select Include Decimal Values. The Include Decimal Values option controls how KPI values are displayed. When selected, values show two decimal places. When cleared, values are rounded to the nearest whole number using standard rounding rules (≥ 0.50 rounds up, < 0.50 rounds down).
Note: For Sum and Average functions, the full calculation is performed first, and then rounding is applied.
- Click New Rule. For each rule, set:
- Condition: Select an operator (>, <, ≥, ≤, =, <>).
- Value: Enter a value. If you select “<>,” enter two values.
- Color: Select the color to display when the condition is met.

- Save your changes. The widget updates with the selected KPI and color rules.
Best practices
- Keep color rules simple. Too many conditions can make the KPI harder to read.
- Use consistent colors across KPIs (for example, red for at risk, green for on track).
- Ensure colors meet accessibility standards so all users can distinguish them.
- Test your rules with sample data to confirm the colors highlight the right values.

Click the Delete ![]() icon. The widget is removed from the Homepage.
icon. The widget is removed from the Homepage.
End User Experience (TE-103284,TE-103371)

The KPI Tile provides a real-time view of project performance indicators.
- Each KPI appears as a card showing the metric name, value, and a color bar for quick status checks.
- Hover over the info icon to see a short description of the metric.
- Colors are applied based on performance rules (for example, green = on track, red = at risk).
- The information updates dynamically based on the selected project view, so you always see the latest numbers.
This Tile gives project managers and stakeholders an at-a-glance way to track budgets, progress, and other key measures.
The My Work Widget provides a customizable view of key Project, Task and Timesheet information directly on the homepage. It allows users to quickly see the status of their projects, tasks and timesheets enabling timely decisions and actions.
Configuration
- Add the My Work Widget to the design area.
- Click the Setup icon on the widget to open the setup dialog box.
- Select the Projects checkbox to include this tab in the tile. It displays only the projects where the logged-in user is a team member.
- From the Filters sub tab, you can refine which projects appear in the Tile:
- Time Range: Show only Projects where the logged-in user’s Onboarding date falls within the selected time range. Available options include:
- Next 7 days (Default selection)
- Next 30 days
- Next 60 days

- If required choose the Suspended option to include suspended Projects.
- Time Range: Show only Projects where the logged-in user’s Onboarding date falls within the selected time range. Available options include:
- Navigate to the Columns sub tab and choose which columns to display. The available options are: Name, Is Active, Health, Project Manager, Start , End , Priority, Client, Alternate Project Manager, Onboarding Date, Offboarding Date, Total Actual Hours, Total Hard Booked Hours and Total Soft Booked Hours.

Note: Name, Is Active, Health, Project Manager, Onboarding Date, Offboarding Date are selected by default.
- From the Filters sub tab, you can refine which projects appear in the Tile:
- Select the Tasks checkbox to include this tab in the tile. It displays only the Tasks that are assigned to logged User, regardless of the Projects listed in the Projects tab.
- From the Filters sub tab, you can refine which tasks appear in the Tile:
- Upcoming Tasks: Include Tasks with start date within
- Next 7 Days
- Next 30 Days
- Next 60 Days
- Inactive Tasks: Exclude Tasks With No Time Entries In
- Past 7 Days
- Past 30 Days
- Past 60 Days
- If required choose the Completed option to include completed Assignments.

- Upcoming Tasks: Include Tasks with start date within
- Navigate to the Columns sub tab and choose which columns to display. The available options are: Name, State, Start, End, Project, Project Manager, Alternate Project Manager, ETC and Completed.

Note: Name, State, Start, End, Project, Project Manager, Alternate Project Manager are selected by default.
- From the Filters sub tab, you can refine which tasks appear in the Tile:
- Select the Timesheets checkbox to include this tab in the tile. It displays the last 10 Timesheets opened and/or submitted by the logged User, regardless of which Projects appear in the Projects tab.
- From the Filters choose to include Timesheets that are Approved.

- Navigate to the Columns sub tab and choose which columns to display. The available options are: Start, End, Total Hours and State.

Note: Start, End, Total Hours and State are selected by default.
- From the Filters choose to include Timesheets that are Approved.
- Click Save.

Administrators can set and save column widths in the My Work widget. This ensures the layout configured in Projects, Tasks, and My Timesheets tabs is preserved and rendered consistently for end users.
- Hover your mouse over the right border of the column header you want to resize.
- When the resize cursor appears
 , click and drag the border left or right to adjust the width.
 - Release the mouse button to apply the new column width.
- Repeat for any other columns as needed.
- The resized widths are saved automatically at the template level and will be rendered for end users.

- Click the pencil icon () to rename the widget title.
- Click the checkmark () to confirm the name and save the template automatically.
- Click the X icon () to cancel.

Click the Delete ![]() icon. The widget is removed from the Homepage.
icon. The widget is removed from the Homepage.
End User Experience (TE-103284,TE-103371)
The My Work widget gives you a personalized view of your Projects, Tasks, and Timesheets in one place. Information is displayed in three tabs:
- Projects: Shows only the projects where you are a Team Member. Filters and columns set by your administrator determine what details appear, such as project health, dates, or priority.

- Tasks: Displays only tasks assigned to you. Filters set by your system administrator mayb limit the list to upcoming tasks or exclude inactive or completed Assignments.
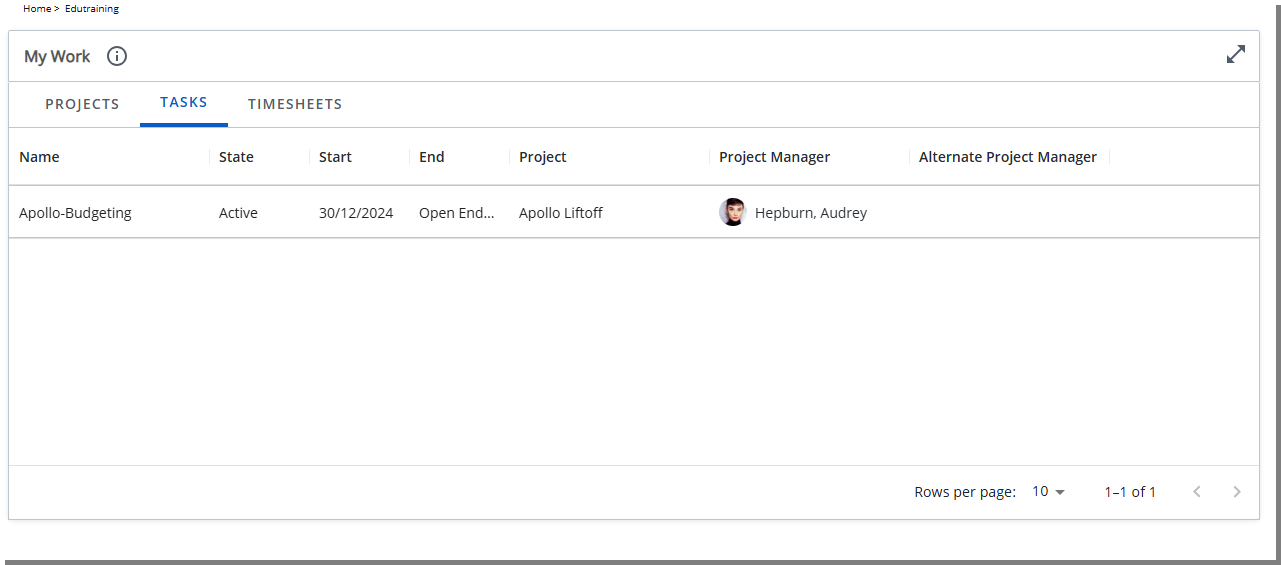
- Timesheets: Displays the last 10 timesheets you opened or submitted. Filters set by your system administrator may exclude approved timesheets.

The content in each tab is tailored to your role and recent activity, so you see only the work relevant to you. Columns, filters, and layout are defined by your administrator, allowing you to manage your Projects, stay on top of assigned Tasks, and keep your Timesheets up to date without extra navigation.
The My Projects Widget provides project managers with a personalized, at-a-glance view of their active projects directly on the homepage. Each project appears as a card showing key details such as health, budget, and team, enabling project managers to quickly assess status and take timely actions.
Configuration
- Add the My Projects Widget to the design area.
- Click the Setup icon on the widget to open the setup dialog box.
-
You can refine which projects appear in the widget using two options:
- Time Frame: Show only projects that end within the selected period. Available options include:
- Next 7 days (Default selection)
- Next 30 days
- Next 60 days
- Select the Suspended option to include suspended Projects.

- Time Frame: Show only projects that end within the selected period. Available options include:
- Click Save.

- Click the pencil icon () to rename the widget title.
- Click the checkmark () to confirm the name and save the template automatically.
- Click the X icon () to cancel.

Click the Delete ![]() icon. The widget is removed from the Homepage.
icon. The widget is removed from the Homepage.
End User Experience (TE-103284,TE-103371)

When added to the homepage, the My Projects Tile displays all projects where the logged-in user is the Project Manager. This Tile gives project managers a centralized, role-specific dashboard, allowing them to monitor project status, identify risks, and act quickly.
Each project is shown as a card with the following details:
- Project Name: Clickable link to the Project: Edit page.
- Client Name: Displays the associated client.
- Project Health: Visual indicator showing project health status. Can be edited from the Tile:
- Green: On Track
- Yellow: At Risk
- Red: Off Track
- Project Cost Budget: Displayed as a progress bar with a clickable link to the project’s Budget page.
Note: The Project Cost Budget bars are color coded: a blue bar indicates the cost is within the budget, while a red bar means the current project cost has exceeded the project’s budgeted cost.
- End Date (Due Date): Displays the project’s End date.
- Project State: Displays current project state.
- % Completion: Project Completion Rate.
The My Assigned Items Widget consolidates all items that require review or approval by the logged in User into a single location on the Homepage. It provides visibility into pending Timesheets, Expense Reports, Invoices, Leave Requests, Work Items, Charges, and Product Entries, helping you manage approvals more efficiently.
Configuration
The My Assigned Items widget is added by dragging it onto the Homepage Template.
You can resize, reposition, and rename the widget title, but no additional settings are available.

- Click the pencil icon () to rename the widget title.
- Click the check mark () to confirm the name and save the template automatically.
- Click the X icon () to cancel.

Click the Delete ![]() icon. The widget is removed from the Homepage.
icon. The widget is removed from the Homepage.
End User Experience (TE-103284,TE-103371)

The My Assigned Items tile gives you a consolidated view of all items requiring your review or approval. Each category displays the number of pending items, and overdue items are flagged when applicable. Click any label to open the corresponding manager view.
Items displayed:
- Timesheets: Shows the number of assigned timesheets. Links to Entries > Timesheet Manager > View > My Assigned Timesheets. Overdue timesheets are flagged.
- Expense Reports: Shows the number of assigned expense reports. Links to Entries > Expense Manager > All Expense Reports.
- Invoices: Shows the number of assigned invoices. Links to Financials > Invoice Manager > Invoices > View (Manager).
- Leave Requests: Shows the number of assigned leave requests. Links to Entries > Leave Request Manager > Assigned Requests.
- Work Items: Shows the number of assigned work items. Links to Entries > Work Items Manager > View: Assigned Work Items. Overdue work items are flagged.
- Charge Entries: Shows the number of assigned charge entries. Links to Entries > Charges > Approval > Work List View.
- Product Entries: Shows the number of assigned product entries. Links to Entries > Products > Approval > Work List View.
By presenting all assigned items in one place, the My Assigned Items tile helps you stay organized and respond promptly to pending approvals.
Description: This release provides two pre-configured Home page Templates that help users get started quickly. Each template includes a set of tiles tailored to the most common tasks for that role. Administrators can use these templates as-is or customize them further.

Designed for individual contributors, this Home page brings together the tools and information you need most often:
- My Work tile
Projects tab: Shows Projects where you are a Team member. You can view details such as Project Name, State, Health, Project Manager, and your Onboarding and Offboarding dates. Suspended Projects are not included.
Tasks tab: Lists Tasks assigned to you. You can view the Task Name, State, Start date, End date, Project, Project Manager, and Alternate Project Manager. Includes Upcoming Tasks (Start date within the next 7 days) and Inactive Tasks (no Time entries in the past 7 days). Completed Assignments are not included.
Timesheets tab: Displays the last 10 Timesheets you opened and/or submitted. Approved Timesheets are not included.
- My Assigned Items tile
Consolidates all items that require your review or approval. Includes pending Timesheets, Expense Reports, Invoices, Leave Requests, Work Items, Charges, and Product Entries, helping you manage approvals more efficiently.
- My Recent Items tile
Provides quick access to Projects , Work Items, Tasks and Users.
- Quick Links tile
Provides shortcuts to: Expense Manager, Leave Request Manager, Create Leave Request, My Work Plan, My Timesheet, Timesheet Manager and Work Item Manager.
Benefit: The Standard User Homepage brings everyday work into a single, streamlined view. The My Work tile helps users stay focused on their current projects, tasks, and timesheets, while the My Assigned Items tile ensures that pending approvals are easy to manage without navigating across multiple areas. With the Quick Links tile, users gain direct access to frequently used tools such as Timesheets, Work Plans, and Expense or Leave Request Managers, reducing time spent searching. Finally, the My Recent Items tile makes it easy to pick up where they left off, enabling a faster and more efficient workday.

Designed for project managers, this homepage provides visibility into key metrics and access to management tools.
- KPIs tiles – Display high-level project metrics based on My Projects View, including:
- Actual Billable in Base Curr. – Displays the total billable amount for all projects shown in the My Projects View for the logged-in user.
- Total Invoiced in Base Curr. – Displays the total invoiced amount across all projects listed in the My Projects View for the logged-in user.
- Total Expenses in Base Curr. – Displays the total expense amount for all projects included in the My Projects View for the logged-in user.
- My Projects tile– Shows the projects you manage, helping you track performance and stay focused on active work.
- My Assigned Items tile – Consolidates all items requiring your review or approval, including pending Expense Reports, Invoices, Timesheets and Work Items.
- My Recent Items tile – Provides quick access to Projects, Tasks, and Work Items you recently viewed.
- Quick Links tile – Provides shortcuts to: Expense Manager, Projects, Project Scheduling, Timesheet Manager, and Work Item Manager.
Benefit: The Project Manager Homepage provides a role-specific dashboard that highlights project health, financials, and operational tasks in one place. KPI tiles surface key metrics such as billable hours, charges, and expenses, giving managers immediate insight into project performance. The My Projects tile centralizes access to active projects, while the My Assigned Items tile streamlines approval workflows for timesheets, expenses, and work items. The Quick Links tile offers shortcuts to essential project and resource management tools, and the My Recent Items tile makes it easy to return to in-progress work. Together, these elements enable project managers to monitor progress, act quickly on approvals, and make informed decisions with minimal effort.
For administrative guidance and additional information on configuring and managing Homepage Templates, see:
- Homepage Templates
- Homepage Templates Page Overview
- Design A Custom Homepage Template
- Widget Library Overview
- Out-of-the-Box Homepages
- Homepage Assignment and Precedence
For help using Homepages and to learn more about the end-user experience, see:
Integrations

Description: In a previous release, we introduced actionable Microsoft Teams Workflow Notifications for Leave Requests and Work Items Workflows. These enhancements allowed you to approve or reject requests directly within Microsoft Teams, eliminating the need to navigate to PSA for every action. This streamlined approach improved response times, supported faster decision-making, and enhanced collaboration across teams by keeping communication and approvals in the same tool many teams use daily.
This release expands the Microsoft Teams Workflow Notification functionality to include Timesheet and Expense approvals. With these enhancement, you can now take action on submitted timesheets or expense reports directly within Microsoft Teams.
A new Send Notification to MS Teams selection box is now available when creating or modifying a Timesheet Workflow State or Transition Notification. When selected, the Notification is delivered to the list of Recipient(s) via Ms Teams.
 via Ms Teams")
Important: To use this functionality, you must download the latest version of the PSA Workflow Notification Bot (V3.0). For assistance, please contact PSA Support. Upon completion of backend configurations, you will be provided with a link to download the updated .zip file. For more information see Install and Connect the Microsoft Teams PSA Workflow Notification Bot.
You will see familiar actions such as:
- View in PSA: Click to open the Timesheet directly in Upland PSA for a detailed review.
- The Details button opens a dialog box displaying additional time entry information. This includes Task names, relevant Attributes, Entry dates, recorded Time, Overtime, Double overtime, Non-working time, and any applicable Adjustments.

Note:
- The Adjustments section is shown only if it is enabled and there are adjustments present, helping keep the interface clean and relevant.
- If the Timesheet contains no Time Entries (for example, a blank Timesheet is submitted), you will see the message: There are no Time Entries.
- Actions such as:
- Approve: Click to approve the submitted Timesheet . This action confirms that the time entries are accurate and complete, allowing them to move forward in the workflow process.
- Reject: Click to reject the submitted Timesheet . You may be prompted to provide a reason or comment, which will be visible to the submitter for review and correction.
Note: When you transition a Timesheet from Microsoft Teams, the system validates whether the Timesheet Period is closed. If the Period is closed, transitions such as Submit, Resubmit, Approve, Reject, or Reopen are blocked, and you receive a clear error message stating that Time Entries cannot be created, updated or deleted because the Timesheet Period is closed.
 hold in —such as Project Manager, Resource Manager, or Approver.")
The View as selection list located within the Details dialog box, lets you choose one of the Roles that you (the recipient of the notification) hold in PSA—such as Project Manager, Resource Manager, or Approver. By selecting a Role from the selection list, the system filters and displays the timesheet information from that specific role's perspective.
Example Scenario:
You receive a Timesheet Notification in MS Teams because you are both a Project Manager and a Resource Manager. In the View as dropdown, you will see both roles. If you select Project Manager, the time entries shown will match what you are allowed to see as a Project Manager—perhaps only for the Projects you manage. Switch to Resource Manager, and the view might broaden to include more Tasks across various Projects for the Resource you are managing.
Note: It is important to note that the language of the Microsoft Teams bot's confirmation messages is based on your Microsoft Teams settings, whereas the PSA-generated content will continue to follow the language preferences set within PSA.
Benefit: By enabling actionable notifications for Timesheet approvals within Microsoft Teams, Upland PSA significantly reduces the need for approvers to switch between systems. Managers and team leads can now review detailed time information and approve or reject submissions without ever leaving Teams. This results in fewer delays, improved compliance with time-tracking policies, and a more seamless, efficient approval workflow for all involved.
For further details see Actionable Timesheet Workflow Notifications in Microsoft Teams.

Description: In a previous release, we introduced actionable Microsoft Teams Workflow Notifications for Leave Requests, Work Items, and Project Workflows. These enhancements allowed you to approve or reject requests directly within Microsoft Teams, eliminating the need to navigate to PSA for every action. This streamlined approach improved response times, supported faster decision-making, and enhanced collaboration across teams by keeping communication and approvals in the same tool many teams use daily.
This release expands the Microsoft Teams Workflow Notification functionality to include Timesheet and Expense approvals. With these enhancement, you can now take action on submitted Timesheets or Expense Reports directly within Microsoft Teams.
A new Send Notification to MS Teams selection box is now available when creating or modifying an Expense Workflow State or Transition Notification. When selected, the Notification is sent to the list of Recipient(s) via Ms Teams.
 via Ms Teams")
Important: To use this functionality, you must download the latest version of the PSA Workflow Notification Bot (V3.0). For assistance, please contact PSA Support. Upon completion of backend configurations, you will be provided with a link to download the updated .zip file. For more information see Install and Connect the Microsoft Teams PSA Workflow Notification Bot.
You will see familiar actions such as:
- View in PSA: Click to open the Expense Report directly in Upland PSA for a detailed review.
- Attachments: Click to view files attached to the Expense Report, such as receipts or supporting documents. Image file types (such as JPEG, and PNG) are directly previewed in the details page. Other file types are available as download links.
 are directly previewed in the details page. Other file types are available as download links")
Note: If there are no attachments for the record, you will see the message: No Attachments found.
- Details: Click to display a summary of the Expense Report, including key information such as, Task Name, Expense Item Name, Expense attributes, date range, and amounts.

- Approve: Click to approve the submitted Expense Report. This action confirms that the time entries are accurate and complete, allowing them to move forward in the workflow process.
- Reject: Click to reject the submitted Expense Report. You may be prompted to provide a reason or comment, which will be visible to the submitter for review and correction.
Note: It is important to note that the language of the Microsoft Teams bot's confirmation messages is based on your Microsoft Teams settings, whereas the PSA-generated content will continue to follow the language preferences set within PSA.
Benefit: Expanding Microsoft Teams Workflow Notification support Expense approvals further reduces the need for context switching between tools, allowing you to review, approve, or reject submissions without leaving Microsoft Teams. This leads to faster turnaround times, improves operational efficiency, and keeps approval processes aligned with the communication platform your team uses most. The inclusion of attachments and detailed views directly in the notification also ensures that you have the context needed to make informed decisions quickly, without sacrificing accuracy or compliance.
For further details see Actionable Expense Workflow Notifications in Microsoft Teams.

Description: In previous release, the Billable attribute was the only task-level checkbox supported in the Upland PSA Time Tracking app for Jira.
With this release, four additional attributes—Payable, Capitalized, Funded, and R&D—are now also available, offering greater flexibility and control when tracking time.
These new checkboxes appear in the time tracking interface based on task template configurations and user permissions. Their default checked or unchecked state reflects the settings of the associated Task in Upland PSA.
Benefit: This enhancement allows for more detailed categorization of time entries and supports better alignment with financial, operational, and compliance requirements.
For further details see PSA - Jira Integration Guide.

Description: To streamline the initial setup of the Jira integration, Upland PSA now supports mass mapping of PSA Projects to Jira Projects via Excel import.
Previously, each project had to be manually mapped one by one, which could be time-consuming during adoption. With this release, Administrators can upload a structured Excel file to perform project mappings in bulk, significantly reducing configuration effort.
The new Import from Excel button is now available under Integration > Jira > Mapping tab. This option allows administrators to access the Import Project Mapping page where they can download the Import Template and associate multiple PSA Projects with their corresponding Jira Project Keys in one action. The Excel Template file includes the following columns:
- Project Code (required): Imported from PSA
- Project Name (for reference): Imported from PSA
- Jira Project Key: Provided by the client
- Override Existing: A flag indicating how the Jira Key should be added
- Value 1: Replaces any existing Jira Project Key(s).
- Value 0: Appends the new key to the existing ones, separated by commas.
During import, the system provides feedback messages indicating success, warnings, or errors encountered during processing.
Note: For successful imports, only the import start and end times are logged in the Import Status field.

Once imported, the mapping can be viewed both in the integration settings and at the individual project level by navigating to Project List > Project Edit > Settings > Integrations.
Benefit: This feature is especially useful during the initial implementation of Jira integration, allowing teams to establish all project links in one step, improving accuracy and efficiency.
For further details see PSA - Jira Integration Guide.

Description: As part of ongoing improvements to CRM integration, the Salesforce package now includes support for mapping the Project Manager field to Upland PSA projects.
A new Project Manager lookup field has been added to the Salesforce Project object. When configuring project mappings in Upland PSA (under Integration > CRM > Salesforce > Mapping > CRM Project to Upland PSA Projects), this field is now available for selection.
If the Project Manager is defined in Salesforce and exists in Upland PSA, the assignment is carried over automatically during the import. If the specified user does not yet exist in PSA, the system will import the user as part of the process.
To ensure data integrity, if the user selected as Project Manager in Salesforce is suspended in Upland PSA at the time of import, the system will block the assignment and display the following error message: The user you selected for Project Manager is suspended.
Important Upgrade Requirement:
To enable the new Project Manager field functionality in Salesforce integration, clients must upgrade their Salesforce package from version 1.1 to 1.2. and the Project Manager Field must be included in the Salesforce Project Page Layout.
This action is required for all clients using the Salesforce integration to fully benefit from the enhancement introduced in this release.
The latest package can be installed from the following link: Salesforce version 1.2.
Benefit: This enhancement eliminates the need to manually assign a Project Manager after importing a project from Salesforce.
For further details see PSA – Salesforce Integration.

Description: A new option has been added to enhance control over how projects are created from Salesforce Opportunities.
When CRM integration page (Integrations > CRM), administrators will now see a new option labeled Import Workflow. This allows administrators to specify which Project Workflow should be applied when a new project is created through the Salesforce integration.
By default, the Standard Project Workflow is selected, but this can be changed as needed.
Note: This setting only affects new imports—existing projects will not be updated retroactively, even if the workflow setting is modified or a re-import occurs. Changes in Opportunity fields (such as name) will still be reflected in the project upon re-import, but the workflow will remain unchanged unless a new project is created.
Benefit: This enhancement streamlines the project creation process by allowing organizations to align imported projects with the appropriate workflows from the outset. By selecting a specific workflow during the import configuration, teams can ensure that new projects follow the correct governance, approvals, and task structures without requiring manual adjustments post-import. This reduces administrative overhead, improves consistency across project records, and supports better alignment with internal processes from the moment a project is created.
For further details see PSA – Salesforce Integration.

Description: In previous releases, projects imported from Salesforce into Upland PSA were always created in a fixed initial state, regardless of the Opportunity's attributes (e.g., probability or type). This lack of flexibility required administrators to manually adjust project states after import, introducing delays and inconsistencies in the project intake process.
To address this limitation, Upland PSA now supports conditional logic to determine the initial Workflow State of Projects created through Salesforce Opportunity imports.
Administrators can configure multi-condition "If" rules based on the Probability field in Salesforce. These rules define which State the project should enter upon creation in PSA, allowing for smarter automation of project workflows aligned with CRM data.
This configuration is available in Integration > System > CRM > Salesforce > Workflow Transition Logic, where you can define multiple Rules, reorder them, and specify target States filtered by the selected Workflow. The Workflow Status dropdown is only shown at the parent condition level, similar to the formatting tab in Timesheet Manager. The Target State options are limited to those that are one step after the Initial State defined in the General tab of the Salesforce integration settings, ensuring valid and consistent transitions.
Note: The Probability field accept only integer values (no decimals) to align with Salesforce’s native behavior. Additionally, these rules apply only during the creation of a new PSA project from an opportunity. Updates to existing projects via re-import will not trigger the workflow logic.
For example:
- If Probability <= 50% → move to "Requested" state
- If Probability = 75% → move to "Approved" state

Project creation occurs automatically when the CRM Data Exchange Automation Service runs in PSA.
Attempting to modify workflows tied to these rules will trigger alerts to maintain integration integrity.
Benefit: This enhancement improves operational efficiency by automating state transitions based on Salesforce Opportunity data. It reduces manual intervention, ensures consistent handling of project workflows, and accelerates onboarding of newly won or forecasted opportunities. By integrating conditional logic directly into the import process, organizations can better align sales forecasting with delivery planning, improving governance and reducing errors in project state assignment.
For further details see PSA – Salesforce Integration.
Description: Upland PSA now offers a native Power BI integration, allowing Administrators to seamlessly connect PSA data with Microsoft Power BI for advanced analytics and reporting.
Power BI empowers users to analyze data from multiple systems, create rich visual reports, and monitor project and business performance in real time. With this integration, Upland PSA data can now become a core part of your business intelligence strategy.
Note: To create the stored procedures, contact PSA Support to discuss your specific business requirements.
Configure Connection:
- From the Icon Bar click Integrations
 .
. - Click the new Power BI option.

- The Configuration Settings for Power BI page includes a Token field and a Generate button, allowing Administrators to securely generate a Token
- Click Copy to Clipboard.
- Open Power BI.
- Paste the copied Token into the Token field.

- Copy and paste your Upland PSA URL in the Upland PSA URL field.
Example: https://ACME.tenrox.net/TEnterprise/Core/Base/MainFrame2.aspx#1 Copy https://ACME.tenrox.net/ and omit the rest.

- Click Load.
Security Permission Tied to this Feature:

To support this feature, a new security permission—Power BI Integration—has been added under Setup > Organization > System > Security > Security Profile > Tools. This setting is enabled by default for administrator users and disabled for all others.
Benefit: This enhancement enables users to build interactive dashboards, track performance indicators, and visualize PSA data directly in Power BI, helping teams make more informed, data-driven decisions.
New Timesheet

Description: A new icon ( ) has been added to the Timesheet interface to clearly indicate partially approved Time Entries. This enhancement addresses scenarios where individual Time Entries are approved by some Project Managers, but the overall Timesheet remains in a Completed state due to pending approvals from others.
Example Scenario
A standard user, Jane Doe, submits a timesheet with two time entries:
- 1 hour logged against Project A1
- 2 hours logged against Project A2
The Project Manager for Project A1 approves only the individual time entry, not the timesheet.
The Project Manager for Project A2 approves the timesheet.
When a General Manager or any other approver views the timesheet:
- The time entry for Project A1 is marked with the icon.
- The time entry for Project A2 is marked with the
 icon.
icon.
Benefit: This improvement makes the timesheet approval process more transparent by clearly showing which Entries are only partially approved. It helps project managers collaborate more effectively, reduces delays caused by unclear approval status, and removes the need for manual checks.
for further details see Visibility of Partially Approved Timesheet Entries.
Notifications

Description: In previous releases, Timesheet Workflow Notifications did not include key summary details such as total hours submitted, requiring approvers to log into Upland PSA to view Timesheets before making approval decisions. This added unnecessary steps, delayed the process, and reduced efficiency, particularly when managing high volumes or approving directly from platforms like Microsoft Teams.
To address this, a new %TIMESH_TTL_HOURS% parameter has been added to Timesheet Workflow Notifications. Administrators can include this parameter in the notification message by typing “%” in the Notification Text field, which brings up a list of available parameters.

The %TIMESH_TTL_HOURS% parameter displays the total number of hours submitted for the selected period, regardless of the approver’s visibility into individual entries.
Benefit: This enhancement streamlines the approval process by giving approvers the context they need to make faster, more informed decisions without navigating into PSA. It improves the usability of notifications and supports more effective approvals from integrated platforms like Microsoft Teams.
for further details see Workflow Notification Parameters.

Description: Enhancements to the Announcement Notifications feature now let you post important messages as persistent in-app banners, email messages, or both. This update adds flexible delivery methods, scheduling controls, and an improved in-app viewing experience to help ensure that critical communications reach the right users at the right time.

What’s new
When editing an announcement, you will notice the following changes:
- A new Delivery Method selection list is now available, allowing you to choose to send announcements via Email, In-App, or both..
Note: Email is selected by default.
- The Time field has been renamed to Scheduled Send Time to simplify announcement setup..
- When you select In-App from the Delivery Method dropdown, a new section titled In-App Persistence appears. An information icon is displayed next to this title. Hovering over the icon shows the message: This announcement will be displayed upon login until the selected Date and Time. In this section, you can define the following settings:
- Scheduled End Date:The date when the announcement will stop appearing to users in the application.
- Scheduled End Time: The time on the Scheduled End Date when the announcement will no longer be shown.
- Display Only Once: When selected, the announcement appears only once to each user upon login.
Note: This option is unchecked by default.
Furthermore, to support this improvement, new fields have been added to the Announcement Notifications list column selection. These new columns give users greater visibility into delivery options and scheduling details when viewing or filtering the records. New and updated columns:
- Scheduled End Date
- Display Only Once
- Scheduled End Time
- Delivery Method (shows a comma-separated list of selected values from the notification edit page)
- Scheduled Send Time (renamed from Time)
How it works
The way an announcement is delivered depends on the selected delivery method, the targeted recipients, and whether the Display only once option is enabled. Use the scenarios below to understand how each combination behaves in the application. Select a case to view details.
- If recipients are logged in when the notification is sent, a blue banner appears at the top of their screen.

- When recipients log in, a dialog box lists all in-app notifications. The background is disabled until the dialog box is closed.
- The dialog box reappears at each login until the scheduled end date and time set in Announcement Settings, unless Display only once is selected. In that case, the notification appears only once and does not return after being closed.
- All targeted recipients receive the announcement by email.

- Logged-in recipients see a blue banner immediately.
- On login, recipients see a dialog box listing all in-app notifications.
- The dialog box appears only once and does not return after being closed.
Note: Additional behavior notes
- Announcements remain marked as unread until the scheduled end date/time.
- They do not appear on the My Notifications page until that date/time.
- They are not removed by archiving until after the scheduled end date/time.
- Linked to the Notification Center — disabled notifications prevent delivery.
Benefit: These enhancements help ensure that important messages are delivered in a timely and visible way. Administrators can match delivery options to the urgency of the message, combine in-app and email channels for broader reach, and use scheduling to control message lifespan. Persistent banners and modals keep critical information in view without disrupting workflow, while new list columns improve tracking and management of announcements.
For further details see:
Organization Breakdown Structure (OBS)

Description: In previous releases, administrators had no visibility into who updated User information or when those updates occurred, making it difficult to audit changes or maintain compliance. To improve traceability, the system now provides detailed auditing for User updates—but only for changes made directly through the User Edit page.
When User Detailed Auditing is enabled under Setup > Organization > System > Security > Audit Setup, the system now records modifications made through the General, Personal, and Security tabs of the User Edit page. These changes appear in the new History tab, including updates to fields such as Title, Resource Type, Functional Group, Team and other list-based or future-dated fields.
Note: Only modifications performed within the User Edit page (General, Personal, and Security tabs) are audited.
Caution: Modifications made to a user outside of the User Edit page—such as editing a Team by associating a User with it—are not yet included in the User History. Auditing for these types of modifications will be available in an upcoming release.
Benefit: This enhancement provides a reliable audit trail for administrator-driven updates to user profiles, improving oversight, accountability, and compliance. With clear historical records—including future-dated and list-based modifications—administrators can trace changes more easily, reduce ambiguity during investigations, and maintain consistent governance across all managed user information.
For further details see:

Description: Previously, administrators had to navigate away from the Role Forecast Rate page to verify the current rates associated with Cost and Billing rules. This made reviewing and managing rates slower and less efficient.
As of this release, when hovering over rule names in the Cost and Billing tabs on the Role Forecast Rate page, you will see tooltips displaying the current forecast rates for Regular Time, Overtime, and Double Overtime, including the applicable currency. These rates are sourced directly from the Cost and Billing Rule entries matching the Role’s Cost/Billing rule association date range.
Benefit: This improvement provides quick access to key rate information without leaving the Role setup page, speeding up rate reviews and reducing click-through effort to retrieve Cost and Billing information.
For further details see Manage Forecast Rate Rule Associations for Roles.

Description: In earlier releases, the Group Manager column was missing when browsing Groups. This made it difficult to identify the correct group at a glance. Users often had to rely on memory, external references, or trial and error to determine who managed a group, which was especially challenging in environments with similarly named groups.
In this release, a new column labeled Manager has been added to the Group List dialog box when browsing for a group
Note: This update applies to all areas where the Group browse select field appears, whether in user defined fields (UDF) or non-UDF contexts.
Benefit: By displaying the Group Manager you can make quicker, more informed selections. This small enhancement streamlines workflows and improves usability when working with multiple groups across the platform.
Description: In previous releases, Workflow Role associations were retained even after a User was Decommissioned. This resulted in unnecessary records being created for each Workflow State assignment.
As of this release, Workflow Role associations are automatically removed when a User is decommissioned. This change helps prevent excessive data growth and ensures that decommissioned users no longer retain workflow assignments.
Caution: When a User is decommissioned, all of their Workflow Roles, including Timesheet, Project, and other workflow roles, will be automatically removed. This action does not trigger any warnings and is irreversible.
Note: Role associations are preserved for Suspended Users.
Benefit: This update improves system performance by automatically removing workflow roles for decommissioned users, reducing unnecessary data. It keeps assignments clean and up-to-date, simplifies user management, and prevents potential confusion for administrators. Suspended users retain their roles, so ongoing work is not disrupted. Overall, this change helps maintain a more organized workflow environment and supports smoother, more efficient system operations.
For further details see Decommission a User.
Project Budget

Description: Previously, administrators lacked visibility into the change history Project Budgets in Upland PSA, making it difficult to audit updates or track how and when key Budget information were modified. This was especially limiting in environments with high compliance or accountability requirements.
To address this, when the new Budget Detailed Auditing option is enabled under Setup > Work tier of Audit Setup page (Setup > Organization > System > Security), all modifications to Budgets are now tracked and displayed in the History dialog box.
To access the Budget History, click the Project Budget context menu and then choose History.
The History dialog box displays a chronological log of changes with clear details such as the field modified, its previous and new values, the user who made the update, and the date and time of modification (with time zone).
Note: For clarity, all time-related changes are shown in hours and all costs are shown in currency.
The feature tracks updates across a wide range of budget entries including Time, Costs, Billable and Non-billable Amounts, Budget Name, Description, and Dates, as well as baseline changes. Adding or removing subitems is also captured, with changes recorded as value shifts (e.g., from 0 to a positive amount for an addition, or to 0 for a deletion), and labeled with descriptive subitem names for easier identification.
Unlike system-generated or automatic recalculations (such as totals adjusting when subitems change), only direct user edits are recorded, ensuring the log reflects intentional actions.
This functionality is available for all budget types such as Task, Project, Assignment, and Role. API-based modifications are also recorded, giving you a complete, auditable history of budget activity.
Benefit: With the new Budget History feature, teams gain greater transparency and accountability in financial planning. By seeing exactly what was changed, who made the update, and when it happened, you can better understand the context behind budget adjustments and reduce the risk of miscommunication. Tracking manual edits while filtering out system-driven updates ensures the history remains accurate and focused on intentional user actions. Overall, this functionality empowers users to manage budgets with more confidence, accuracy, and control.
For further details see:
Project Management

Description: In past releases, Milestone Charge Entries were always created as Non-Payable by default, even when the Work Type and Charge were Payable. As a result, milestone amounts were recorded in the system but could not be treated as project costs, which prevented proper cost tracking and reporting.

Improvements in this release ensure that payable milestones are accurately reflected in project costs without being invoiced. When you complete a Billing Milestone, the system now creates a Charge Entry that reflects the correct Payable flag. If both the Work Type and Charge are set to Payable, the generated Charge Entry will also be marked Payable and treated as project cost.
Note: If either the Work Type or Charge is not set to Payable, the generated Charge Entry will remain Non-Payable.
Action Required: Upon upgrading to 2025 R3.0, please review your setup and, if necessary, update your Work Type and Charge configurations to confirm that the Payable flag reflects your intended project billing and cost requirements.
Error Handling
As part of this improvement, new validation checks help maintain data integrity when working with milestones and related financial records. If a milestone or its associated charge has already been invoiced or is linked to a Payroll Batch or Payable Batch, one of the following error messages will appear:
- Error! You cannot modify or delete this record. Please replace or remove the Payroll Batch associations before making any such modification.
- Error! You cannot modify or delete this record. Please replace or remove the Payable Batch associations before making any such modification.
- Error! You cannot un-complete this milestone because it is already processed for invoicing.
Benefit: This change ensures milestone amounts are accurately recorded as project costs when intended, improving cost tracking, reporting, and financial planning. You can now manage payable and non-payable milestones with confidence, reducing manual adjustments and administrative overhead.
For further details see Creating a Billing Milestone.
Description: In previous releases, when copying a project and selecting the User Defined Field values checkbox, all UDFs across related objects—Projects, Tasks, Milestones, and Work Items—were automatically included in the copy. This approach provided no control over which UDFs to carry forward.
This release introduces a more flexible and granular method for handling UDFs during the project copy process. Instead of a single checkbox affecting all objects, you now have the ability to selectively choose which UDFs to copy at each level of the project structure. New checkboxes have been added for Project UDFs, Task UDFs, Milestone UDFs, and Work Item UDFs, each clearly labeled and unchecked by default. This gives you precise control over what gets carried into the newly copied project, based on your needs.
From the Projects List page, when selecting Copy from a project’s context menu:
- Project UDFs: A new checkbox is available. When selected, all UDFs associated with the source project are copied to the new project. This option is unchecked by default.

- Task UDFs: A new checkbox is available under the Tasks section. When selected, all Task UDFs are copied. This option is unchecked by default.

- Milestone UDFs: A new checkbox is available under the Milestones section. When selected, all Milestone UDFs are copied. This option is unchecked by default..

- Work Item UDFs: A new checkbox is available under the Work Items section, below the browse selector. When enabled, all UDFs for the selected Work Items are copied. If the Work Items option is selected, this checkbox is automatically selected by default.

Note: The previous User Defined Field values checkbox has been deprecated and no longer available.
Benefit: This improvement allows you to tailor your project duplication process to specific requirements, ensuring that only relevant UDF data is carried forward.
For further details see:
- Copying a project
- Copying and Editing a Project
- Copying the User Defined Field Values of a Project and associated Tasks to a New Project
- Copying the Budget Notifications of a Project and its Associated Tasks to a New Project
- Copying the Work Item Entries and associated User Defined fields to a new Project

Description: To support better visibility into project workflow configurations, you now have the option to display the Workflow name and version number directly in the Project List view. A new Workflow column has been added to the list of available columns and can be manually included via the Column Selection. By default, this column is not displayed.
The Workflow column shows the Workflow name and Version number of the Project Workflow associated with each project, allowing project managers to easily identify which version is in use without opening individual records. This is especially useful for teams managing projects across multiple workflow versions.

Additionally, the State Name column now includes a tooltip that displays a list of all State Attributes currently enabled in the active Workflow State, sorted alphabetically. This allows you to immediately understand the status and contextual tags associated with a project at a glance.
Benefit: These enhancements make it easier for project managers to identify the workflow version and active state attributes directly from the Project List, supporting more efficient reviews and better process tracking.
For further details see Out-Of-The-Box Column Selection options | Project List.
Resource Management
Resource Management just got easier and more intuitive. Enjoy a refreshed interface, smoother workflows, and smarter insights to help you plan and manage with confidence. This release enhances usability, clarity, and control. We have modernized the interface for a cleaner, more intuitive experience, streamlined everyday workflows to save time, and strengthened security and insights so you can plan with confidence.
Together, these improvements make managing resources easier and more effective, aligned with today’s best practices.
Key Focus Areas:
- Modernize and Simplify the Interface: A refreshed design with cleaner pages, updated tooltips, and consistent dialog boxes for a more intuitive experience.
- Enhance User Experience and Efficiency: Streamlined Quick Add/Copy, removal of outdated elements, and improved workflows for faster task management.
- Strengthen Security and Insights: Expanded permissions, booking history, and advanced filtering to increase control, transparency, and decision-making.

While the interface has been modernized, there are no changes to how you access Work Plans. Depending on your role and permissions, you can continue to navigate to the appropriate Work Plan using the same familiar paths:
- Group Work Plan: Setup > Organization > Groups > Group Edit
- User Work Plan: Setup > Organization > Users > User Edit
- Role Work Plan: Setup > Organization > Roles > Role Edit
- Project Work Plan: Project List > Project Edit > Planners Or Project List > Context Menu
- Resource Scheduling Work Plan: Entries > Resource Scheduling
- Project Scheduling Work Plan: Entries > Project Scheduling
- My Work Plan: Entries > My Work Plan

When you access the new and improved Work Plans, you will notice a cleaner, more streamlined interface designed to enhance your experience. The redesign brings a modern Upland look while retaining all the functionality you rely on to manage your work effectively.
The changes, improvements, and deprecated or unsupported features are detailed below.
Header Area:

- As in previous releases, you can manage your Views from the View context menu. Selecting this menu displays the following options:
- Create: Define a new custom View.
- Edit Details: Modify details of the selected View.
- Manage: Modify a Private or Public View.
- Delete: Permanently remove a View you no longer need.
- Below these options, you will see a list of your existing Views. You can select any View to quickly switch to a saved configuration that matches your needs.

- The Group selection list works the same as in previous releases, but with a refreshed look. Click Group, then select one or more Groups from the list.

- The Refresh
 button functions the same as before, but with an updated appearance. Click Refresh to reload the latest data.
 - The Filter
 button works as it did in previous releases, but with a cleaner, modern look. Click Filter to refine the data shown based on your selected criteria.
 - From the Context menu
 button, you can choose the following options:
- Export to Excel: Download the current view of the Work Plan as an Excel file for offline access or reporting.
- Legend: View a key explaining the colors used in the Work Plan for quick reference.
- Reports (available for Group, Project Work Plans only): Access predefined reports to analyze Work Plan data based on your current view.
- Adjustments (available for Project Work Plan only): Apply allocation adjustments to tasks or resources directly from the Work Plan.
- Project Planner (available for Project Work Plan only): Open the Project Planner to manage and visualize project timelines and dependencies in more detail.
- The Search
 feature works the same as before, but with a refreshed look. Select an anchored search criterion, then enter the text you want to find.
 - Pagination works just as it did in previous releases, but with a refreshed look. Use the page controls to navigate through your Work Plan data.
Left Panel Header
All buttons in the left panel have been visually refreshed to align with the modern Upland interface. This includes buttons such as New, and the Group By options as well as the Actions context menu. While the look has been updated for consistency and clarity, all functionality remains unchanged.

- New: Click to create a new Booking or Booking Request.
- Actions: Click to view the available options such as Modify, Split, Shift, Update Effort, Email, Delete Booking and Delete Request.
- Group by Resource Group
 : Click to organize the Work Plan by resource group, making it easier to view and manage a Group's assignments.
 - Group by Project
 : Click to organize the Work Plan by Project, allowing for clearer visibility into task allocations by project.
 - Group by Resource
 : Click to organize the Work Plan by individual Resources, helping you review and manage workloads at the person level.
Right Panel Header
In previous releases, many settings that controlled the right panel of the Work Plans, such as Timeline View, calendar selection, and Heat Map configuration, were located in the left panel. This often created confusion and disrupted workflow. To improve clarity and usability, all controls that affect the right panel are now positioned directly on the right side, closer to the area they influence. The following updates reflect this change and introduce a more intuitive, modern interface.

- Calendar Control: Newly added calendar control that makes date selection faster and more flexible. Learn more about this enhancement in the New Calendar Control section.
- Timeline View Buttons: Newly added Daily, Weekly, and Monthly buttons for quicker timeline switching in the Work Plan. Learn more in the Timeline View Buttons section. Learn more in the New Timeline View Buttons section.
- Chart
 View or Grid
  View: Updated buttons for a more modern look. The functionality remains unchanged.
 - Heat Map
 : Updated button for a more modern look. The Heat Map dialog box now matches the updated interface and has an improve range control for better usability. Learn more in the Improved Heat Map section.
 - Removed zero values for empty bookings – When no booking exists, the system no longer shows 0:00 (hours) or 0.00 (FTE), reducing visual clutter and making schedules easier to read.
Grouping Row

The grouping row includes several elements and visual indicators to help you manage bookings efficiently. While the functionality remains unchanged, the icons and buttons have been updated with a fresh new look to align with the modern Upland interface.
- Context menu : Click to access options such as Quick Add, New Booking, New Request, Modify, Email, Delete Bookings, and Delete Requests.
- Expand
 /Collapse
  buttons: Click to show or hide the Booking row.
 - Suspended Users or Roles: Names are displayed in red to indicate suspended status.
- Overallocated Users
 : A red icon appears next to the name to indicate overallocation.
Booking Row
The booking row includes several contextual actions and visual indicators to support efficient task and resource management. While the functionality remains unchanged, the icons and buttons have been updated with a fresh new look to align with the modern Upland interface.

- Context menu : Click to access options such as Edit, Matching Criteria, Quick Copy, Copy, Modify, Split, Shift, Update Effort, Find Matches, Notes, Email and Delete.
- Matching Criteria
 : Click the icon to open the Matching Criteria dialog, where you can add, remove, or manage criteria.
Note: A counter (example:
 ) appears when matching criteria exist for the booking.
 - Notes
 : Click the icon to open the Notes dialog, where you can view, add, or manage notes.
 Note: A counter (example:
 ) appears when notes are available for the booking.
 - Belongs to my Resource Group indicator
 : A yellow vertical line indicates that the booking belongs to your resource group.

Furthermore, when you modify a booking using Quick Edit from the booking context menu, the UI elements now follow the modern Upland design.
- Buttons such as Save and Cancel display the updated style.
- Selection boxes have been refreshed with the new UI.
- Resizable columns allow you to adjust the width to view or edit information more easily.
- Overall layout reflects the modern Upland look and feel.
Booking Request Row
The booking request row provides key actions and indicators to help you manage pending requests effectively. While the functionality remains unchanged, the icons and buttons have been updated with a fresh new look to align with the modern Upland interface.

- Context menu : Click to access options such as Modify, Delete, Matching Criteria, Attachments, History, Assignments, Create Fulfillment as well as actions based on the current state of the Resource Request Workflow and the rights assigned to you such as Approve, Recall or Reject.
- Matching Criteria : Click the icon to open the Matching Criteria dialog, where you can add, remove, or manage criteria.
Note: A counter (example:
) appears when matching criteria exist for the booking. - History
 : Click the icon to open the History dialog, where you can view a complete log of actions taken on the request such as Source State, Destination State, Action, Modified Date and Modified By.
 - Attachments
 : Click the icon to open the Attachments dialog, where you can upload, download, preview, or delete documents related to the request.
Note: A counter (example:
 ) appears when attachments exist for the booking.
 - Request Details
 /
/ : Hover over the to view a summary of the request, including:Tracking #, State, Submitted by, Role, User, Project, Allocation, From and To.
 - Improved Request Tooltip Hovering over a request bar in the right panel displays an enhanced summary tooltip with key details at a glance. The tooltip includes: Tracking #, State, Submitted by, Role, User, Project, Allocation, From, and To dates, making it easier to understand the request without needing to open it.
Right Panel
The pane panel has received a visual update as part of the broader UI refresh. The most noticeable change is the removal of the alternating light blue and white column colors as well as the borders, resulting in a cleaner and more streamlined look.
Additionally, all buttons and controls that influence the right pane, such as the newCalendar Control, Timeline View Button, Chart ![]() View or Grid
View or Grid ![]() View, and Heat Map settings, have been improved and relocated to the right pane header area, directly above the content they affect. For further details refer to Right Panel Header.
View, and Heat Map settings, have been improved and relocated to the right pane header area, directly above the content they affect. For further details refer to Right Panel Header.
The separator between the left and right panels now a three-dot handle, consistent with other dual-pane areas of the application, such as Expense Reports. This visual cue helps you recognize the draggable nature of the divider.
These changes improve usability by placing relevant controls closer to the area they influence, reducing confusion and unnecessary navigation. Functionally, everything continues to work as before—the enhancements are strictly visual, aimed at delivering a more intuitive and consistent user experience.
Bottom Section

The bottom section of the Workplan has received visual updates, including improved spacing, refreshed colors, and new icons.
- The Refresh button functions the same as before, but with an updated appearance. Click Refresh to reload the latest data.
- The Filter button works as it did in previous releases, but with a cleaner, modern look. Click Filter to refine the data shown based on your selected criteria
- The Heat Map button was updated for a more modern look. The Heat Map dialog box now matches the updated interface and has an improve range control for better usability. Learn more in the Improved Heat Map section.
- The Search feature works the same as before, but with a refreshed look.
- Pagination works just as it did in previous releases, but with a refreshed look and new position. Use the page controls to navigate through data.
These UI/UX enhancements provide a cleaner, more intuitive experience, while functionality remains unchanged, you can continue working as you did in previous releases.

Description: In past releases, changing the Timeline View in the Work Plan required clicking the table header, which was not always intuitive.
Now, you can quickly switch between Daily (D), Weekly (W), and Monthly (M) views using dedicated buttons.
| Selected View | Column Format | Tooltip (Column header) |
|---|---|---|
| Daily | MM
DD Example: Oct 01 |
(Weekday, MM DD, YYYY) Example: Wed, Oct 01, 2025 |
| Weekly | Start date of the week (MM DD) Example: Oct 13 |
(Q# YYYY) Example: Q4 2025 |
| Monthly | MM YYYY
Example: Dec 2025 |
(Q# YYYY) Example: Q4 2025 |
Note: The background color of the selected Timeline View button changes to blue, providing a clear visual indicator of the active one.
When you hover over a column header, a tooltip appears showing additional information about the date or date range in Daily, Weekly and Monthly views. This helps you better understand the time period represented in each column.
Benefit: This makes it easier and faster to adjust your view to fit your planning needs.
For further details see Use Timeline View Buttons in the Work Plans.

Description: In prior versions, the Summary section in the Project Work Plan displayed key time and financial metrics, but the compact layout and uniform formatting occasionally made it difficult to distinguish between related data points. This could lead to extra effort when reviewing multiple metrics side by side.
The Summary section in the Project Work Plan has been visually enhanced to align with the modern Upland design standards. While no functional changes were made, the updated interface introduces clearer spacing, improved alignment, and consistent font styles across all data elements, such as:
- Time (hrs)
- Billable and Non-billable Time (hrs)
- Cost and Billable/Non-billable Amounts (Currency)
- Work Plan and EAC values (Billable, Non-billable, and Total)
This refreshed look brings the Summary section in line with other modernized areas of the Work Plan.
Note: When the available screen space is smaller than the space needed to display all selected KPIs in the summary section, a scroll bar appears so that you can navigate through them.
Benefit: The improved layout enhances visual clarity, making it easier for users to scan and interpret data at a glance. This streamlines the review of time and cost information across billable and non-billable categories, supporting more efficient project oversight. The consistent visual language also contributes to a unified user experience throughout the platform.

Description: In earlier versions, tooltips in Work Plans were inconsistent in appearance and not always present where needed. The styling varied across elements, and in some cases, longer text was truncated without hover support, limiting the ability to view full information efficiently.
In this release, all tooltips in the Work Plans area have been standardized to feature a black background with white text and a subtle border, ensuring consistency and improved legibility. These tooltips now appear across key interactive areas, including:
- Calendar Notes and Holidays
- Grand Total rows
- Adjusted time entries in the scheduling grid
- Conditional formatting indicators
- Truncated names or labels, such as task or booking attributes
These updates are visual only and do not affect underlying functionality.
Benefit: This update improves the overall clarity and accessibility of tooltip information within Work Plans. Users benefit from a uniform and visually clean experience, enabling them to quickly review details without distraction or additional clicks. Enhanced tooltip coverage also helps reduce ambiguity, supporting more confident and efficient decision-making.
Description: Tooltips are now available for Project, Resource Requests and Allocation Details in Chart View. Each new tooltip provides detailed context to help you quickly understand Project, Resource Request, and Allocation information.
- Project details tooltip: Displays the Project Name, Client Name, Project Manager, Project Start date, Project End date, Tracking # and the current Workflow State of the Project.

- Booking Request details tooltip: Displays the Tracking #, State, Submitted by, Role, User, Project, Allocation, From and To details of the Booking Request.

- Allocation details tooltip (Chart view): Displays the Allocated Details such as From, To and Allocation as well as the Booking Details such as First Allocation, Last Allocation and Total Allocation.

Benefit: New tooltips for Projects, Resource Requests, and Allocations deliver clear, contextual details at a glance, while the enhanced tooltips across Work Plans ensure consistency and readability throughout the application. These improvements streamline workflows, reduce confusion, and make it easier to understand key information quickly.

Description: In earlier versions, the Legend dialog box in the Work Plan presented all necessary information, but the layout offered limited spacing and minimal visual distinction between legend items. This design made it more difficult for some users to quickly identify and interpret the meaning of various colors and indicators, particularly in time-sensitive scenarios.
In this release, the Legend dialog box has been refreshed to align with the latest Upland interface standards. The updated layout introduces enhanced spacing, improved text readability, and consistent formatting across all legend elements. These changes support a cleaner and more structured presentation of information.
Benefit: The redesigned dialog improves the user experience by making the content easier to scan and understand. The clearer layout helps users locate key legend items more efficiently, supporting faster decision-making and reducing the need to reference supporting documentation. This update also contributes to a more consistent visual experience across the application.
Description: We have modernized several Resource Management dialog boxes to deliver a cleaner, more consistent, and intuitive experience. Each dialog box now features a streamlined layout, clearer labeling, and updated controls designed to reduce effort and improve usability.
These improvements not only enhance clarity and efficiency but also bring the dialog boxes in line with the broader modern look and feel of PSA, ensuring a more uniform experience across the application.
You can explore the improvements in detail by selecting any of the updated dialog boxes below:

Key updates to the New Booking dialog box include control relocations, and visual enhancements such as spacing, alignment, and color updates:
- Booking and Booking Properties combined: The previous Booking and Booking Properties sections are now merged into a single section called Booking Properties.
- Allocation section repositioned: The Allocation section has been moved to the right side of the dialog box, with fields grouped more logically for improved usability.
- Matching Criteria – The Matching Criteria link is now a button, positioned to the right of the Booking Type field, aligning related fields more clearly.
- Links converted to buttons: The Save, Save & New, and Save & Copy options are now presented as buttons and relocated to the bottom-right corner of the dialog box.
- Custom Booking Attributes: – Any custom-defined booking attributes now appear immediately after the Billable checkbox.

Key updates to the Modify Booking dialog box include control relocations, and visual enhancements such as spacing, alignment, and color updates:
- Booking and Booking Properties combined: The previous Booking and Booking Properties sections are now merged into a single section called Booking Properties.
- Allocation section repositioned: The Allocation section has been moved to the right side of the dialog box, with fields grouped more logically for improved usability.
- Links converted to buttons: The Applyoptions is now presented as button and relocated to the bottom-right corner of the dialog box.
- Custom Booking Attributes: Any custom-defined booking attributes now appear immediately after the Billable checkbox.

Key updates to the New Request dialog box include control relocations, and visual enhancements such as spacing, alignment, and color updates:
- Request and Request Properties combined – The previous Request and Request Properties sections are now merged into a single section called Request Properties.
- Allocation section repositioned – The Allocation section has been moved to the right side of the dialog box, with fields grouped more logically for improved usability.
- Matching Criteria – The Matching Criteria link is now a button, positioned to the right of the Booking Type field, aligning related fields more clearly.
- Links converted to buttons – The Save, Save & New, and Save & Copy options are now presented as buttons and relocated to the bottom-right corner of the dialog box.
- Custom Attributes – Any custom-defined Attributes now appear immediately after the Billable checkbox.

Key updates to the Copy Booking dialog box include control relocations, and visual enhancements such as spacing, alignment, and color updates:
- Booking and Booking Properties combined: The previous Booking and Booking Properties sections are now merged into a single section called Booking Properties.
- Allocation section repositioned: The Allocation section has been moved to the right side of the dialog box, with fields grouped more logically for improved usability.
- Matching Criteria – The Matching Criteria link is now a button, positioned to the right of the Booking Type field, aligning related fields more clearly.
- Links converted to buttons: The Copy option is now presented as button and relocated to the bottom-right corner of the dialog box.
- Custom Booking Attributes: – Any custom-defined booking attributes now appear immediately after the Billable checkbox

Key updates to the Delete Booking dialog box include control relocations, and visual enhancements such as spacing, alignment, and color updates:
- From and To calendar controls relocated: The date selection fields now appear at the top of the dialog box for quicker access when defining a deletion range.
- Expanded resource and project details: Previously the dialog showed only Resources and Projects. The dialog now also shows the Task name. Furthermore, tooltips appear when you hover over resource, project, or task names so you can read full text when names are truncated.
Note: Names that exceed the display area are truncated in the dialog to preserve layout. You can click Show more to expand and view the full name, or hover over the truncated text to see the complete name in a tooltip.
- Action buttons repositioned: The Cancel and Delete actions are now presented as buttons in the bottom-right corner, matching common UI conventions and improving visibility.

Key updates to the Split Booking dialog box include:
- Visual refresh: Controls, sections, and buttons have been visually updated for better spacing, alignment, and readability.
- Color and styling improvements: Colors and highlights have been adjusted to improve clarity and distinguish key elements.
No fields or sections have been moved; this update focuses solely on improving the visual experience.

Key updates to the Shift Booking dialog box include:
- Visual refresh: Controls, sections, and buttons have been visually updated for better spacing, alignment, and readability.
- Color and styling improvements: Colors and highlights have been adjusted to improve clarity and distinguish key elements.
No fields or sections have been moved; this update focuses solely on improving the visual experience.

Key updates to the Update Booking dialog box include:
- Visual refresh: Controls, sections, and buttons have been visually updated for better spacing, alignment, and readability.
- Color and styling improvements: Colors and highlights have been adjusted to improve clarity and distinguish key elements.
No fields or sections have been moved; this update focuses solely on improving the visual experience
Benefit: These updates make your day-to-day tasks faster and easier. The modernized design reduces unnecessary clicks, the new calendar control simplifies date selection, and the consistent look and feel across dialog boxes helps you navigate with confidence. Together, these changes improve efficiency and create a smoother, more intuitive experience in Resource Management.

Description: In earlier versions, the Export to Excel dialog box offered all necessary options for exporting spreadsheets, but its dense layout and compact styling made it harder to quickly scan and select settings. Additionally, clicking Export opened a new browser window, which could disrupt your workflow and cause confusion.
In this release, the Export to Excel dialog box has been redesigned to align with the modern Upland visual style. The refreshed interface features cleaner spacing, improved alignment, and clearer typography visually organized and easier to understand at a glance.
A significant usability improvement is that clicking Export no longer opens a new browser window. Instead, the export process happens seamlessly within the current window, eliminating interruptions and maintaining your focus within the workflow. This reduces the risk of lost context and streamlines the export experience.

Another key enhancement is the modernization of the Calendar control used in date selection within the dialog. The calendar now adopts a more contemporary design approach. Dates that cannot be selected, such as past dates or disabled periods, are visually distinct with muted styling, making it immediately clear which dates are unavailable. This visual differentiation prevents errors and helps you quickly identify valid date options without confusion.
Benefit: These improvements enhance the overall clarity and confidence when exporting data. The interface now supports faster review and selection of export settings, minimizes the chance of mistakes, and creates a smoother, more intuitive experience. The consistent, modern look also reinforces a professional and unified platform design.

Description: The Heat Map configuration dialog box has been refreshed to align with the modern Upland interface. In addition to visual updates, we have improved the range adjustment controls to simplify setup and avoid common issues:
- The left end point of the range slider has been removed. In past releases, adjusting this end point caused the final threshold to shift unexpectedly.
Note: Only the right end point is now used to define the Heat Map range.
- The right end point is hidden when the maximum range is applied and visible when adjustments are possible.
Benefit: These updates improve the configuration experience and ensure greater consistency across the application.

Description: In previous releases, navigating to a different date, especially one far in the past or future, required clicking the forward or back arrows repeatedly. With this release, a new, intuitive, and flexible calendar control is now available.
- You can now type dates directly in the date field, which is especially useful for users who prefer manual entry.
- Use the back and forward arrows to move through periods one step at a time.
- The Today link allows you to return to the current date instantly.
- Click the calendar icon to open a modern date picker where you can:
- You can navigate by month and year.
- Select a specific day. The selected date is circled with a blue background.
- The current date is automatically circled in black., helping you stay oriented.
Benefit: This update makes date selection much more efficient, especially when working with long timelines. The month and year selectors make it easy to jump across long time ranges. It supports a variety of working styles, whether you prefer to click, type, or jump, and brings the control in line with the modern, consistent design of the Upland interface.

Description: In previous releases, after copying or editing a booking, the new or updated booking line was not visually highlighted. This made it difficult to quickly locate the relevant booking when many entries are present in the Work Plan.
Improvements in this release ensure that when you save a booking via Quick Copy, Quick Edit, or the Booking Edit dialog box, the line is now highlighted in light blue for a few seconds. The highlight then fades back to the normal background color. This helps you quickly spot the booking.
This change applies across all Work Plans, including Group, User, Role, Project, Resource Scheduling, Project Scheduling, and My Work Plan
Benefit: The temporary highlight makes it easy to spot newly copied or edited bookings, reducing the time spent searching through entries and helping you manage multiple bookings more efficiently.
For further details refer to:

Description: In the previous releases, the Role you selected in Quick Add changed automatically when you chose a User. This caused you to lose your initial Role selection and required extra manual updates.
Improvements in this release ensure that when you select a Role first in Quick Add and then choose a User, the selected Role remains unchanged. This behavior applies across all Work Plans, including Group, User, Role, Project, Resource Scheduling, Project Scheduling, and My Work Plan.
Benefit: You no longer need to re-enter the Role after selecting a User. This saves time, reduces manual edits, and ensures your intended Role assignment is retained throughout the booking process.

Description: In previous releases, when you used Quick Copy, the copied booking appeared at the top of the list instead of directly below the original booking. This made it harder to track which booking you had copied.
Improvements in this release ensure that when you use Quick Copy, the new Booking now appears directly below the booking you copied. This change applies across all Work Plans, including Group, User, Role, Project, Resource Scheduling, Project Scheduling, and My Work Plan.
Benefit: Placing the copied booking directly below the original makes it easier to identify related entries and reduces the chance of editing the wrong booking. This improves clarity and speeds up your workflow when managing multiple bookings.

Description: To ensure consistent terminology across the system, the label Grand Total has been updated to "Total" in the Work Plan interface.
This change applies to all Work Plans:
- Group Work Plan: Setup > Organization > Groups > Group Edit
- User Work Plan: Setup > Organization > Users > User Edit
- Role Work Plan: Setup > Organization > Roles > Role Edit
- Project Work Plan: Project List > Project Edit > Planners Or Project List > Context Menu
- Resource Scheduling Work Plan: Entries > Resource Scheduling
- Project Scheduling Work Plan: Entries > Project Scheduling
- My Work Plan: Entries > My Work Plan
This update is reflected in both the View Settings and the main Work Plan display, ensuring a consistent user experience throughout the interface.
Benefit: This update improves clarity and aligns terminology across the platform, making it easier for users to understand and navigate the Work Plan. By standardizing the label to "Total," users can quickly interpret data without confusion, leading to a more consistent and intuitive experience.

Description: In the past, when you created a Booking in the Work Plan by first selecting a User and then the Task, the Allocation End Date defaulted to the current date. This forced you to adjust it manually to match the Task End Date, which was both time-consuming and prone to errors.
As of this release, the Allocation End Date now automatically sets to the earlier of the Task End Date or your Offboarding Date. This improvement applies to all Work Plans across the application, ensuring consistency wherever you work.
Example 1: Allocation End Date = Resource Offboarding Date

If a Task ends August 31 but your Offboarding Date is August 30, the Allocation End Date is set to August 30. This ensures the Booking does not extend beyond your availability.
Example 2: Allocation End Date = Task End Date

If a Task ends on August 25 and your Offboarding Date is August 30, the Allocation End Date is set to August 25. This ensures the Booking does not extend beyond the task itself.
Benefit: You no longer need to manually correct allocation end dates. By automatically choosing the earlier of the Task End Date or the resource's Offboarding Date, the system provides greater accuracy and consistency in scheduling. This reduces effort, prevents mistakes, and gives you confidence that your bookings in any Work Plan always reflect the correct timelines.

Description: In previous releases, the Quick Add/Edit Task selection box included expired Tasks, making it harder to identify the correct Task when creating or editing a Booking.
This Quick Add/Edit Task selection box now shows only ongoing Tasks or those starting in the future. By default, expired Tasks are hidden. You can choose to Show All Tasks by selecting the checkbox in New Booking > Task List.
This behavior applies across all Work Plans, including Group, User, Role, Project, Resource Scheduling, Project Scheduling, and My Work Plan.
Benefit: This improvement helps you avoid booking against expired Tasks, shortens the time to find the right Task, and keeps the selection list focused on relevant work. You still have the option to view all tasks when needed.

Description: In previous releases, the Group list in the Resource Scheduling Work Plan included suspended or irrelevant groups, such as those containing only decommissioned users or roles, making it harder for Resource Managers to identify valid and assignable resources. This added unnecessary items to the selection list and hindered scheduling efficiency.
To resolve this, the Group list in the Resource Scheduling Work Plan has been enhanced to exclude all suspended and inactive groups. Specifically, it will no longer display:
- Groups that contain only Suspended or Decommissioned Users within the Resource Group category.
- Suspended Groups containing only suspended or decommissioned Users in the Resource Group category.
- Groups with only Suspended Roles.
- Suspended Groups containing only suspended Roles.
- Groups with no members at all in the Resource Group category.
Only active Groups with at least one active User or Role assigned under the Resource Group type will now appear in the list.
Benefit: This enhancement significantly improves the clarity and usability of the Resource Scheduling Work Plan by ensuring only active, relevant Groups are available for selection. It helps scheduling managers make faster, more accurate decisions, reduces confusion from outdated data, and maintains cleaner group lists aligned with actual project and resource availability.

Description: A new History link is now available from the Booking row context menu. This option appears only when the Booking Detailed Auditing Event Type is enabled under Entry > Workforce Planning tier of Audit Setup page (Setup > Organization > System > Security). The following details are tracked:
- Booking modifications such as Role, User, Project, and Task
- Booking properties such as Booking Type, Booking Attributes, and any custom Properties
Note: Allocation changes are not included in detailed auditing.

The Booking History dialog box displays: Modification, Previous Value, New Value,Date Modified, and Modified By. You can:
- Refresh the list.
- Export the list to Excel.
- Search by any Modification, Previous Value, New Value,Date Modified, and Modified By.
- Pagination is available at the top right corner to facilitate easy navigation across pages.
- From the table header:
- Sort the columns by ascending or descending order simply by clicking a column header. Note that an arrow indicates the descending () or ascending () order applied to the column.
- Click
 and move a column to the desired position.
 - Dynamically resize column(s), to your preferred width. Simply move your cursor to the column boundary () you want to resize. When the cursor becomes a resize cursor, click and drag the column accordingly
- Sort the columns by ascending or descending order simply by clicking a column header. Note that an arrow indicates the descending (
Benefit: This improvement gives you greater transparency and control over bookings by providing a clear, detailed history of changes. You can see exactly who made updates, what changed, and when covering roles, projects, tasks, and booking properties. With flexible options to search, sort, and export, you can quickly find and organize the information you need. This makes it easier for you to strengthen audit compliance, ensure accountability, and streamline the review of booking activities.

Description: In previous releases, users of the Group, Project, Resource Scheduling and Project Scheduling Work Plans had no straightforward way to distinguish between User Bookings and Role-based Bookings. This lack of filtering made it difficult for Resource Managers and Project Planners to focus on unassigned capacity or generalized planning needs.
To address this, a new filter field called Booking is Role Booking has been added to the Advanced Filter and View Filter across the following Work Plans:
- Group Work Plan: Setup > Organization > Groups > Group Edit
- Project Work Plan: Project List > Project Edit > Planners Or Project List > Context Menu
- Resource Scheduling Work Plan: Entries > Resource Scheduling
- Project Scheduling Work Plan: Entries > Project Scheduling
This new filter supports the following options:
- Condition: In / Not In
- Value: Yes / No
Depending on the selected filter combination, you can now isolate only Role bookings, only User bookings, or combined views with flexible inclusion/exclusion logic based on role or user assignment. The outcomes of each filter configuration are detailed below:
| Field Name | Condition | Value 1 | Work Plan View Output |
|---|---|---|---|
| Booking is Role Booking | In | Yes | Displays only the role bookings |
| Booking is Role Booking | Not In | Yes | Displays only user bookings |
| Booking is Role Booking | In | No | Displays only user bookings |
| Booking is Role Booking | Not In | No | Displays only role bookings |
Benefit: This enhancement significantly improves visibility and focus in scheduling workflows by allowing users to segment booking types with precision. Resource managers can now quickly identify unassigned roles that require staffing, while project planners can isolate confirmed user allocations without manual visual inspection. This streamlines planning, improves capacity analysis, and supports more efficient project execution.

Description: In previous releases, Project Managers were unable to use the Project State Name as a Condition when configuring formatting rules for the Project Scheduling Work Plan Views. This limited their ability to visually differentiate bookings based on the project’s current state (e.g., Draft, Active, Completed), making it harder to prioritize and manage resources effectively.
As of this release, the Project State Name field has been added to the Conditional Formatting tab in the Project Scheduling Work Plan. This new option appears in the Field Name list. You can define rules using text-based inputs for specific State Names and apply formatting accordingly to highlight bookings associated with projects in particular states.
Benefit: This enhancement gives Project Managers greater flexibility and control over how project bookings are displayed. By allowing conditional formatting based on project state, teams can quickly identify and react to project progress or issues, streamline resource planning, and maintain better visibility of active work across the organization.

Description: In the previous release, users mentioned in Booking Notes received notifications but had to manually navigate to the relevant Project Workplan, slowing response time and increasing effort.
Two new parameters are now available in the Booking Note Mention Feature Notification: %LINK_PROJECT_WORK_PLAN% and %LINK_PROJECT_WORK_PLAN_NOSSO%. When included in the notification, these parameters provide a direct link to the Workplan of the associated Project.
Benefit: This enhancement streamlines workflow by allowing users to access the relevant Project Workplan immediately from the notification. It reduces time spent searching for project details and ensures that mentioned Resources can take prompt action based on the information in the Booking Note.
For further details see Booking Notes Mention Notification.
Security

Description: To support the new Homepage Templates feature, a dedicated security permission has been added to control access to the Homepage Templates designer. These access rights ensure that only authorized users can view, create, modify, or delete Homepage Templates, enabling targeted configuration of the Homepage experience for different user groups.
A new security setting, Homepage Templates, is available under: Setup > Organization > System > Security > Security Profile Edit > Setup > Organization.
This Security Permission includes four access rights:
- View: Controls visibility of the Homepage Templates link in the navigation menu.
- Modify: Allows editing of existing Templates .
- Create: Allows creation of new Templates .
- Delete: Allows removal of Templates .
Note: These permissions are enabled by default for the Administrator security profile and disabled for all other profiles.
Benefit: By introducing granular security permissions, administrators can safeguard homepage design settings while delegating template management to specific roles. This prevents unauthorized changes, ensures consistency in the homepage layout across the organization, and supports role-specific dashboards without compromising security or governance.
for further details see Manage Access to Homepage Templates.

Description: In previous releases, users without any of the following permissions—Can Hard Book all Users, Can Hard Book only myself, Can Hard Book only Users in my Resource Group, Can Soft Book all Users, Can Soft Book only myself, or Can Soft Book only Users in my Resource Group—were unable to create or modify any User bookings in the Work Plan. This limitation meant that even if a Resource was already Hard Booked on a Project, team members without these broader permissions could not adjust the booking. As a result, routine updates such as modifying hours, shifting dates, or changing between Hard and Soft Bookings required intervention from a Resource Manager or Administrator, creating bottlenecks and delaying project adjustments.
As of this release, a new security permission—Can only Book Users who are already Hard Booked in the Project—is now available under Workforce Planning (Security Profile > Entry). When enabled, it allows users to create, modify, or delete bookings for a User only if that User already has a Hard Booking on the Project.
Note: By default, the Can only Book Users who are already Hard Booked in the Project permission is enabled only for the Administrator Security Profile.
Scenario 1:
Audrey, a project planner, has access to the Work Plan and the Can only Book Users who are already Hard Booked in the Project security permission. This means she can create, modify, or delete bookings only for Users who already have a Hard Booking on that project.
For example, if UserA is already Hard Booked on ProjectX, Audrey can update UserA’s bookings. However, she cannot create a booking for UserB, who has no existing hard booking on ProjectX.
Scenario 2:
In cases where a Project Manager doesn’t have Delete rights under Can Hard Book All Users, adding a new Project Team member through the Work Plan can still allow them to delete that team member’s hard booking if they also have the Can only Book Users who are already Hard Booked in the Project permission.
Audrey, a project planner, has the following permissions:
- Only Modify and Create under Can Hard Book All Users (Delete right is not granted)
- Can only Book Users who are already Hard Booked in the Project
When Audrey hard books a new User through the Work Plan, that action makes the Users part of the project Team. As a result, the Can only Book Users who are already Hard Booked in the Project permission allows her to delete the hard booking — even though Delete rights were not explicitly granted under Can Hard Book All Users.
Benefit: This enhancement streamlines resource management by enabling authorized users to adjust bookings for users already committed to a project without needing to escalate to a resource manager. It reduces administrative overhead, shortens the time required to implement schedule or allocation changes, and ensures that project teams can respond more quickly to evolving needs. By limiting these actions to users who are already hard booked, the feature maintains governance and control over project resources while improving agility and operational efficiency.
For further details see Limit Bookings to Users Already Hard Booked on the Project.
System Notifications

Description: Previously, you had to monitor Project end dates manually and send reminders yourself. This made it easy to miss important deadlines or delay closing and extending projects.
With this release, we have introduced a new System Notification called Project End Date Reminder (Automation Service).
The Message body reads: This is a reminder that the end date for %PROJECT_NAME% is approaching on %PROJECT_END%.
The notification includes project-specific Parameters such as:
%PROJECT_NAME%- Name of the Project.%PROJECT_MANAGER_NAME%- Name of the Project Manager.%ALTERNATE_PROJECT_MANAGER%- Name of the Alternate Project Manager.%PROJECT_END%- End Date of the Project.
The Project End Date Reminder System Notification is processed through the new Project End Date Reminder Notifications Automation Processing Service. This service ensures that reminders are sent automatically based on your configured schedule.
When the process runs, the Project Manager will receive the notification by email and also see an alert in the Notification Center ![]() .
.
Note: If the Project Manager is marked as Out of Office in PSA, the notification is sent to the Alternate Project Manager instead.
Benefit: You no longer need to monitor project end dates manually or send reminder emails yourself. Automated notifications reduce your workload, prevent missed deadlines, and give you more control over project closure or extension. By receiving timely reminders, you can take the right actions to ensure smooth project management, avoid disruptions, and maintain accurate timelines.
for further details see Project End Date Reminder (Automation Service).

Description: A newly introduced System Notification titled Financial Planner Note Mention Notification is now available from System Notifications page (Setup > Notifications).
The email Notification will be sent to the mentioned Users in a Financial Planner Note, ensuring they are promptly informed and can take necessary action.
This email includes relevant details about the mention such as:
- Notification Title: Financial Planner Note Mention Notification
- To:
%USER_NAME%(receiver) - Title:
%PROJECT_NAME%Financial Planner - Message:
%USER_NAME%(sender) mentioned you in a Note added to the Financial Planner of the Project %PROJECT_NAME%.Note:
%FINANCIAL_PLANNER_NOTE%Note Period:
%NOTE_PERIOD%Note Category:
%NOTE_CATEGORY%Note Sub-Category:
%NOTE_SUB_CATEGORY%Note Item:
%NOTE_ITEM%
Field definitions:
%FINANCIAL_PLANNER_NOTE%: The text content entered in the Financial Planner Notes section. This note may include details, instructions, or comments related to a project’s financial planning activities.%NOTE_PERIOD%: The date range or period that the Financial Planner Note applies to, such as a specific month, quarter, or fiscal year.%NOTE_CATEGORY%: The primary classification assigned to the Financial Planner Note, used to group similar types of notes for reporting and organization.%NOTE_SUB_CATEGORY%: A secondary classification under the note category that provides more specific context for the Financial Planner Note.%NOTE_ITEM%: The specific charge, product, expense, or other financial planning item to which the note relates.
In addition to email notifications, mentioned users will also receive an alert in the Notification Center ![]() , keeping them informed within the application.
, keeping them informed within the application.
Benefit: The Financial Planner Notes Mention Notification enhances communication and collaboration by ensuring you are promptly alerted when mentioned in a Financial Planner Note. This feature helps streamline financial planning discussions and keeps all relevant stakeholders informed in real time.
- Enables users to tag relevant stakeholders (e.g., project managers, alternate managers, finance teams) for quick clarifications.
- Reduces the need for separate email chains by keeping all financial planning discussions within the system.
- Saves time spent searching for the right contact person or following up manually.
For further details see Financial Planner Note Mention Notification.
Timesheet Templates

Description: In previous releases, users were able to submit timesheets with 0 hours without any warning or confirmation. These submissions were frequently unintentional but when processed automatically, often resulted in inaccurate time reporting. This gap also led to inconsistencies in data used for billing, forecasting, and compliance audits, ultimately impacting the reliability of timesheet-driven processes.

As of this release a new Display Warning when empty Timesheet is submitted check box has been introduced within the Timesheet Template Rules tab. When this setting is active, users attempting to submit a Timesheet with zero hours will be presented with a confirmation dialog asking, Are you sure you want to submit this empty Timesheet? This prompt allows the user to either confirm and proceed with submission or cancel the action.
Note: The feature is disabled by default, giving organizations the flexibility to adopt it based on their internal processes and compliance requirements.
Benefit: This improvement helps prevent accidental 0-hour timesheet submissions from progressing through the approval workflow.
For further details see Display Warning When Empty Timesheet is Submitted.
Description: The Complete Timesheets [x] day(s) prior to the end of period and Complete Timesheets [x] day(s) after the end of period reminders now also trigger when a timesheet enters a rejected Sub-Workflow State.
Example: When a Project Manager rejects a specific Timesheet (a partial rejection), the Timesheet moves into a Sub-Workflow State requiring user action. The user must correct and resubmit the Timesheet. In this case, the configured reminders are now also sent to notify the user that their Timesheet needs attention.
These reminders are configured in Setup > Timesheet > Timesheet Templates > Timesheet Template Edit > Reminders and follow the same format as standard completion reminders.
Note: Escalation reminders are not affected by this change.
Benefit: This enhancement ensures users are promptly notified when their timesheets are partially or fully rejected within a Sub-Workflow, enabling faster corrections and resubmissions. Timely reminders help maintain accurate time reporting and smoother project management workflows.
For further details see:
UI/UX Enhancements
The UI/UX improvements described in this section aim to modernize the look and feel of the application, fostering uniformity and elevating user experience.

Description: IIn the previous release, the Comments editor in Work Items included extra controls and button placement that did not match other parts of the application. This inconsistency sometimes made it harder for users to quickly save their input.
The Comments editor in Work Items has been redesigned to align with standard patterns across the application. Updates include:
- The Cancel button has been removed.
- The Save button has been repositioned, updated with a new icon, and now shows Send
 on hover to better reflect its use for submitting comments.
 - A Show/Hide
 Formatting button has been added next to the Save button.
 - Formatting indicators and the character counter have been removed.
- The Delete and Edit buttons, which are available only for already sent comments, have been resized and restyled to match standard button design across the application.
Benefit: These improvements deliver a cleaner, more consistent interface. By simplifying the available options and standardizing button placement, users can enter and save comments more efficiently without distraction.
For further details see

Description: All Upland Analytics–related Security Permissions have been moved under a new section: Reports > Upland Analytics within the Security Profiles edit page (Setup > Organization > System > Security).
Any synced Upland Analytics Roles are also displayed in this list, alongside the following permissions:
- Can view Upland Analytics dashboards
- Upland Analytics Administrator
- Upland Analytics Read Only
- Upland Analytics Read Write
This change improves clarity and organization by grouping all Upland Analytics Permissions in one dedicated location, separate from other reporting options.

Other report-related Security Permissions now appear under Reports > Upland Reports. These include:
- Advanced Dashboards
- Advanced Reports
- Application Report
- Can Modify Report Scope
- Can modify Report Security
- Can report on any Client
- Can report on any Group
- Can report on any Project
- Can report on any User
- Public Tab
- Report Folder
- Reports Tab
- Upland PSA Reports
Benefit: This update provides a cleaner, more intuitive user experience by making it easier for administrators to locate and manage Upland Analytics permissions. By clearly separating Analytics and standard reporting permissions, the new structure reduces confusion, improves navigation, and streamlines security configuration tasks. This enhancement also supports consistency with the new dynamic synchronization of Upland Analytics Roles, ensuring both better organization and a smoother overall administrative experience.
Upland Analytics
Since the 2022 R2.0 release, Upland Analytics has been available in both Classic and New Analytics versions. This dual approach allowed you to explore the innovative features of New Analytics while continuing to work in the familiar Classic interface.
Now, we are fully transitioning to New Analytics—a modern, streamlined platform designed to elevate your data experience. With more intuitive navigation, optimized workflows, and advanced analytical capabilities, New Analytics empowers you to gain deeper, actionable insights faster than ever before.
This upgrade is seamless. Your existing reports and settings will be automatically migrated, ensuring uninterrupted access to your analytics. By moving entirely to New Analytics, we are providing a unified, future-ready platform that meets evolving business needs.
For tips on getting the most from New Analytics, visit the New Analytics Help Center.
Description: Previously, you could open dashboards from the PSA interface using the dashboard dropdown list. However, even when New Analytics was enabled, dashboards opened using the classic UA interface.
With this enhancement, dashboards you select from the PSA dashboard dropdown now open directly in UA New Analytics, as long as you have the necessary permissions and have selected dashboards to display. This update aligns your dashboard access with the rest of the New Analytics experience, providing a seamless and modern interface across the application.
You can continue setting a dashboard as your initial landing page, and it will now load using New Analytics by default.
Benefit: This improvement ensures a consistent and unified reporting experience across the platform. By directing dashboard access through New Analytics, users benefit from a more intuitive interface, enhanced performance, and alignment with other upgraded analytics features. It also reduces confusion by eliminating interface switching, which enhances productivity and reinforces adoption of the new UA experience.
For further details see:
Description: To enhance performance and prevent browser slowdowns, the Expand All / Collapse All button behavior in report creation and editing has been optimized. When a Data Source contains 200 or fewer fields, the Expand All / Collapse All button is available, allowing you to easily expand or collapse Views. However, when a Data Source contains more than 200 Fields, the button is hidden by design.
Benefit: This enhancement ensures consistent performance and a smoother user experience when working with large or complex data sets. By intelligently managing the availability of the Expand All / Collapse All option, the system prevents browser freezes, maintains stability, and improves responsiveness when creating or editing reports across data sources of varying sizes.
Description: Previously in Classic Analytics, the in-list On-Page Filter allowed you to select multiple values at once using checkboxes, keeping the menu open as you made your selections. This made it easy to quickly choose multiple Filter options without repetitive clicks.
With this enhancement, New Analytics now supports multi-select functionality in in-list on-page filters—just like in Classic Analytics. You can now select multiple values in one interaction, without the menu closing after each click.
For further details see Working With Filters in Upland Analytics.
Description: When the Append email timestamp setting is turned on, a server-side date stamp (Date/Time) is added to the Subject field of Subscription reports or reports sent instantly via the Send by Email option. This ensures that the date and time the report was generated are clearly displayed in the email subject.
Note: The Append email timestamp setting must be turned on through a database configuration. If you are interested in using this functionality, contact PSA Support to discuss your specific business requirements. In a future release, a setting will be available in the user interface for easier management of this feature.
Benefit: This enhancement helps recipients easily identify when a report was generated by displaying the exact timestamp in the subject line. This adds clarity and makes it easier to track and organize reports, ensuring better visibility and management of subscription-based or instantly sent reports.
For further details see Add Date/Time Stamp to Subscription and Send by Email Reports.
Description: In earlier versions, date filters were limited and often difficult to work with. Options such as Date, Current Day, Next Day, or Previous Day only covered narrow cases which made reporting less intuitive and slowed down analysis.
In the New Analytics, Date Filters have been redesigned to match common business needs. You can now select broader, more flexible options:
- Current to return records for the current day, week, month, quarter, or year.
- Previous to look back across one or more past periods.
- Next to look ahead at upcoming periods, starting from today.
- Range to define a custom start and end by day, week, month, quarter, or year.
- All YTD to quickly view all records from the beginning of the year to today.
- Null / Not Null to easily identify records with missing or valid dates.
Benefit: These improvements eliminate the need for manual date entry, reduce errors, and make reports easier to run. Instead of struggling with exact date calculations, you can now filter records in the way you naturally think about time — by weeks, months, quarters, or years.
For further details see Working With Filters in Upland Analytics.
Description: Previously, monthly subscriptions in Upland Analytics could only be scheduled on the 1st or 15th of the month.
This release extends the options to allow selection of any day of the month, including dates like the 3rd, 5th, or 7th, as well as the Last day of that month option.
Benefit: You can now schedule monthly subscriptions on any day of the month, ensuring alignment with reporting, billing, and operational timelines while reducing manual adjustments.
For further details see Subscriptions in Upland Analytics and Subscribe to a Report or Dashboard.
Description: In previous releases, it was possible to send email notifications and subscriptions to any recipient without domain restrictions, which posed significant data security risks. This lack of control could lead to unintentional data exposure or potential misuse of sensitive organizational information. With this enhancement, administrators can ensure that email subscriptions are sent only to recipients within a predefined list of authorized domains, safeguarding organizational data and aligning with security best practices.
In this release we are introducing a domain validation mechanism to enhance data security for email subscriptions.
Note: To enable this feature on your environment, contact PSA Support. Our team will assist in configuring the domain validation mechanism and ensuring the authorized domains list is properly set up to meet your organization's needs. This step is essential for activating the functionality and aligning it with your security requirements.
Once the authorized domains list is configured, the system will validate the recipient's email domain against the pre-approved list whenever an email subscription is created or sent. If the recipient's domain is not on the whitelist, the email will be blocked from being sent.
Benefit: This improvement ensures that email notifications are delivered only to recipients from authorized domains, significantly reducing the risk of unintentional data exposure
For further details see Restrict Upland Analytics Email Subscriptions to Authorized Domains.

Description: In past releases, Subscriptions could only be sent to individual users, requiring manual selection for each recipient.
As of this release, when creating or managing Subscriptions in Upland Analytics, you can now choose to send Subscriptions to User Groups and/or User Security Roles by selecting the required option from the Subscription Owner list.
Benefit: This enhancement streamlines communication by allowing Subscriptions to be sent directly to User Groups and User Security Roles, saving time and ensuring consistent delivery to predefined teams or roles.
For further details refer to the Subscriptions in Upland Analytics.

Description: A new Include On Page Filters section is now available when creating/managing a Subscription where you can now choose one of the following methods to manage on page filters:
- Do not include on page filters: Subscriptions will always be sent with the unfiltered report/dashboard.
- Include applied on page filters (Static): Subscriptions will include currently applied on page filters.
- Include saved on page filters (Dynamic): Subscriptions will include all saved on page filters.
Note: If there are no saved on page filters, you can select this option as a placeholder so that when on page filters are saved in the future, they will be automatically included in the subscription.
Benefit: This improvement empowers you with greater flexibility and control over your Subscriptions, enabling you to customize data output to suit your individual needs and preferences. Moreover, it ensures enhanced data accuracy and consistency, as subscriptions accurately reflect selected filters and remain consistent across various user sessions.
For further details refer to the Subscribe to a report or dashboard article in Analytics Help Center.

Description: Users with the Upland Analytics Administrator permission can now choose to Allow SFTP connection from the New Analytics Settings navigation pane.
Once configured, users can opt to save the exports/subscriptions in the SFTP root folder specified under SFTP Settings.
Note: We are currently working on enhancing this feature to allow for saving files in a specified folder rather than the root SFTP folder. This capability will be available in a future release, providing you with more control over file organization within your SFTP structure. Thank you for your patience and understanding as we continue to improve our services.
Benefit: This improvement simplifies New Analytics report delivery to external cloud drives, automating distribution and integration with other systems, thus reducing manual efforts and time consumption.
For further details refer to the SFTP settings article in Analytics Help Center.

Description: You can now Filter ![]() the Subscriptions list based on various criteria such as:
the Subscriptions list based on various criteria such as:
- Enabled status
- Email Subject
- Subscribed To (Report/Dashboard name)
- Created by (Owner)
- Schedule Type (Once, Daily, Weekly, Monthly)
Note: Despite showcasing the number of recipients in the Subscriptions list, you cannot apply a Filter based on the recipients' names.
Benefit: You can now effortlessly locate the required Subscription(s), even amidst a vast array of options, ensuring smoother navigation and increased efficiency.
For further details refer to the Subscriptions in Upland Analytics.

Description: You can now choose to include or exclude Metadata in exported or emailed .CSV files for all UA users. When opting to include metadata by selecting Include metadata on .CSV format files when downloading, the reports' titles and details about their generation, including the date and user responsible, are appended to the .CSV file. Otherwise, these details are omitted from the report.
Note: If your organization would like the Include metadata on .CSV format files when downloading setting modified, please contact PSA Support.
Benefit: You now have the flexibility to customize CSV file outputs based on your unique organizational requirements. Moreover, by excluding the metadata, you can seamlessly import the data into another system if needed, simplifying data transfer and integration processes.
For further details see:
-
The Default Settings article in Analytics Help Center.
-
Include Metadata in .CSV Format Files for Upland Analytics When Exporting or Emailing Reports
Description: Organizations can now choose to display both the Start and End Dates for each week when using Date Week Aggregated fields in Analytics Reports. Previously, only the Start Date of the week was shown.
Note: If your organization would like the Default Week Format setting modified, please contact PSA Support.
This enhancement provides clarity on the week's Start and End dates when using End Week, Start Week or Date Week fields such as the fields listed in the table below:
| Data Source | View | Field |
|---|---|---|
| Assignment Budget | Project | - Project Actual End Week - Project Actual Start Week |
| Audit Trail | Audit Trail | - Entry Date Week |
| Client Purchase Order | Project | - Project Actual End Week - Project Actual Start Week |
| Cost & Billing Rule Association | Project | - Project Actual End Week - Project Actual Start Week |
| Enhanced Resource Request | Project | - Project Actual End Week - Project Actual Start Week |
| Request Booking Details | - Request Booking Details Custom Date Week - Request Booking Details Date Week |
|
| Request Fulfillment | - Request Fulfillment Custom Date Week - Request Fulfillment Date Created Week - Request Fulfillment Date Modified Week - Request Fulfillment End Week - Request Fulfillment Start Week |
|
| Expense | Expense Entry Basic | - Expense Entry Date Week |
| Expense Report Summary | - Expense Report End Date Day of Week - Expense Report End Date Week - Expense Report Process Date Day of Week |
|
| Project | - Project Actual End Week - Project Actual Start Week |
|
| Expense Workflow History | Expense Report Summary | - Expense Report End Date Day of Week - Expense Report End Date Week - Expense Report Process Date Day of Week |
| Project | - Project Actual End Week - Project Actual Start Week |
|
| Financial | Project | - Project Actual End Week - Project Actual Start Week |
| Financial Planner | Project | - Project Actual End Week - Project Actual Start Week |
| Financial Planner Combined | Project | - Project Actual End Week - Project Actual Start Week |
| In Out Timesheet | Project | - Project Actual End Week - Project Actual Start Week |
| Invoice | Project | - Project Actual End Week - Project Actual Start Week |
| Invoice Summary |
- Invoice Document Date Week - Invoice Posted Date Week |
|
| Invoice & PO Associations | Project | - Project Actual End Week - Project Actual Start Week |
| Invoice Summary | - Invoice Document Date Week - Invoice Posted Date Week |
|
| Invoice PO Association | - Invoice PO Issue Date Week - Invoice PO Valid From Date Week - Invoice PO Valid To Date Week |
|
| Invoice Entry Details | Invoice Entry Details | - Invoice Entry Date Week |
| Project | - Project Actual End Week - Project Actual Start Week |
|
| Invoice Summary | - Invoice Document Date Week - Invoice Posted Date Week |
|
| Invoice Workflow History | Project | - Project Actual End Week - Project Actual Start Week |
| Invoice Summary | - Invoice Document Date Week - Invoice Posted Date Week |
|
| Leave Request | Leave Request | - Leave Request Date Created Week - Leave Request Date Modified Week - Leave Request End Week - Leave Request Start Week |
| Milestone Task Association | Milestone | - Milestone Actual Completion Date Week - Milestone Billing Date Week - Milestone Target Completion Date Week |
| Project | - Project Actual End Week - Project Actual Start Week |
|
| Money Charge | Money Charge | - Money Charge Entry Approval Date Week - Money Charge Entry Date Week |
| Project | - Project Actual End Week - Project Actual Start Week |
|
| Product | Product | - Product Entry Approval Date Week - Product Entry Date Week |
| Project | - Project Actual End Week - Project Actual Start Week |
|
| Program Management | Program Summary | - Program Actual End Week - Program Actual Start Week - Program Planned End Week - Program Planned Start Week |
| Project | - Project Actual End Week - Project Actual Start Week |
|
| Project Budget | Project | - Project Actual End Week - Project Actual Start Week |
| Project Budget Summary | - Project Budget End Week - Project Budget Start Week |
|
| Project Entry Details | Project | - Project Actual End Week - Project Actual Start Week |
| Project Management | Project | - Project Actual End Week - Project Actual Start Week |
| Project Planning | Milestone | - Milestone Actual Completion Date Week - Milestone Billing Date Week - Milestone Target Completion Date Week |
| Project | - Project Actual End Week - Project Actual Start Week |
|
| Project Rate Cards | Project | - Project Actual End Week - Project Actual Start Week |
| Project Team User Role Rate Association | - Project Rate Card Effective Date Week - Project Rate Card End Date Week - Project Team User Role Association Date Week - Project Team User Role End Date Week |
|
| Project Scheduling | Project | - Project Actual End Week - Project Actual Start Week |
| Project Allocation Summary | - Project Allocation Date Week | |
| Project Status Report Entry | Project | - Project Actual End Week - Project Actual Start Week |
| Resource Bookings | Project | - Project Actual End Week - Project Actual Start Week |
| Resource Allocations Details | - Resource Allocation Date Week | |
| Resource Request | Project | - Project Actual End Week - Project Actual Start Week |
| Revenue Batch | Project | - Project Actual End Week - Project Actual Start Week |
| Role Scheduling | Role Availability | - Availability Date Day of Week - Availability Date Week |
| Skill Associations | Resource Utilization Summary | - Calendar Date Week |
| Task Budget | Project | - Project Actual End Week - Project Actual Start Week |
| Task Budget Summary | - Task Budget End Week - Task Budget Start Week |
|
| Task Scheduling | Project | - Project Actual End Week - Project Actual Start Week |
| Task Allocation Summary | - Task Allocation Date Week | |
| Timesheet | Project | - Project Actual End Week - Project Actual Start Week |
| Time Entry Basic | - Time Entry Date Week | |
| Time Entry Extended | - Time Entry Reference Date Week | |
| User Scheduling | Resource Utilization Summary | - Calendar Date Week |
| WIP | Milestone | - Milestone Actual Completion Date Week - Milestone Billing Date Week - Milestone Target Completion Date Week |
| Project | - Project Actual End Week - Project Actual Start Week |
|
| WIP Accrual Batch | - WIP Accrual Batch Date Week | |
| Work | Milestone | - Milestone Actual Completion Date Week - Milestone Billing Date Week - Milestone Target Completion Date Week |
| Project | - Project Actual End Week - Project Actual Start Week |
|
| Recurring Billing Rule Detailed | - Recurring Billing Rule Entry Billing Date Week | |
| Recurring Billing Rule Summary | - Recurring Billing Rule End Week
- Recurring Billing Rule Start Week |
|
| Work Item Entry | Project | - Project Actual End Week - Project Actual Start Week |
| Work Item Entry | - Work Item Entry Date Created Week | |
| Work Process Entry | Project | - Project Actual End Week - Project Actual Start Week |
Benefit: This enhancement facilitates comprehensive week analysis by providing clear visibility into Week Start and End dates for improved understanding of weekly data trends.
For further details see Display Both Start and End Dates for Date Week Aggregated Fields in Upland Analytics Reports.
Description: A new Role Budget Data Source has been added to support more granular and flexible reporting on project budget allocations by role. This Data Source includes the following views: Base Currency, Billing Currency, Client, Client Created By User, Client Modified By User, Cost Currency, Portfolio, Project, Project Manager, Project Team Role and Role Budget Summary. These Views allow you to analyze budget data in the context of both organizational and financial dimensions.
Scoping options for this Data Source include All Projects, Available Projects, Client Contacts, My Portfolios and My Projects, providing tailored access to ensure data is relevant and secure based on user roles and permissions.
Benefit: The new Role Budget Data Source enables project managers, finance teams, and executives to report on planned budget amounts at the Role level across portfolios, clients, and projects. This allows for more accurate forecasting, better staffing alignment, and improved financial oversight. By incorporating multiple currency views and contextual project data, this data source helps stakeholders make informed decisions about resourcing, profitability, and budget performance throughout the project lifecycle.
For further details see Role Budget Data Source and related views.
Description: A new Data Source called Business Unit is now available to support enhanced reporting and analysis of business structures and their associated managers. This Data Source includes two dedicated Views: Business Unit and Business Unit Manager.
Business Unit: Contains core details about each business unit, such as:
- Business Unit
- Business Unit Description
- Business Unit End Date
- Business Unit Id
- Business Unit Is Parent
- Business Unit Is Placeholder
- Business Unit
- Business Unit Parent
- Business Unit Start Date
- Business Unit Is Active
Business Unit Manager: Provides detailed information about each manager assigned to a business unit, including:
- Business Unit Manager Alternate Role
- Business Unit Manager Date Created
- Business Unit Manager Date Modified
- Business Unit Manager First Name
- Business Unit Manager Is Active
- Business Unit Manager Last Login Date
- Business Unit Manager Last Name
- Business Unit Manager Name
- Business Unit Manager Payable Account
- Business Unit Manager Payable Segment Code
- Business Unit Manager Payment Method
- Business Unit Manager Receivable Account
- Business Unit Manager Receivable Segment Code
Benefit: This new Data Source enables organizations to gain deeper visibility into their business unit structures and leadership assignments. It supports reporting needs across operational, organizational, and financial dimensions by combining structural hierarchy data with detailed user information. The inclusion of UDFs and financial accounts makes this source especially valuable for custom dashboards, performance tracking, and financial accountability at the business unit level. It also enhances governance by allowing stakeholders to audit business unit setup, monitor manager activity, and support informed strategic decisions.
for further details see Business Unit Data Source and related views.
Description: As of this release, the Fields Skill, Proficiency, Interest, and Expiry Date were removed from the General tab in PSA and are now included as permanent Fields in the new Skills tab. For further details on this feature refer to Multi-Skill Requests In A Single User Skill Update Work Item Entry.
To align with the new Skills tab and prevent reporting failures caused by deprecated fields, we reorganized the Work Item Entry Data Source. The following Fields we added to the Work Item Entry View in the Work Item Entry Data Source:
- Work Item Entry Skill
- Work Item Entry Skill Proficiency
- Work Item Entry Skill Interest
- Work Item Entry Skill Expiry
Furthermore, the Work Item Entry Summary was renamed to Work Item Entry Title.
A separate row is displayed for each Skill if a Work Item Entry includes multiple Skills in PSA, ensuring accurate representation in Upland Analytics Reports
Benefit: This release streamlines how you manage Skill updates by allowing multiple changes in a single request, reducing the need for repetitive submissions and saving time. Approvers benefit from a consolidated view of all requested changes, making reviews faster, clearer, and more consistent across users. The updated Data Source ensures accurate reporting by representing each Skill individually and eliminates issues caused by deprecated fields. Together, these enhancements improve efficiency, reduce errors, and provide better visibility and control over user Skill updates.
For further details see Work Item Entry Data Source and related views.
Description: A new User History View is now available in the Organization Data Source. This View allows administrators to audit changes made to Users and their associated objects. It includes the following fields:
- User History Modification
- User History Previous Value
- User History New Value
- User History Modification Date
- User History Modified by User First Name
- User History Modified by User Last Name
Benefit: This enhancement provides a reliable way to track user-related changes over time, giving administrators greater visibility and accountability. With detailed audit fields, you can quickly identify what was modified, who made the change, and when it occurred, improving compliance, governance, and troubleshooting capabilities.
For further details see Organization Data Source and related views.
Description: A new Time To Staff View is now available in the Resource Bookings Data Source. This view helps you measure the elapsed time between when a Role Booking is created and when a Resource is assigned, giving you visibility into staffing efficiency.
The View includes the following Fields:
- Booking Unique ID (hidden by default)
- Time To Staff End Date
- Time To Staff Start Date
Benefit: This new View enables you to track and report how long it takes to staff bookings, identify potential delays in resource assignment, and improve overall resource planning accuracy.4
For further details see Resource Bookings Data Source and related views.
Description: Any User Defined Fields associated to Business Units are now available through the Business Unit View located within the Business Unit, Organization and Work Data Sources.
Furthermore, Business Unit and Business Unit Manager Views which are part of the Business Unit Data Source, are now also included in both the Organization and Work Data Sources.
Benefit: Making User Defined Fields (UDFs) for Business Units available across the Business Unit, Organization, and Work Data Sources allows you to incorporate custom business-specific attributes directly into your reports and dashboards. Combined with the newly added Business Unit-related fields and Views, this enhancement enables more connected, context-rich reporting without the need for manual joins or workarounds.
For further derails see:
Description: In previous releases, users lacked the ability to track and report on which Project Manager approved specific Time Entries in a Timesheet This was especially limiting for organizations where Partial Rejection was enabled, where understanding who approved each Time Entry is critical for compliance, auditing, and performance tracking.
To address this need, the Time Entry Basic View in Timesheet Data Source, now includes the following new Fields:
- Time Entry Approver: The name of the Project Manager that approved the individual Time Entry when Partial Rejection is enabled.
Note: When a project is set to auto-approve, the approver will appear as Auto Approved and the Unique ID will be set to 2, corresponding to the system’s Batch Admin.
- Time Entry Approver Unique ID: The system-generated identifier for the approver.
Note: Manual approvals reflect the unique ID and name of the actual approver, along with the approval date.
- Time Entry Status: Indicates whether the assigned approver has taken one of the following actions on the specific Time Entry line item: No Action Taken, Approved, Rejected, or Auto Approved.
- Time Entry Approval Date: The date and time when the approver (or system) approved the individual time entry.
Benefit: This improvement enhances auditability and control by enabling organizations to track approval actions at the time entry level. It supports compliance, particularly in workflows where Partial Rejection is used, by clearly showing who approved or did not approve each line. This transparency aids in performance analysis, dispute resolution, and regulatory reporting.
For further details see Timesheet Data Source and related views.
Description: A new Financial Planner Notes View has been added to the Financial Planner Category Data Source in Upland Analytics. This View allows reporting on individual Financial Planner Notes without concatenating multiple entries. The view includes the following Fields:
- Note
- Note Created By User Name
- Note Date Created
- Note Date Modified
- Note Is Public
- Note Modified By User Name
- Note Type
All notes remain separate, even when they belong to the same cell or category, ensuring accurate representation of the original data.
Benefit: With this enhancement, you can now create precise, note-level reports for financial planning activities. This improves transparency, supports detailed auditing, and enables richer analysis of comments and context within financial planning data. The view ensures that all recorded details remain visible and reportable.
For further details see Financial Planner Category Data Source and related views.
Description: Previously, you could not report on Financial Planner data with accurate fiscal years or quarters in custom views because the necessary unique period identifier was missing.
As of this release, the new Period_Unique_Id field is available in the Financial Planner Category View within the Financial Planner Category Data Source. You can now use this field to access and report on data by precise fiscal periods.
Benefit: You no longer need to rely on manual workarounds to align financial data with fiscal years and quarters. With the Period_Unique_Id field, you can build accurate custom reports, improve period-based analysis, and gain greater confidence in your financial planning data.
For further details see Financial Planner Category Data Source and related views.
Description: In previous releases, you could only report on the current baseline when using the Financial Planner Category View. This limited your ability to analyze historical Baseline data for planning and reporting.
With this release, the View now includes all baselines, not just the current one, so you can query and analyze both current and historical Baseline information in a single view.
Benefit: You can now run comprehensive reports that include all baselines without needing workarounds or multiple queries. This gives you greater visibility into historical trends, improves the accuracy of financial planning analysis, and allows you to compare current and past baselines to make better-informed decisions.
For further details see Financial Planner Category Data Source and related views.
Description: In past releases, PSA Security Profiles only supported the three default roles (Administrator, Read-only, Read-Write) for Upland Analytics Reports. Furthermore, any updates to Upland Analytics Roles required manual changes.
With this release, PSA now dynamically synchronizes all Upland Analytics Roles with PSA Security Profiles. Synchronization occurs both at user login and when the Synchronize Integration service runs.
-
When a new Role is added in Upland Analytics, it automatically appears as an option under each PSA Security Profile. For the Master Administrator profile, the new Role is selected by default, while for all other profiles it remains unselected.
-
Deleted Upland Analytics Roles are removed from PSA.
-
Renamed Roles are updated automatically.
To improve organization, all Upland Analytics Roles (existing and new) now appear under a new dedicated Reports > Upland Analytics placeholder in User Security Profiles (Setup > Organization > System > Security), while other reporting options have been moved under Reports > Upland Reports.
Note: Workflow access Roles follow the same automated add, delete, and rename behavior.
Benefit: This enhancement ensures that PSA Security Profiles remain aligned with current Upland Analytics Role definitions without requiring manual updates. It reduces administrative overhead, keeps Security Profiles consistent, and provides clearer organization of reporting and Role options. In addition, with the new UA roles in place, you can now grant or restrict access to existing data sources, reports, and dashboards, giving you greater control over how information is shared across your organization.
For further details see Dynamic Synchronization of Upland Analytics Roles with PSA Security Profiles.
Description: Previously, the Upland Analytics Subscription list window had a fixed size, requiring you to scroll up and down to view or edit subscription information. This limited usability and made navigation less efficient.
This release makes the Subscription list window extensible, allowing you to resize it for easier viewing and editing of subscription details. Scroll bars are still available if needed, but the window can now be adjusted to improve the user experience.
Benefit: You can now work more efficiently in the Subscription list window, reducing scrolling and improving accessibility when reviewing or editing subscription information.
For further details refer to the Subscriptions in Upland Analytics.
User Defined Fields
Description: In previous releases, Memo User-Defined Fields associated to Projects and Work Items were restricted to a single column in the layout. This often limited readability for larger text fields, forcing users to scroll or work within a narrow display area.

As of this release, you can configure Memo User-Defined Fields to span across multiple columns when associating them to Projects or Work Item Workflows. This enhancement allows Memo fields to use more screen space, improving readability for longer text entries.

When configuring a Memo UDF in Setup > User Defined Fields > Associate to Project or in Setup > Work > Work Item Workflows > Edit Workflow > Setup, a new Column Span property is available.
- The minimum value is 1 (default).
- You can select values 2, 3, or 4 to extend the field across additional columns.
Note: Invalid column spans (for example, four fields in a row with one set to span two columns) are automatically adjusted at run-time to maintain layout integrity. This ensures that the maximum of four columns per row is not exceeded, keeping the page organized and readable.

Furthermore, users can now adjust the height of the Memo box by dragging the triangular handle at the bottom-right corner, allowing more lines of text to be visible at once. This reduces the need for scrolling and enhances the overall user experience when entering or reviewing longer notes.
Benefit: This improvement makes Memo fields easier to read and work with, particularly for large text inputs. By allowing fields to span multiple columns, the layout is more flexible and can be tailored to your screen space and workflow needs.
For further details see Configure Column Spanning for Memo User-Defined Fields (UDFs) on Projects and Work Item Workflows.

Description: In past releases, User Defined Field Descriptions were limited to plain text, preventing you from adding hyperlinks to supporting resources or documentation.
With this release, the Description field in User Defined Fields now supports the rich text editor, allowing you to insert hyperlinks directly in the description.

When you hover over the tooltip beside the associated User Defined Field, any links appear as clickable and take you to the defined web page.
Expected Behavior and Limitations
The following outlines current limitations and expected behavior for the Description field and info icon in User Defined Fields (UDFs).
Expected Behavior
The following outlines the standard behavior for the User Defined Fields Description and info icon:
- The info icon does not appear for User Defined Fields (UDFs) associated with Timesheet Templates.
- Images and tables are not supported in the Description field.
- The info icon appears only when the Description field contains text. If the Description is blank, the icon will not be displayed.
- Any leading or trailing spaces in the Description text are automatically removed when displayed in the tooltip.
Limitation
- When a User Defined Field is associated with the Groups object, the tooltip for the info icon displays plain text only. Any formatting applied to the Description field (such as bold, italics, or hyperlinks) will be displayed as HTML code rather than formatted text.
Note: It is therefore recommended to avoid using rich text formatting for UDFs associated with Groups.
Benefit: By adding hyperlinks, you can provide direct access to guidelines, policies, or reference materials from the associated User Defined Field tooltips, making it easier for you and your team to follow consistent processes without needing to search elsewhere.
For further details see Use the Rich Text Editor in User Defined Field Descriptions.
Description: You can now configure Browse for User Data type User Defined Fields (UDFs) associated with Work Item Workflows to be selectable as Recipient in Work Item Workflow Notifications. This allows workflow-driven communication to reach users assigned via UDFs, improving flexibility in notification management.

A new checkbox labeled Can receive Workflow Notifications is now available when associating or editing a Browse for User Data type User Defined Field, association to a Work Item Workflow.
Note: This option is unchecked by default.

When configuring a Work Item Workflow and defining Recipients for State or Transition Notifications, any associated Browse for User UDFs with the Can receive Workflow Notifications setting enabled will appear in the Notify list.
These UDFs are clearly labeled using the format UDF: [UDF Display Name] to distinguish them from standard User or Role-based recipients.
For example, if a UDF is named Notify User, it will appear in the list as “UDF: Notify User.”

When a Workflow Notification is triggered, the system sends the notification to all assigned recipients for that State/Transition. If a User-type User Defined Field (UDF) is configured to receive Workflow Notifications and is selected as a Recipient, the Notification is automatically sent to the User currently selected in the associated UDF on the Work Item Entry.
If the Can receive Workflow Notifications option is not enabled for a given UDF, it will not appear in the Notify list. To maintain consistency and data integrity, once a User-type UDF is being used as a Workflow Notification Recipient, the system will prevent it from being modified in ways that would break the association. Specifically, the Can receive Workflow Notifications checkbox cannot be unchecked, and the UDF cannot be disassociated from the Workflow while it is in use. If such an action is attempted, an error message will be displayed: Error! You cannot modify or delete this record. Please replace or remove the Notification Recipient associations before making any such modification.
Benefit: This feature improves flexibility in managing workflow communications by allowing users referenced in Work Item UDFs to be included as notification recipients. It supports better alignment between Work Item data and automated communication logic, without requiring custom development or manual recipient maintenance.
For further details see Use Browse for User User Defined Fields as Recipients in Work Item Workflow Notifications.
Description: You can now configure Browse for User Data type User Defined Fields (UDFs) associated with Projects to be selectable as Recipient in Project Workflow Notifications. This allows workflow-driven communication to reach users assigned via UDFs, improving flexibility in notification management.

When associating or editing a Browse for User Data type User Defined Field association to a Project, a new checkbox labeled Can receive Workflow Notifications is now available.
Note: This option is unchecked by default.

When configuring a Project Workflow and defining Recipients for State or Transition Notifications, any associated Browse for User UDFs with the Can receive Workflow Notifications setting enabled will appear in the Notify list.
These UDFs are clearly labeled using the format UDF: [UDF Display Name] to distinguish them from standard User or Role-based recipients.
For example, if a UDF is named Notify User, it will appear in the list as “UDF: Notify User.”

When a Project Workflow Notification is triggered, the system sends the notification to all assigned recipients for that State/Transition. If a User-type User Defined Field (UDF) is configured to receive Workflow Notifications and is selected as a Recipient, the Notification is automatically sent to the User currently selected in the associated UDF on the Project.
If the Can receive Workflow Notifications option is not enabled for a given UDF, it will not appear in the Notify list. To maintain consistency and data integrity, once a User-type UDF is being used as a Workflow Notification Recipient, the system will prevent it from being modified in ways that would break the association. Specifically, the Can receive Workflow Notifications checkbox cannot be unchecked, and the UDF cannot be disassociated from the Workflow while it is in use. If such an action is attempted, an error message will be displayed: Error! You cannot modify or delete this record. Please replace or remove the Notification Recipient associations before making any such modification.
Benefit: This feature improves flexibility in managing workflow communications by allowing users referenced in Project User Definied Fields to be included as notification recipients. It supports better alignment between Work Item data and automated communication logic, without requiring custom development or manual recipient maintenance.
For further details see Use Browse for User User Defined Fields as Recipients in Project Workflow Notifications.

Description: In previous releases, when a User Defined Field (UDF) of Browse for Task was associated to a Work Item Workflow, the Task list included all Tasks across the entire system, regardless of the selected Project. This often resulted in long, overwhelming lists especially in environments with many active projects and hundreds or even thousands of tasks. Users were required to manually scroll through or search within this extensive list to locate the task relevant to their specific project. This process was time-consuming, increased the risk of selecting the wrong task, and disrupted workflow efficiency, particularly for teams managing multiple concurrent projects.
As of this release, a new configuration option for User Defined Fields (UDFs) that use the Browse for Task data type and are associated with a Work Item Workflow. This enhancement adds a checkbox labeled Display only Project Tasks within the UDF settings.

When this option is selected, the list of tasks that appears when browsing is filtered to include only those tasks that are associated with the currently selected project. This means you will no longer see tasks from other unrelated projects.
This new behavior applies automatically once the checkbox is enabled during UDF configuration. No additional customization or scripting is required.
Note: When the Project field is not included in the Work Item layout, any Work Item Entry created is automatically associated with the System Default Project. In this scenario, if a User Defined Field (UDF) of the Browse for Task data type is present and the Display only Project Tasks option is enabled, the Task list will show tasks from the System Default Project. This is expected behavior, as the system uses the available project context to determine which tasks to display. To ensure the correct project's tasks are shown in the UDF, include the Project field in the Work Item layout so that the Work Item can be explicitly tied to the appropriate project at creation.
Benefit: This improvement is especially useful for teams working on multiple projects simultaneously, as it ensures that users stay focused on tasks that matter within the scope of the project they are working on. By displaying only project-specific tasks, users are able to more quickly identify and select the correct task related to their current Work Item. As a result, it reduces errors, speeds up data entry, and helps maintain data accuracy and relevance.
For further details see Configure Browse-for-Task UDFs to Show Only Project-Specific Tasks.

Description: In previous releases, we introduced the ability to restrict user access to User Defined Fields (UDFs) associated with Projects, Users, and Work Items. With this release, that capability has been extended to Milestones. You can now control visibility and edit access for Milestone UDFs based on Security Profiles, allowing administrators to define who can view or modify specific fields.
To support this enhancement, a new Access Control tab has been added, providing a centralized interface to manage UDF access rules more efficiently. From this tab, you can:
- Refresh the view using the Refresh button.
- Delete selected access control rules.
- Apply mass actionsto update visibility settings (Hidden or Read-Only) across multiple UDFs at once.
- Export the current list to Excel for reporting or documentation purposes.
- Search for items using "contains-in" logic based on Security Profile or User Defined Field
- Create New Access Control rule.
Note:
- Tab-level security settings configured under Setup > Organization > System > Security > Security Profile will always take precedence over User Defined Field Access Control settings.
- The Reporting module(s) are not impacted by this feature.
- Any changes made to the User Defined Field Access Control settings can be audited.
Benefit: With this enhancement, organizations can enforce greater control over how milestone-related UDFs are exposed or restricted to users. This supports better data governance, reduces the risk of unintended edits, and improves user experience by hiding irrelevant fields from certain roles.
For further details seeRestrict Access to UDFs Associated with Milestones.

Description: Previously, Timesheet users could select suspended (inactive) User Defined Field (UDF) values when creating or updating Time Entries. This caused confusion and errors, as those values were no longer valid but remained available for selection.Now, suspended UDF values are automatically hidden from dropdown menus in the time entry screen.

If a user tries to save a new or updated time entry with any suspended UDF value, a clear error message appears: You cannot change or update an entry while any of its attributes are suspended.
Note: The Timesheet User Defined Fields license in Upland PSA must be turned on. Otherwise, the Use in Timesheet Template option will be unavailable. If you are interested in using this functionality, contact PSA Support to discuss your specific business requirements.
Benefit: This update ensures users only see and select active UDF values, making time entry more accurate and reducing mistakes without needing administrator support.
For further details see Suspend Option(s) for User Defined Fields of Type Selection.
Users

Description: In past releases, you could set your Out of Office Status immediately. You couldn’t schedule it for a future date, which meant you had to remember to manually update your status at the right time. This often caused your availability to appear incorrectly and created extra work when Assignments were not adjusted in advance.
As of this release, you can schedule your Out of Office status directly in PSA. A new Schedule Out of Office section is available under the General tab of your Profile Settings, where you can define a Start Date and End Date for your absence.
The system automatically updates your status to Out of Office during the scheduled period and reverts it to In Office once the period ends.
Dates before today are disabled, and when a Start Date is chosen, the End Date defaults to the same day but can be extended. Schedules are timezone-aware and follow the user’s Active Site Timezone.
Note: The Out of Office flag is managed by the Update User Data Automation Service, which runs once per day. The service schedule is fixed and cannot be modified.
How Scheduled Out Of Office Status Works with Other Entry Points:
- User Edit / Excel Import / API: If an administrator changes a user’s Out Of Office status directly, the Schedule Out of Office fields are cleared, and the system reflects the new In Office status immediately.
- Profile Settings / General Tab: Users can create or clear Out Of Office schedules. The checkbox in User Edit reflects the scheduled status during the defined period.
- Override behavior: Any manual override (via User Edit, Excel Import, or API) clears scheduled fields to prevent conflicts.
This ensures that user availability is always accurate and consistent, regardless of whether it is managed by the user or by an administrator.
Benefit: This enhancement gives you precise control over your availability without requiring manual updates. It reduces administrative effort by automatically handling transitions between In Office and Out Of Office status.
For more information, see Set Up and Manage Scheduled Out of Office Status.

Description: When you change your Language settings, the confirmation message has been updated. Previously, the message "The change(s) you have requested will not take effect until your next logon." appeared as a success message bar. It now displays as a warning with a yellow bar and includes a close (X) icon for dismissal.
Benefit: This update improves clarity by better reflecting the nature of the action. Changing language settings does not take effect immediately, and the new warning format helps ensure you understand that a logon is required before the change applies.
For more information, see Change Your PSA Language Settings.
Workflow Setup

Description: This release introduces the Pre and Post Process functionality in Timesheet Workflows. The Pre and Post Process fields are now available within the new Processing tab of the Timesheet Transition Edit page and rely on database stored procedures to perform validations or actions.
When transitioning a Timesheet from one state to another, the execution sequence of the custom stored procedure is as follows:
- Pre process Stored Procedure for the Transition is called (can be a validating Stored Procedure; may display errors or warnings).
- Post process Stored Procedure for the Transition is called (executed after the Transition is committed to the database; ideally with no validation).
Note: To create or customize stored procedures, contact PSA Support.
Examples
Examples of PRE (error) validations: These prevent the timesheet transition from going through until corrected:
- Invalid Client/Pay Code combination: An error appears if you select a Pay Code that is not mapped to your Functional Group.
- Invalid hours for Pay Code: An error appears if you enter hours that exceed the allowed limit for a specific Pay Code (for example, only 1 hour is allowed for “Training Session Cancelled”).
- Invalid Pay Code for day: An error appears if you enter a Pay Code on a restricted day, such as a holiday.
Examples of PRE (warning) validations: These show a warning but still allow the transition:
- Part-time employee > 35 hours: A warning appears if you enter more hours than allowed for a part-time employee in a week, based on the configured maximum hours (35 hrs).
- Leave codes > 3 days: A warning appears if you record more than 3 days in a week against Leave Time Pay Codes such as Vacation Leave, Sick Leave, or Compassionate Leave.
Examples of POST validations: These execute actions after the transition:
- Automatically creating an issue and copying key data when a timesheet transition meets defined conditions.
- Running follow-up functions (e.g., logging or reporting) once a transition completes.
Benefit: This new addition allows you to define custom business rules before or after a Timesheet Transition. Pre-process triggers can block transitions when errors occur, or allow them with warnings, while post-process triggers can perform follow-up actions after the transition is complete.
For more information, see Pre and Post Process in Timesheet Workflows.
Description: In previous releases, Workflow version numbers were not visible, making it difficult for to quickly identify which version was currently in use.
As of this release, the following enhancements ensure that you have clear visibility of workflow versions:
-
On the Workflow Edit page, the version number appears as read-only text near the Back button in the format: Version: <VersionNumber>. This applies to the following workflows:
- Leave Request Workflows (Setup > Timesheet)
- Project Workflows (Setup > Work)
- Timesheet Workflows (Setup > Timesheet)
- Work Item Workflows (Setup > Work)

-
The tooltip displaying the workflow name and version in the format "<WorkflowName> – Version <VersionNumber>" appears when you hover over a workflow name in the following locations:
- Leave Request Manager (Entries)
- Project Workflows (Setup > Work)
- Timesheet Workflows (Setup > Timesheet

-
The Type field displays the Workflow Name and Version in the format "<WorkflowName> – Version <VersionNumber>" in the following locations:
- Work Item Manager (Entries)
- Project Work Items (Project List> Project Edit > Work Items)

Benefit: This update improves clarity by showing version information where you need it most. It reduces the need to navigate between screens and helps you maintain workflows accurately.
Work Items

Description: In past releases, you had to create one request for each Skill update, as the General tab included fixed fields for Skill, Proficiency, Interest, and Expiry Date. That setup limited you to a single change per request and forced approvers to review multiple User Skill Update Work Item Entries for the same user, increasing both effort and delays.
With this release, you can now manage multiple skill updates in a single request. The Skill, Proficiency, Interest, and Expiry Date fields are removed from the General tab. They are now part of the new Skills tab.

This new table-based Skills tab lets you update multiple Skills at once, including their Proficiency, Interest, and Expiry Date, with clear status indicators for New, Updated, Deleted, or N/A.
You can add new Skills, modify existing ones, or mark Skills for removal, and each action is tracked with its previous and new values. Undo actions are available for updates and deletions, giving you control before submission. Furthermore, tooltips provide details on exactly what changed (for example, proficiency level or expiry date), and Undo actions help you quickly reverse updates or deletions before submitting.
Validations are in place for expired Skills. If you try to update Proficiency or Interest on a Skill with an expired End Date, the system displays the error "Skill details cannot be changed on expired Skill Associations without also changing the Expiry Date to a current or future date". If multiple skills meet this condition, all errors appear together in a dialog box. You can either update the End Date to a current or future date, or delete the skill and save again.

Approvers now receive a consolidated view of all changes in one place. By default, only modified Skills are shown, but you can choose to see the full skill list for the User. This makes reviewing requests faster and clearer, while ensuring that approval applies consistently across all listed skills. Approvers can also use the Comments section to provide feedback and collaborate directly with the Creator, further streamlining the review process.
These changes are fully supported in Upland Analytics through updates to the Work Item Entry Data Source. Each skill associated with a Work Item Entry is now displayed as its own row in Upland Analytics reports, ensuring accurate visibility into multi-skill updates and aligning reporting with the new Skills tab in PSA. For further details refer to Data Source Changes for Skill Update Workflow.
Benefit: This enhancement streamlines how you submit and approve skill changes, saves you time by reducing repetitive requests, and improves visibility into user skill updates across your organization.
For further details see:

Description: In previous releases, rejecting a Work Item Entry did not prompt the approver to provide a reason. This often resulted in missing context for the rejection, leading to confusion for requesters and additional back-and-forth communication to clarify the decision.

With this release, a Rejection Note dialog box has been added when a Work Item Entry is moved to a State flagged by the Rejection Attribute. Approvers can now enter a note explaining the reason for the rejection.

This rejection note is saved automatically in the Notes sub-tab of the Work Item's Attachments.
Note: The Note is set to Public visibility by default. It is optional and can be edited or deleted at any time..
Additionally, the following two Parameters are now available in Work Item Workflow Notifications:
- %WORKFLOW_REJECTED_BY%: Inserts the full name of the user who performed the rejection action in the workflow. This helps recipients identify who rejected the work item.
- %REJECTION_NOTE%: Inserts the rejection note or comment entered by the rejecting user. This provides context and explanation for why the work item was rejected.
Benefit: This enhancement improves transparency and accountability in the approval process, helping teams stay informed and reducing the need for follow-up. It aligns Work Item behavior with that of Timesheets, Invoices, and Expense Reports, promoting consistency across the platform.
Description: In previous releases, the parameter lists in Work Item Workflow notifications and Work Item Mention notifications did not match. This made it difficult to configure consistent notifications and often required switching between pages to compare available options.
The parameter lists are now aligned. Missing parameters have been added, names have been standardized for consistency, and outdated workflow-specific parameters have been removed. A new parameter, %WORK_ITEM_PROJECT%, has also been added to the Mention feature. Both locations now provide the same set of relevant, clearly named parameters. Changes include:
-
Parameters from Work Item Mention Notifications are now available in Work Item Workflow Notifications:
%USER_NAME%%WORK_ITEM_TRACKING_NUMBER%%WORK_ITEM_TITLE%%WORK_ITEM_COMMENT%
-
Parameters from Work Item Workflow Notifications are now available in Work Item Mention Notifications:
%WORK_ITEM_WORKFLOW%%WORK_ITEM_ASSIGNED_USER%%WORK_ITEM_CLIENT%%WORK_ITEM_CREATOR%%WORK_ITEM_CREATION_DATE%%WORK_ITEM_DEADLINE%%WORK_ITEM_DESCRIPTION%%WORK_ITEM_ENTRY_LINK%%WORK_ITEM_ENTRY_LINK_NOSSO%%WORK_ITEM_LAST_UPDATE_DATE%%WORK_ITEM_ORIGINATOR%%WORK_ITEM_PROBABILITY%%WORK_ITEM_PRIORITY%%WORK_ITEM_PROJECT_MANAGER%%WORK_ITEM_REJECTED_BY%%WORK_ITEM_REJECTION_NOTE%%WORK_ITEM_SEVERITY%%WORK_ITEM_STATE%%WORK_ITEM_TITLE%%WORK_ITEM_TRACKING_NUMBER%
- New:
%WORK_ITEM_PROJECT%parameter. - Renamed for consistency:
%WORKITEM_COMMENT_LINK%was renamed to%WORK_ITEM_COMMENT_LINK%%WORKITEM_COMMENT_LINK_NOSSO%was renamed to%WORK_ITEM_COMMENT_LINK_NOSSO%
- Removed from both locations:
%WORKFLOW_COMPONENT%%WORKFLOW_ADDITIONAL_INFO%%WORKFLOW_WAY_TO_REPRODUCE%%WORKFLOW_WORKAROUND%
- Standardized naming:
- All parameters beginning with
WORKFLOW_now begin withWORK_ITEM_.
- All parameters beginning with
Benefit: You can now configure notifications without cross-referencing between features. Consistent parameter names and availability make it easier to insert the right information in messages, reduce configuration errors, and ensure recipients receive complete and accurate notification content.
For further details see Workflow Notification Parameters.
General

Description: Previously, you had to manually scroll through History pages to find specific changes, which made it time-consuming to review modifications.
As of this release, the following search criteria are available on History pages, allowing you to filter records by Modification, Previous Value, New Value, and Date Modified. This enhancement applies to multiple areas of the system, including:
- User History (Setup > Organization > Users > User Edit)
- Project History (Project List > Project Edit)
- Budget History (Project Edit > Budget > History)
- Program History (Program List > Program Edit)
- Work Item History (Entries > Work Item Manager > Work Item Edit)
- Project Work Item History (Project List > Project Edit > Work Item Edit)
- Project Work Plan History (Project List > Project Edit > Planners > Work Plan > Expand Booking)
Benefit: You can now quickly locate specific changes in History pages without manually scanning through extensive records. This improves efficiency when auditing or reviewing updates, reduces the risk of overlooking important modifications, and provides a more streamlined and user-friendly experience across users, projects, programs, work items, and work plans.

Description: In previous releases, the Advanced Filter icon only changed to blue (![]() ) when you modified selections to display a subset of data. With this release, the icon itself now displays with a blue background (
) when you modified selections to display a subset of data. With this release, the icon itself now displays with a blue background (![]() ) whenever a filter is defined, making it easier to recognize when filtering is active.
) whenever a filter is defined, making it easier to recognize when filtering is active.
You can see the updated Advanced Filter in the following areas:
- Timesheet Manager (Entries)
- Work item Manager (Entries)
- Project List (
 )
) - Project Work Items (Project List > Project Edit > Work Items)
- Program List (
 )
)
Benefit: This improvement gives you a clearer visual indicator of active filters, helping you quickly identify when your data set has been refined.
Deprecated/Unsupported Functionality

Description: As part of the enhancements introduced in Enhanced Project Copy – Selectively Copy UDFs Associated with Projects, Tasks, Milestones, and Work Items, the User Defined Field values checkbox has been deprecated and is no longer available in the Project Copy interface.
This legacy checkbox previously applied a blanket rule to include all UDFs across related project objects during the copy process. It has been replaced by more granular, object-specific checkboxes that allow you to selectively include UDFs for Projects, Tasks, Milestones, and Work Items individually.
This change provides greater flexibility, improves data relevance, and reduces the risk of unnecessary information being copied into new projects.
Description: As part of the enhancements introduced in Import Roles and Associated User Defined Fields Using the Excel Import Tool, the Import Roles button previously available on the Roles list page (Setup > Organization > Roles) has been deprecated and is no longer available.
All Role imports, including any associated User Defined Fields, must now be performed using the standard Excel Import Template and process from the Tools > Import section.